優雅地分離tableview回調
你是否遇到過這樣的需求,在tableview中顯示一列數據,點擊某一個cell時,在此cell下顯示相應的附加信息。如下圖:

你是不是覺得需求很容易實現,只要使用tableview的insertRowsAtIndexPaths:withRowAnimation:插入一個附加cell就可以了(為表述清楚,我們姑且稱被點擊的cell為原始cell,展示的附加信息為附加cell)。如果你是這麼做的,那麼後遺症來了:展開的附加cell影響了後面cell的indexPath,當我們對後面的cell配置、點擊、增加、刪除、系統回調等等操作時,都需要考慮附加cell對indexPath的影響。例如我們已經展開了row == 0的原始cell的附加cell,配置row == 0的附加cell實際是對tableview的row == 1的配置;配置原始數據的row == 1時,實際是配置tableview的row == 2的cell。每次indexPath相關操作都要轉換一遍(特別是當展開的附件cell很多時),非常麻煩,且數據源雜亂、代碼可讀性差。
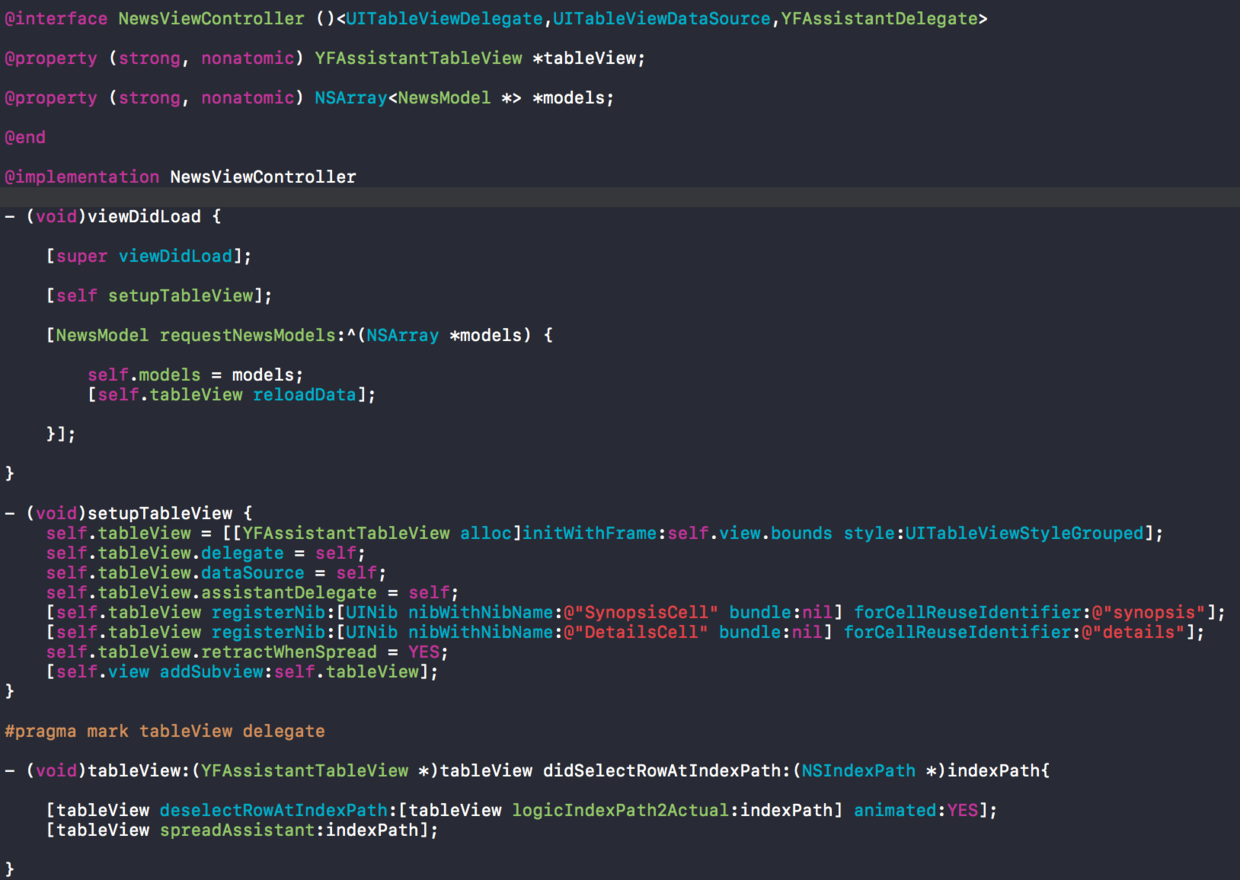
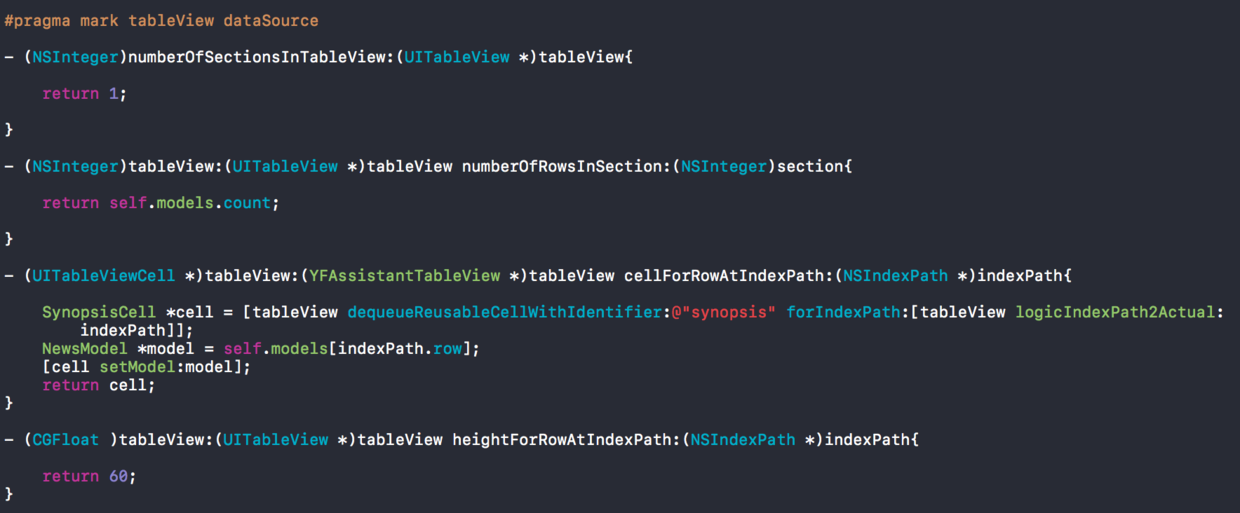
本文介紹了一種方法消除附加cell對後面的indexPath產生的影響;並且使delegate和dataSourse回調只配置原始cell,將附加cell的配置分離出來。
1.首先定義兩種數據類型:
typedef NSIndexPath ActualIndexPath;
實際indexPath:考慮附加cell影響的indexPath,暨系統調用傳入的indexPath。
typedef NSIndexPath LogicIndexPath;
邏輯indexPath:不考慮附加cell影響的indexPath,暨我們希望在代碼中使用的indexPath。
參照上面的例子解釋:展開row == 0的原始cell後,row == 0的原始cell的附加cell的實際indexPath.row為 1,邏輯indexPath.row為0;row == 1的原始cell實際indexPath.row為2,邏輯indexPath.row 為1。
2.為tableview增加了一個assistantDelegate,負責附加cell的配置。
@interfaceYFAssistantTableView :UITableView
@property(nonatomic,weak)id
assistantDelegate;
YFAssistantDelegate中聲明了配置附加cell的方法(為了減少過多的protocol聲明,在不影響代碼可讀性前提下,將附加cell的delegate和dataSource統一放到assistantDelegate裡)。理論上YFAssistantDelegate裡面的方法應該是UITableViewDelegate和UITableViewDataSource的並集,但很多方法並不會使用所以不再聲明。
@protocol YFAssistantDelegate
//截取了部分YFAssistantDelegate的方法
@required
- (UITableViewCell*)YFAssistantTableView:(YFAssistantTableView*)tableView cellForRowAtIndexPath:(NSIndexPath*)indexPath;
- (BOOL)YFAssistantTableView:(YFAssistantTableView*)tableView shouldSpreadAssistantAtIndexPath:(NSIndexPath*)indexPath;- (CGFloat)YFAssistantTableView:(YFAssistantTableView*)tableView heightForRowAtIndexPath:(NSIndexPath*)indexPath; @end
3.將ActualIndexPath轉化為LogicIndexPath
- (LogicIndexPath*)actualIndexPath2Logic:(ActualIndexPath*)indexPath{
NSIntegersection = indexPath.section;
__block NSInteger row = indexPath.row;
//self.assistantsIndexPaths存儲了所有已展開的附加cell的indexPath
[self.assistantsIndexPaths enumerateObjectsUsingBlock:^(ActualIndexPath *obj,NSUInteger idx,BOOL *stop) {
if(obj.section== section && obj.row<=indexPath.row) {
row--;
}
}];
return[NSIndex PathindexPathForRow:row inSection:section];
}
3.將對附加cell的方法調用從delegate(dataSource)轉到assistantDelegate。
這裡用Method Swizzling鉤住delegate(dataSource)的每一個方法,在hook方法裡首先將ActualIndexPath轉為LogicIndexPath,然後判斷傳進來的indexPath指向的cell的類型,如果指向原始cell那麼調用delegate(dataSource)方法並傳入LogicIndexPath;如果指向附加cell那麼調用assistantDelegate方法並傳入LogicIndexPath。(以下以tableView:cellForRowAtIndexPath:為例,其他方法一樣)
Method method1 = class_getInstanceMethod([delegate class], @selector(tableView:cellForRowAtIndexPath:));
const char *type = method_getTypeEncoding(method1);
IMP imp = class_getMethodImplementation([self class], @selector(hookTableView:cellForRowAtIndexPath:);
class_addMethod([delegate class], @selector(hookTableView:cellForRowAtIndexPath:), imp, type);
Method method2 = class_getInstanceMethod([delegate class], @selector(hookTableView:cellForRowAtIndexPath:));
method_exchangeImplementations(method1, method2);
- (UITableViewCell*)hookTableView:(YFAssistantTableView*)tableView cellForRowAtIndexPath:(ActualIndexPath*)indexPath{
LogicIndexPath *logicIndexPath = 實際indexPath轉為邏輯indexPath(indexPath);
if(indexPath指向附加cell) {
return [tableView.assistantDelegate YFAssistantTableView:tableView cellForRowAtIndexPath:logicIndexPath];
}
//indexPath指向原始cell
return [self hookTableView:tableView cellForRowAtIndexPath:logicIndexPath];
}
至此,YFAssistantTableView的基本思路和主要方法已經介紹完畢。在實際使用中,我們只需要關心哪個indexPath的附加cell需要展開、收回,而不用關心indexPath的變化;並將原始cell和附加cell的分離解耦,調用配置數據清晰順暢、代碼可讀性強。附上demo


源碼:https://github.com/haltNoShut/YFAssistantTableView
- iOS法式開辟之應用PlaceholderImageView完成優雅的圖片加載後果
- WAMSimpleDataSource,更優雅的編寫靜態UITableView
- 全新iPhone版QQ空間客戶端評測:隨時隨地分享溝通無限
- 6款奢侈優雅的iPhone6/6 Plus手機殼
- 如何優雅地查出哪個微信好友刪了你?
- 源碼推薦(8.07):快速創建Settings屏幕,icon間優雅的過渡
- 優雅的創建一個UIDatePicker輸入鍵盤
- 如何優雅的插入廣告——代碼篇
- Storyboard 優雅使用規范
- 一句代碼,更加優雅的調用KVO和通知
- 面試時如何優雅的談論OC
- 如何優雅地攔截按鈕事件
- iOS富文本編輯器之更優雅的實現方法
- 論優雅的實現描邊
- UITableView“優雅”支持不同類型的Cell


