高仿貓眼電影選座(選票)模塊
編輯:IOS開發基礎
前言:
高仿貓眼選票模塊,看著貓眼app選票模塊做的如此之帥,網上又沒比較好的庫,自己手癢癢了就開始模仿起來了,最終用了幾天時間實現了,也封裝好了一套選座模塊。
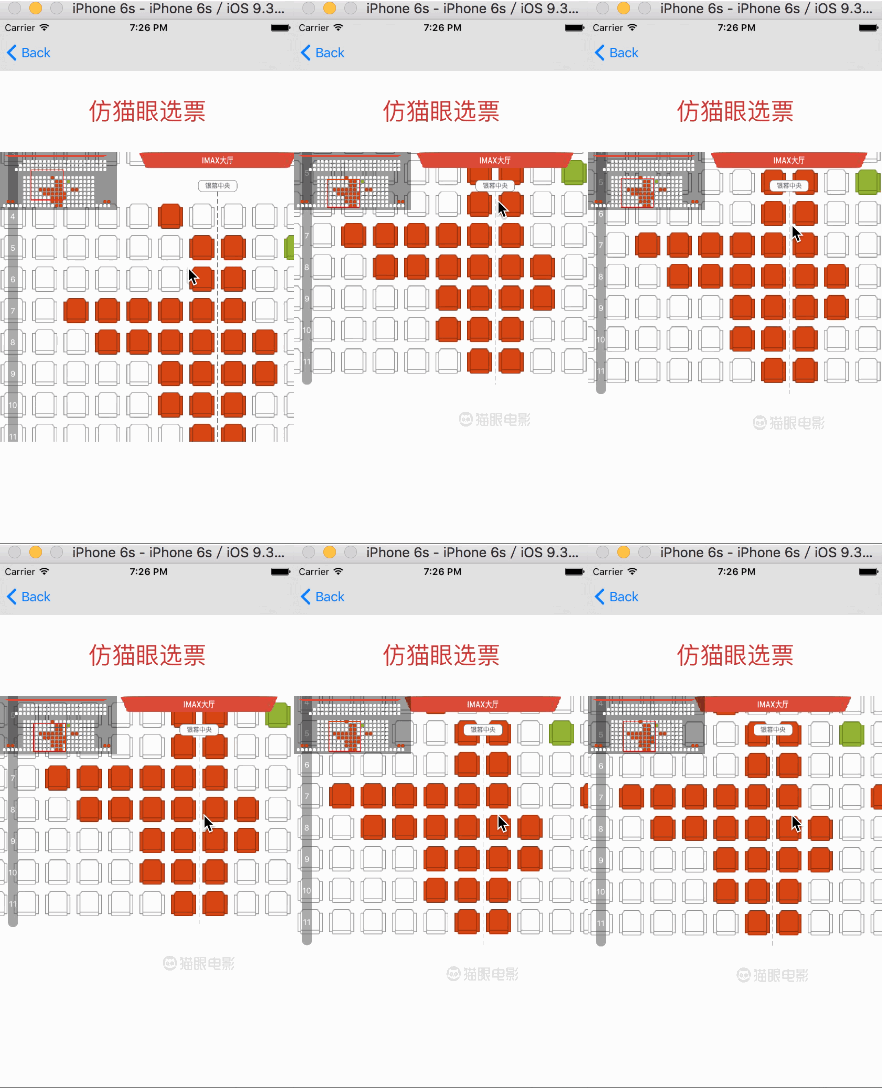
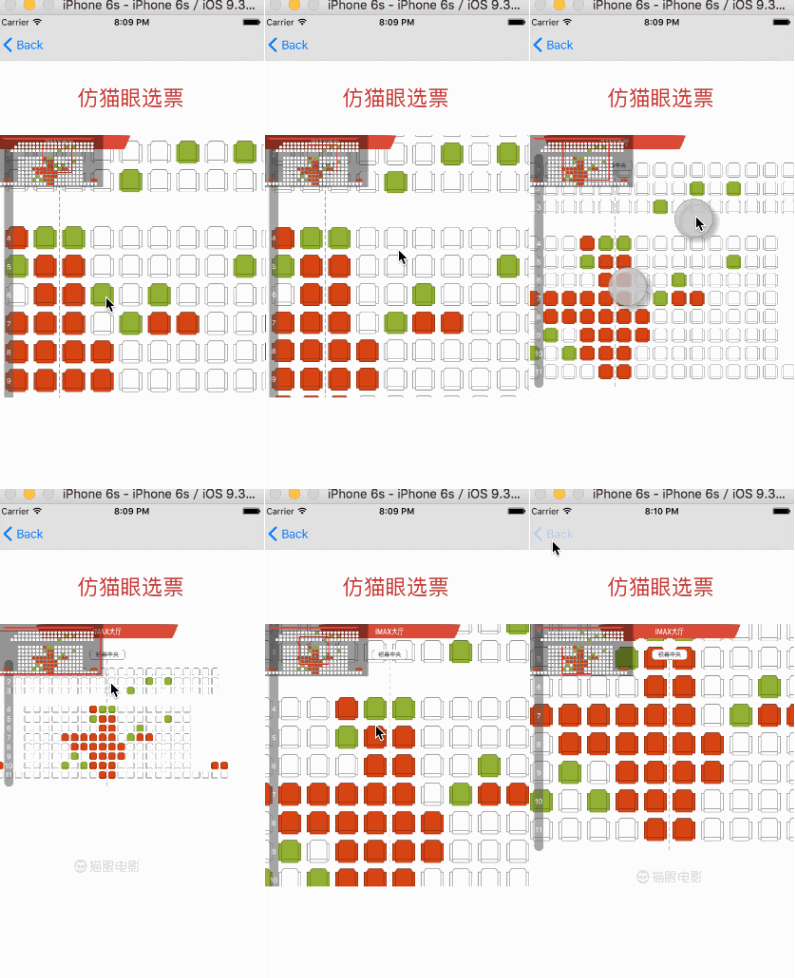
上圖看效果先:
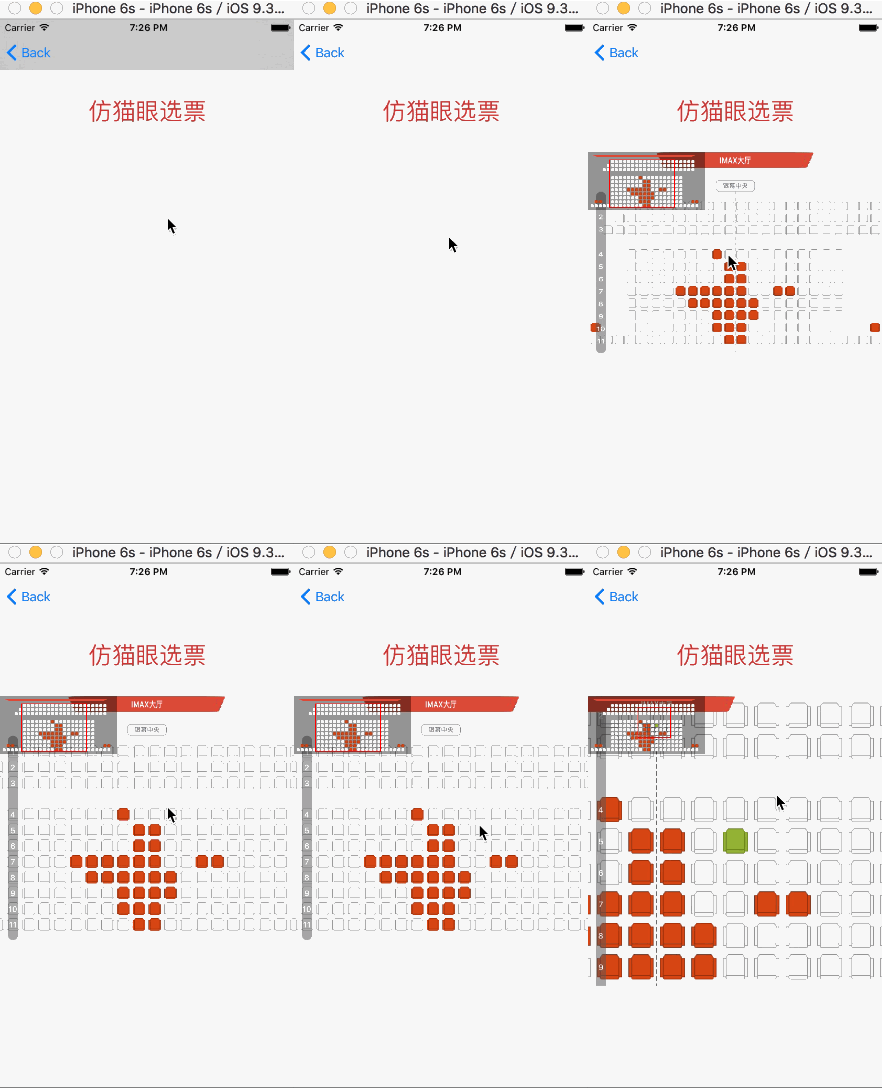
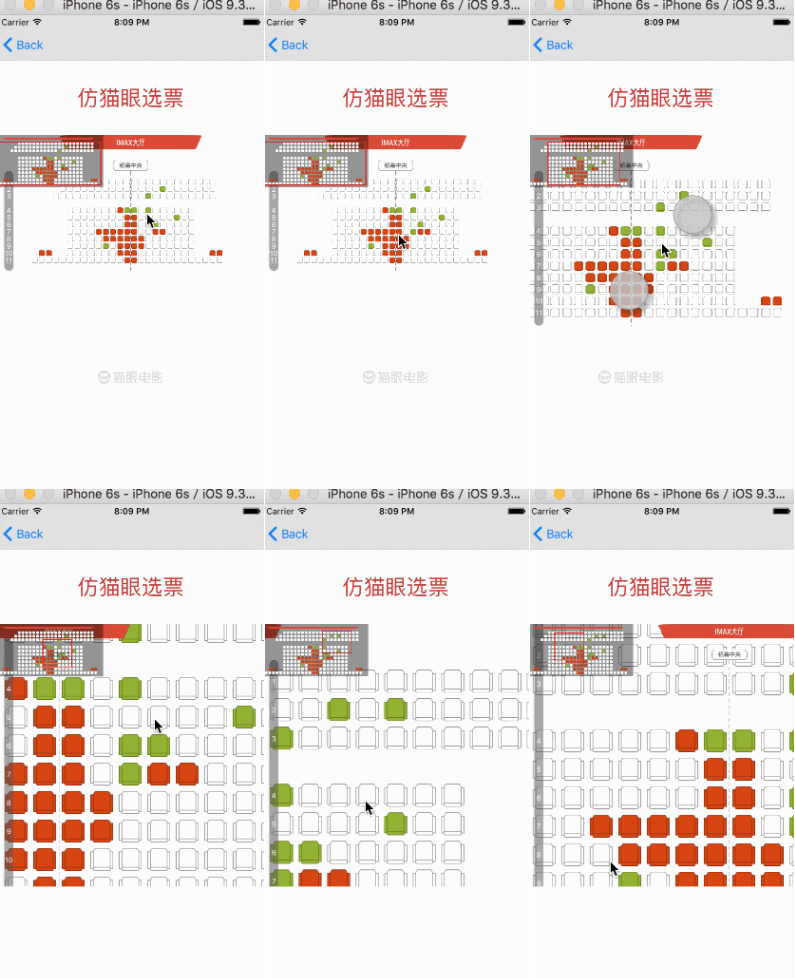
1)畫座位圖其實不是很難一般數據都會給坐標,將坐標對應座位畫出來就可以了,主要是開場動畫要設置默認大小,還有座位圖的數量也不是固定的,所以在初始化座位圖的時侯就默認算出了整個座位圖的大小
-(instancetype)initWithSeatsArray:(NSMutableArray *)seatsArray maxNomarWidth:(CGFloat)maxW seatBtnActionBlock:(void (^)(id))actionBlock{

    if (self = [super init]) {

        self.actionBlock = actionBlock;

        ZFSeatsModel *seatsModel = seatsArray.firstObject;

        NSUInteger cloCount = [seatsModel.columns count];

        if (cloCount % 2) cloCount += 1;//偶數列數加1 防止中線壓住座位

        CGFloat seatViewW = maxW - 2 * ZFseastsRowMargin;

        CGFloat seatBtnW = seatViewW / cloCount;

        if (seatBtnW > ZFseastMinW_H) {
            seatBtnW = ZFseastMinW_H;
            seatViewW = cloCount * ZFseastMinW_H;
        }
        //初始化就回調算出按鈕和自身的寬高
        CGFloat seatBtnH = seatBtnW;
        self.seatBtnWidth = seatBtnW;
        self.seatBtnHeight = seatBtnH;
        self.seatViewWidth = seatViewW;
        self.seatViewHeight = [seatsArray count] * seatBtnH;
        //初始化座位
        [self initSeatBtns:seatsArray];
    }
    return self;
}
2)畫側邊的索引條 主要就是算出總共有多少列,有沒走到之類的 將座位列號根據每個豎向坐標直接畫進索引條就可以了
//畫索引條
- (void)drawRect:(CGRect)rect {

    NSDictionary *attributeName = @{NSFontAttributeName: [UIFont systemFontOfSize:10],NSForegroundColorAttributeName : [UIColor whiteColor]};

    CGFloat NuomberTitleH = (self.height - 2 * 10) / self.indexsArray.count;

    [self.indexsArray enumerateObjectsUsingBlock:^(ZFSeatsModel *seatsModel, NSUInteger idx, BOOL *stop) {

            CGSize strsize =  [seatsModel.rowId sizeWithAttributes:attributeName];
            [seatsModel.rowId drawAtPoint:CGPointMake(self.width * 0.5 - strsize.width  * 0.5,10 + idx * NuomberTitleH + NuomberTitleH  * 0.5 - strsize.height  * 0.5) withAttributes:attributeName];

    }];
}
3)中線啟示也是自定義一個view畫一條線線上是label,每次隨座位圖上下滾動,重新設置自身高度重繪該線條就能達到效果
-(void)setHeight:(CGFloat)height{

    [super setHeight:height];

    [self setNeedsDisplay];
}
- (void)drawRect:(CGRect)rect {

    CGContextRef context = UIGraphicsGetCurrentContext();
    CGContextSetLineWidth(context, 1.0);
    CGContextSetStrokeColorWithColor(context, [UIColor darkGrayColor].CGColor);
    CGFloat lengths[] = {6,3};
    CGContextSetLineDash(context, 0, lengths,2);
    CGContextMoveToPoint(context, 0, 0);
    CGContextAddLineToPoint(context, 0, self.bounds.size.height);
    CGContextStrokePath(context);
}
4)每次座位圖滾動的時候隨著偏移量的變化更新其他所有控件的坐標就能達到某一方向跟隨scrollview滾動方向移動
- (void)scrollViewDidScroll:(UIScrollView *)scrollView{
    // 更新applogo
    if (scrollView.contentOffset.y <= scrollView.contentSize.height - self.height +ZFseastsColMargin + 15) {
        self.maoyanLogo.y = CGRectGetMaxY(self.seatView.frame) + 35;
        self.maoyanLogo.centerX = self.seatView.centerX;
    }else{
        self.maoyanLogo.centerX = self.seatView.centerX;
        self.maoyanLogo.y = scrollView.contentOffset.y + self.height - self.maoyanLogo.height;
    }
    //更新hallLogo
    self.hallLogo.y = scrollView.contentOffset.y;

    //更新中線
    self.centerLine.height = CGRectGetMaxY(self.seatView.frame) + 2 * ZFSmallMargin;

    if (scrollView.contentOffset.y < - ZFseastsColMargin ) {
        self.centerLine.y = self.seatView.y - ZFseastsColMargin + ZFCenterLineY;
    }else{
        self.centerLine.y = scrollView.contentOffset.y + ZFCenterLineY;
        self.centerLine.height = CGRectGetMaxY(self.seatView.frame) - scrollView.contentOffset.y - 2 * ZFCenterLineY + ZFseastsColMargin;
    }
    // 更新索引條
    self.rowindexView.x = scrollView.contentOffset.x + ZFseastMinW_H;


    //更新indicator大小位置
    [self.indicator updateMiniIndicator];
    if (!self.indicator.hidden || self.seatScrollView.isZoomBouncing)return;
    self.indicator.alpha = 1;
    self.indicator.hidden = NO;

}
最後不多解釋啦上Github地址:https://github.com/ZFbaby/ZFSeatsSelection/blob/master/ZFSeatsSelection
如果該模塊有幫到你,或者從中學到了一些知識請麻煩給個星,謝謝啦!
相關文章
+- iOS高仿微信表情輸出功用代碼分享
- 蘋果iOS10兼容性超強:高仿數據線也能正常用
- iOS6高仿iOS7多任務切換模式
- 如何高仿iOS7狀態欄與電池圖標
- iOS6高仿iOS7半透明通知中心
- 源碼推薦(5.07):JsWebView實現objectc與javascript交互,高仿支付寶手勢解鎖(增強版)
- 源碼推薦(5.14):TYAttributedLabel簡單易用的富文本,高仿iOS 系統計算器(基本功能)
- 源碼推薦(5.15):瀑布流布局演示demo,高仿微信限定行數文字內容
- 再造 “手機QQ” 側滑菜單(二)——高仿左視圖
- 源碼推薦(6.16):高仿新浪微博,支付寶(高仿)源碼
- 源碼推薦(6.24):一個Mp3播放控制器,高仿支付寶手勢解鎖
- 源碼推薦(6.30):圖片浏覽器 高仿新浪微博,仿QQ未讀消息彈性按鈕動畫
- 源碼推薦(7.02):LazyTableView(一個可以最大程度簡化uitableview操作的第三方框架),高仿微信
- iOS高仿城覓項目(開發思路和代碼)
- 源碼推薦(8.06):模仿MJ老師iPad版美團(swift版),高仿百度傳課iOS版


