史上比較用心的純代碼實現 AutoLayout
入職有兩三個月了吧,都是使用 Objective-C 純代碼(雖然有時候偷偷參雜一些 Swift 開源庫)來編寫公司APP,寫布局的時候幾乎都是要麼在初始化的時候用 initWithFrame,要麼就初始化完畢之後用 view.frame。雖然這種方法很直觀,一眼就可以看出這個 view 的位置以及大小,但是壞處也是有的,比如說在計算的時候麻煩等等。
概述
使用 Objective-C 純代碼編寫 AutoLayout,看 AutoLayout 的字面理解就是自動布局,聽起來好像蠻屌的樣子。說白了就是適配:適應、兼容各種不同的情況,包括不同版本的操作系統的適配(系統適配)和不同屏幕尺寸的適配(屏幕適配)。
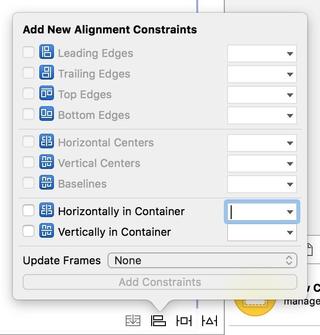
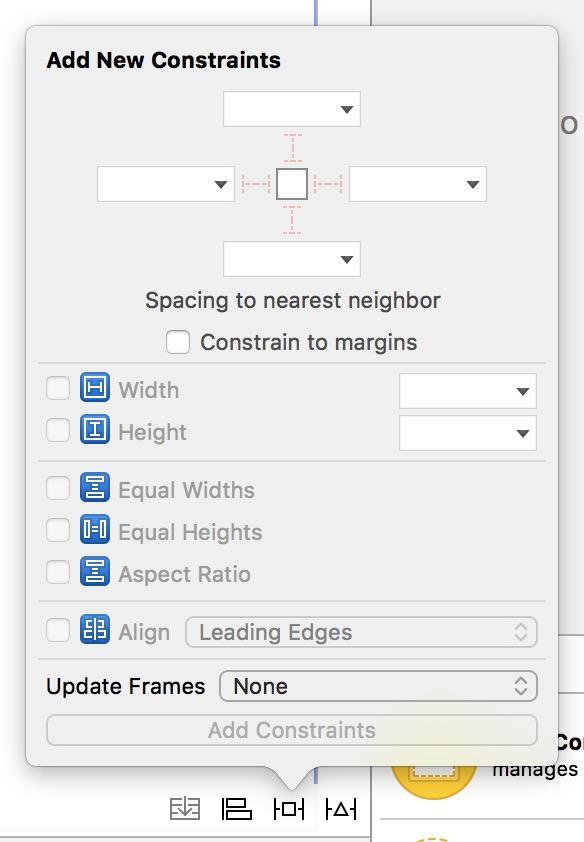
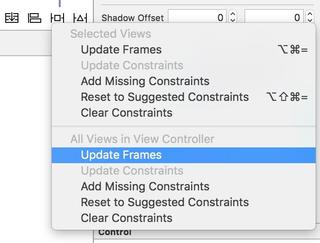
在 Storyboard 中,AutoLayout 有以下 3 個常用面板:
Align(對齊)
Pin(相對)
Resolve Auto Layout Issues(約束處理)
在 Storyboard 中實現 AutoLayout 我就不在本文講解,因為講了就是違背了不忘初心,方得始終的標題了。
Talk is cheap, show me the code
先說一下用代碼實現 AutoLayout 步驟,別眨眼:
利用 NSLayoutConstraint 類創建具體的約束對象;
添加約束對象到相應的 view 上,代碼有這兩種:
- (void)addConstraint:(NSLayoutConstraint *)constraint;
- (void)addConstraints:(NSArray *)constraints;
或許有人問了,原來才兩個步驟就可以了,我剛剛褲子都脫了,你就給我看這個?!
話不多說,馬上 show you the code !
先看看我們使用 frame 的方式是如何確定一個 view 的位置的:
- (void)viewDidLoad {
    [super viewDidLoad];
    self.title = @"使用 frame 的方式";
    UIView *purpleView = [[UIView alloc] initWithFrame:CGRectMake(100, 200, 150, 150)];
    purpleView.backgroundColor = [UIColor purpleColor];
    [self.view addSubview:purpleView];
}
代碼很簡單,運行效果如下:
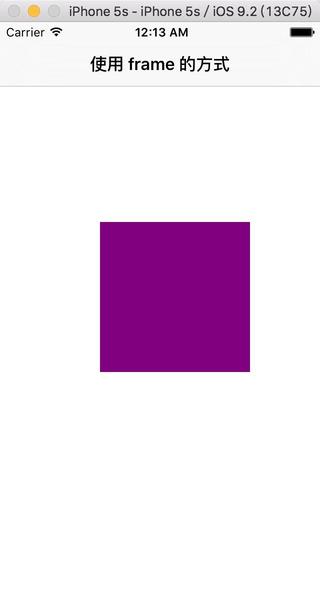
運行效果
再來看看 AutoLayout 的實現:
- (void)viewDidLoad {
    [super viewDidLoad];
    self.title = @"使用 AutoLayout 的方式";
    UIView *purpleView = [[UIView alloc] init];
    purpleView.backgroundColor = [UIColor purpleColor];
    // 禁止將 AutoresizingMask 轉換為 Constraints
    purpleView.translatesAutoresizingMaskIntoConstraints = NO;
    [self.view addSubview:purpleView];
    // 添加 width 約束
    NSLayoutConstraint *widthConstraint = [NSLayoutConstraint constraintWithItem:purpleView attribute:NSLayoutAttributeWidth relatedBy:NSLayoutRelationEqual toItem:nil attribute:NSLayoutAttributeNotAnAttribute multiplier:0.0 constant:150];
    [purpleView addConstraint:widthConstraint];
    // 添加 height 約束
    NSLayoutConstraint *heightConstraint = [NSLayoutConstraint constraintWithItem:purpleView attribute:NSLayoutAttributeHeight relatedBy:NSLayoutRelationEqual toItem:nil attribute:NSLayoutAttributeNotAnAttribute multiplier:0.0 constant:150];
    [purpleView addConstraint:heightConstraint];
    // 添加 left 約束
    NSLayoutConstraint *leftConstraint = [NSLayoutConstraint constraintWithItem:purpleView attribute:NSLayoutAttributeLeft relatedBy:NSLayoutRelationEqual toItem:self.view attribute:NSLayoutAttributeLeft multiplier:1.0 constant:100];
    [self.view addConstraint:leftConstraint];
    // 添加 top 約束
    NSLayoutConstraint *topConstraint = [NSLayoutConstraint constraintWithItem:purpleView attribute:NSLayoutAttributeTop relatedBy:NSLayoutRelationEqual toItem:self.view attribute:NSLayoutAttributeTop multiplier:1.0 constant:200];
    [self.view addConstraint:topConstraint];
}
看完這段代碼,我收到了驚嚇!我被這一大段代碼嚇到了,很多童鞋看到那麼簡單的布局需要寫那麼多代碼,可能就被嚇跑了。我只能說一句:先不要走,待我慢慢解釋~
創建約束對象(NSLayoutConstraint)的常用方法
一個 NSLayoutConstraint 對象就代表一個約束。
+ (id)constraintWithItem:(id)view1 attribute:(NSLayoutAttribute)attr1 relatedBy:(NSLayoutRelation)relation toItem:(id)view2 attribute:(NSLayoutAttribute)attr2 multiplier:(CGFloat)multiplier constant:(CGFloat)c;
總共有 7 個參數,那就以 leftConstraint 為例吧介紹這 7 個參數吧
view1: 要約束的控件(purpleView)
attr1: 約束的類型(常量),就是要做怎麼樣的約束,大家可以進去看看都有什麼常量(這裡是NSLayoutAttributeLeft)
relation: 與參照控件之間的關系(常量),包括等於、大於等於、小於等於(NSLayoutRelationEqual 是指等於)
view2: 參照的控件(self.view)
attr2: 約束的類型(常量),就是要做怎麼樣的約束,大家可以進去看看都有什麼常量(這裡是NSLayoutAttributeLeft)(NSLayoutAttributeLeft)
multiplier: 乘數,就是多少倍(1.0)
c: 常量,做好了上述的約束之後會加上這個常量(100)
所以 leftConstraint 就是代表:要約束的控件purpleView 的左間距是等於參照控件 self.view 的左間距的 1.0 倍加上 100。
所以我們得出 AutoLayout 的核心計算公式:
obj1.property1 =(obj2.property2 * multiplier)+ constant value
添加約束(addConstraint)的規則
在創建約束了之後,需要將其添加到作用的控件上才能生效,注意在添加約束的時候目標控件需要遵循以下規則(這裡控件就用 view 簡單表示吧):
(1)對於兩個同層級 view 之間的約束關系,添加到它們的父 view 上
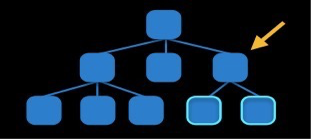
(2)對於兩個不同層級 view 之間的約束關系,添加到他們最近的共同父 view 上
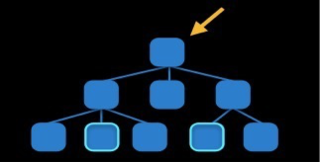
(3)對於有層次關系的兩個 view 之間的約束關系,添加到層次較高的父 view 上
(4)對於比如長寬之類的,只作用在該 view 自己身上的話,添加到該 view 自己上,不用圖了吧。
可以看出,widthConstraint 和 Constraint 屬於第(4)種,leftConstraint 和 rightConstraint 屬於第(3)種。
代碼實現 AutoLayout 的注意事項
如果只是創建和添加了約束,是不能正常運行的,要做好以下的工作:
(1)要先禁止 autoresizing 功能,防止 AutoresizingMask 轉換成 Constraints,避免造成沖突,需要設置 view 的下面屬性為 NO:
view.translatesAutoresizingMaskIntoConstraints = NO;
(2)添加約束之前,一定要保證相關控件都已經在各自的父控件上。用上面的例子就是 [self.view addSubview:purpleView]; 一定要放在添加 left 約束之前,否則程序會 crash,因為要確保 purpleView 要已經在 self.view 上了。建議先寫 [self.view addSubview:purpleView]; 之後,再專心寫約束。
(3)不用再給 view 設置 frame
看到了吧,那麼簡單的一個界面,用 AutoLayout 實現的話竟然要那麼多代碼,感覺上並沒有那麼方便是吧?
其實 AutoLayout 要看應用內容決定,上面只是一個使用的 demo。如果你的內容是信息眾多,同時需要展示的類別也很多,尺寸動態不定,比如說微博列表、QQ 動態列表等等,寫這些復雜界面使用 AutoLayout 能給予(jǐ yǔ??)很大的幫助。
Apple 為了簡化 AutoLayout 復雜的代碼,開發了一種 VFL 語言(Visual format language),事實上沒看見簡化多少,而且還有比較大的局限性,這裡就不介紹了,想了解的童鞋自己 Google 去。
算了,給個官方鏈接吧:Visual Format Language。
如何優雅的代碼編寫 AutoLayout
看到了 Apple 自帶的 AutoLayout 實現方式,感覺實在是太惡心了,那麼如何優雅的代碼編寫 AutoLayout 呢?
—— 使用第三方框架 Masonry。GitHub: https://github.com/SnapKit/Masonry,看它的介紹,感覺挺牛掰的:
Harness the power of AutoLayout NSLayoutConstraints with a simplified, chainable and expressive syntax. Supports iOS and OSX Auto Layout.
看完 README.md 文件發現的確蠻優雅的。
先一覽 Masonry 是如何實現 AutoLayout 的:
#import "ViewController.h"
#import "Masonry.h" // 第三方或自己寫的用引號,系統自帶用雙引號。
@interface ViewController ()
@end
@implementation ViewController
- (void)viewDidLoad {
    [super viewDidLoad];
    UIView *purpleView = [[UIView alloc] init];
    purpleView.backgroundColor = [UIColor purpleColor];
    [self.view addSubview:purpleView];
    [purpleView mas_makeConstraints:^(MASConstraintMaker *make) {
        // 在這個 block 裡面,利用 make 對象創建約束
        make.size.mas_equalTo(CGSizeMake(100, 100));
        make.center.mas_equalTo(self.view);
    }];
}
運行效果:
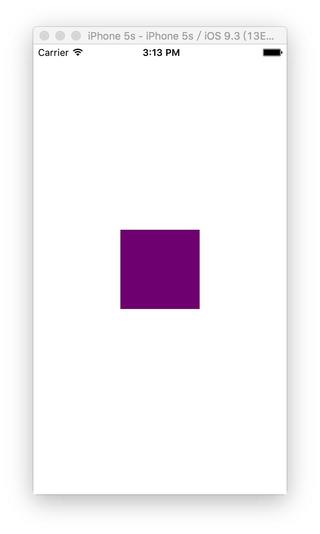
創建一個長和寬均為 100、與父 view 居中的 view
注意:purpleView.translatesAutoresizingMaskIntoConstraints = NO;不需要在這裡寫了,因為 Masonry 已經寫好了。
Masonry 開車,趕緊上車
一步一步跟著來,哈哈嘻嘻
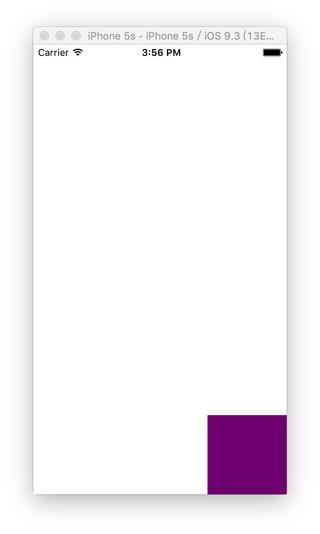
// 長寬均為 100,粘著父 view 右下角
[purpleView mas_makeConstraints:^(MASConstraintMaker *make) {
  make.width.equalTo(@100);
  make.height.equalTo(@100);
  make.right.equalTo(self.view);
  make.bottom.equalTo(self.view);
}];
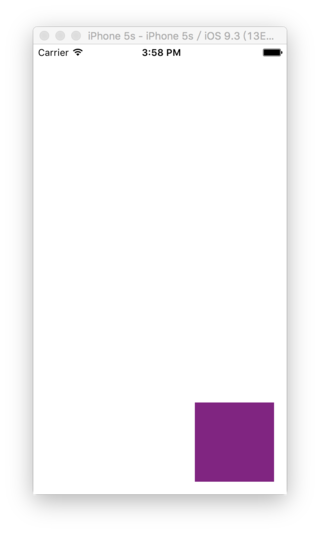
// 長寬均為 100,粘著父 view 右下角,間距為 16
[purpleView mas_makeConstraints:^(MASConstraintMaker *make) {
     make.width.equalTo(@100);
     make.height.equalTo(@100);
     // 這裡也可以寫 make.right.equalTo(self.view.mas_right).offset(-16);
     // 為了增強可讀性,可以在 .offset 前加上 .with 或者 .and: make.right.equalTo(self.view).with.offset(-16); 看自己習慣吧
     make.right.equalTo(self.view).offset(-16);
     // 這裡也可以寫 make.right.equalTo(self.view.mas_bottom).offset(-16);
     make.bottom.equalTo(self.view).offset(-16);
}];
看到上面代碼的包裝好的 @100,其實也可以直接傳值 100,不過要把 equalTo 改成 mas_equalTo,這樣它就自動幫你包裝好了。
make.width.mas_equalTo(100);
make.height.mas_equalTo(100);
其實 mas_equalTo 就是一個宏,大家可以進去看看定義。
mas_equalTo 這個方法會對參數進行包裝
equalTo 這個方法不會對參數進行包裝
mas_equalTo 的功能強於 equalTo
大家可能會覺得有點兒暈,有時候用 mas_equalTo,有時候用 equalTo,其實大家可以在 pch 文件裡定義兩個宏,就可以完美解決這個糾結問題。注意要寫在 #import "Masonry.h" 前面。
//define this constant if you want to use Masonry without the 'mas_' prefix,這樣子 `mas_width` 等就可以寫成 `width`
#define MAS_SHORTHAND
//define this constant if you want to enable auto-boxing for default syntax,這樣子 `mas_equalTo` 和 `equalTo` 就沒有區別了
#define MAS_SHORTHAND_GLOBALS
好,現在來一個稍微比剛才的復雜一點點的界面:
- (void)viewDidLoad {
    [super viewDidLoad];
    UIView *purpleView = [[UIView alloc] init];
    purpleView.backgroundColor = [UIColor purpleColor];
    [self.view addSubview:purpleView];
    UIView *orangeView = [[UIView alloc] init];
    orangeView.backgroundColor = [UIColor orangeColor];
    [self.view addSubview:orangeView];
    CGFloat margin = 16;
    CGFloat height = 32;
    [purpleView mas_makeConstraints:^(MASConstraintMaker *make) {
        make.left.equalTo(self.view).offset(margin);
        make.bottom.equalTo(self.view).offset(-margin);
        make.right.equalTo(orangeView.left).offset(-margin);
        make.height.equalTo(height);
        make.width.equalTo(orangeView);
    }];
    [orangeView mas_makeConstraints:^(MASConstraintMaker *make) {
        make.bottom.equalTo(self.view).offset(-margin);
        make.right.equalTo(self.view).offset(-margin);
        make.height.equalTo(height);
    }];
}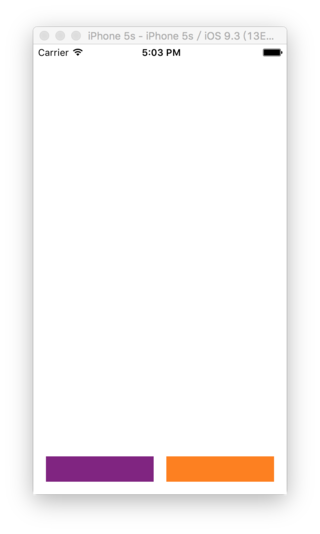
兩個等高等寬的 view 平分屏幕寬度,帶有間隙
其實實現這個界面有很多中寫法,大家可以試試,比如說這樣寫:
- (void)viewDidLoad {
    ...
    [purpleView mas_makeConstraints:^(MASConstraintMaker *make) {
        make.left.equalTo(self.view).offset(margin);
        make.bottom.equalTo(self.view).offset(-margin);
        make.right.equalTo(orangeView.left).offset(-margin);
        make.height.equalTo(height);
        make.height.equalTo(orangeView);
        make.width.equalTo(orangeView);
        make.top.equalTo(orangeView);
    }];
    [orangeView mas_makeConstraints:^(MASConstraintMaker *make) {
        make.right.equalTo(self.view).offset(-margin);
    }];
}
總結
其實 Masonry 的文檔已經很詳細了,建議大家去看文檔,我寫這個主要是為了做這個界面的 Tableview 上下拉阻尼效果而准備的

對我粗暴~
本文作者:伯樂在線 - 小良 。
- 上一頁:iOS 實現第三方登錄(圖文)
- 下一頁:盤點:Xcode 8新特性
- 史上最具體的CocoaPods裝置教程(圖文)
- iPhone連接不上iTunes怎麼辦?史上最全解決辦法匯總教程
- iPhone史上最惡搞5款軟件
- 升級iOS6最新教程 史上最簡單的升級iOS6安裝方法
- 史上最簡單的升級iOS6安裝方法
- 歷史上最受歡迎的iOS付費/免費應用
- iPhone設置功能中比較難用的解決辦法
- 兩款iPhone6裸機在哪買比較劃算?
- 史上最拼的土豪金山寨iPhone5s長什麼樣
- 史上最詳細的iPhone6/iOS8夜拍技巧
- 史上最詳細App Store退款流程
- iphone6傳照片到電腦怎樣比較快?
- iphone應該怎麼充電比較好呢?
- 蘋果iOS 9與iOS 8哪個比較安全?
- 史上最全的iPhone省電技巧匯總


