iOS圖片動態緩存方案

項目地址:LDSImageCache
一直都想寫一個關於圖片緩存方案的,但是積累不夠,一直扔在這,最近開始嘗試。就先從我寫下載開始分享。
下載
下載的話,我查閱了很多人寫的,像SDWebImage,使用的是NSURLConnection,但是我這裡准備使用NSURLsession,使用NSURLSessionDataDelegate的代理方法實現下載數據。
說點題外話:我為什麼選擇NSURLsession二部選擇NSURLConnection。因為iOS9之前在做網絡連接的時候,我們使用的時NSURLConnection,但是iOS9之後NSURLConnection宣布被棄用了,在2013年的WWDC大會上,蘋果就已經設計出NSURLConnection的繼任者NSURLSession,他使用起來比NSURLConnection更加簡單,更加強大。
在這個過程當中,還會用到GCD與NSOperation來管理下載線程,為什麼混合使用呢?我們使用子類化NSOperation來高復抽象我們的下載線程進行抽象化,這樣使我們的下載模塊更加清晰,在整個不算太復雜的下載過程中,讓接口變得簡單。GDC我們在下載中局部會使用到,GCD的優點我們都知道,簡單,易用,節省代碼,使用block讓代碼變得更加簡潔。
基本上使用的東西上面都總結完了,開始進入下載的設計。
線程程管理器
使用子類化自定義NSOperation,這樣一個下載就是一條線程,管理這些線程的話,就需要一個下載管理器,我們就是先來構建這個下載管理器。
這個管理器在整個下載模塊中起到的就是對線程資源進行管理,起到一個工具的作用,這樣的話我們需要把管理器構建成一個單例類,所以這裡我們需要先使用單例模式來達到數據共享的目的。
+(instancetype)shareDownloader{
    static LYImageDownloader *lyImageDownloader;
    static dispatch_once_t onceToken;
    dispatch_once(&onceToken, ^{
        lyImageDownloader = [[LYImageDownloader alloc] init];
    });
    return lyImageDownloader;
}
以上就是我們下載管理器的單例。
整個下載的時候,通過閱讀開源庫,查找資料,發現很多的設計者他們的下載都具備狀態監聽,這個狀態指的就是像下載進度,完成進度,錯誤信息回調。這些都是下載過程中,我們需要實時知道的東西。
這些信息都准備以block回調的形式展現,具體如下:
/**
 *  無參數block
 */
typedef void(^DownloaderCreateBlock)();
/**
 *  下載回調信息,下載進度Block
 *
 *  @param AlreadyReceiveSize 已經接收大小
 *  @param NotReceiveSize     未接收大小
 */
typedef void(^DownloaderProgressBlock)(NSInteger alreadyReceiveSize,NSInteger expectedContentLength);
/**
 *  下載回調信息,完成下載Block
 *
 *  @param data     data
 *  @param image    圖片
 *  @param error    錯誤信息
 *  @param finished 是否完成
 */
typedef void(^DownloaderCompletedBlock)(NSData *data,UIImage *image,NSError *error,BOOL finished);
在整個下載中,我們還需要有一些配置選項,例如是否允許後台下載,選擇隊列下載方式,還是棧的下載方式。所以設置了以下的選項。
typedef NS_OPTIONS(NSInteger,DownloaderOptions) {
    //默認下載操作
    DownloaderDefault = 1,
    //允許後台操作
    DownloaderContinueInBackground = 2
};
typedef NS_ENUM(NSInteger,DownloaderOrder){
    //默認下載順序,先進先出
    DownloaderFIFO,
    //先進後出
    DownloaderLIFO
};
基本的信息構建完成,我考慮的就是需要將這些狀態的回調信息存在一個NSMutableDictionary中,key值就是我們的下載地址,value就是NSMutableArray,裡面包含所DownloaderProgressBlock,DownloaderCompletedBlock進度信息。
定義了一下屬性:
/**
 *  將所有的下載回調信息存儲在這裡,Key是URL,Value是多組回調信息
 */
@property(strong,nonatomic) NSMutableDictionary *downloaderCallBack;
在一個下載開始之前,需要加載,或者是刪除一些狀態信息,構建了以下的函數。
/**
 *  添加回調信息
 *
 *  @param progressBlock  DownloaderProgressBlock
 *  @param completedBlock  DownloaderCompletedBlock
 *  @param url  url
 *  @param DownloaderCreateBlock DownloaderCreateBlock
 */
-(void)addWithDownloaderProgressBlock:(DownloaderProgressBlock)progressBlock DownloaderCompletedBlock:(DownloaderCompletedBlock)completedBlock URL:(NSURL *)url DownloaderCreateBlock:(DownloaderCreateBlock)downloaderCreateBlock{
    /**
     *  判斷url是否為空
     */
    if ([url isEqual:nil]) {
        completedBlock(nil,nil,nil,NO);
    }
    /**
     *  設置屏障,保證在同一時間,只有一個線程可以操作downloaderCallBack屬性,保證在並行多個處理的時候,對downloaderCallBack屬性的讀寫操作保持一致
     */
    dispatch_barrier_sync(self.concurrentQueue, ^{
        BOOL firstDownload = NO;
        /**
         *  添加回調信息,處理同一個url信息。
         */
        if(!self.downloaderCallBack[url]){
            self.downloaderCallBack[url] = [NSMutableArray new];
            firstDownload = YES;
        }
        NSMutableArray *callBacksArray = self.downloaderCallBack[url];
        NSMutableDictionary *callBacks = [[NSMutableDictionary alloc] init];
        if (progressBlock) {
            callBacks[@"progress"] = [progressBlock copy];
        }
        if (completedBlock) {
            callBacks[@"completed"] = [completedBlock copy];
        }
        [callBacksArray addObject:callBacks];
        self.downloaderCallBack[url] = callBacksArray;
        if (firstDownload) {
            downloaderCreateBlock();
        }
    });
}
首先就是判斷當前的url是否為空,如果為空,直接回調空處理。不為空的話,為了防止同一URL的value被重復創建,我們需要在這裡判斷下原來是否存在,是否為第一次下載,是第一下下載的話,這裡我們會觸發adownloaderCreateBlock()的回調來進行operation的配置,當然如果不是第一次,我就僅僅需要把這個新的DownloaderProgressBlock,DownloaderCompletedBlock放進callBacksArray中即可。
這裡為了保證downloaderCallBack的線程安全性,我們加了一個屏障,來保證每次只有一個線程操作downloaderCallBack屬性。
這麼做的一個好處就是,我每一個下載,我判斷一下是不是同一URL,是的話我就做偽下載,就是感覺上下載,但是不下載,然後已經正在下載進度會同時反饋給當前其他相同的下載請求。
整個下載管理器,我們需要將下載在一個模塊中被管理。就像下面這樣
/**
 *  下載管理器對於下載請求的管理
 *
 *  @param progressBlock  DownloaderProgressBlock
 *  @param completedBlock DownloaderCompletedBlock
 *  @param url            url
 */
-(void)downloaderImageWithDownloaderWithURL:(NSURL *)url DownloaderProgressBlock:(DownloaderProgressBlock)progressBlock DownloaderCompletedBlock:(DownloaderCompletedBlock)completedBlock{
    __weak __typeof(self)myself = self;
    __block LYDownloaderOperation *operation;
    [self addWithDownloaderProgressBlock:progressBlock DownloaderCompletedBlock:completedBlock URL:url DownloaderCreateBlock:^{
        NSMutableURLRequest *request = [[NSMutableURLRequest alloc] initWithURL:url cachePolicy: NSURLRequestReloadIgnoringLocalCa            cheData timeoutInterval:20];
      operation = [[LYDownloaderOperation alloc] initWithRequest:request
            DownloaderOptions:1
            DownloaderProgressBlock:^(NSInteger alreadyReceiveSize,NSInteger expectedContentLength){
            __block NSArray *urlCallBacks;
            dispatch_sync(self.concurrentQueue, ^{
                urlCallBacks = [myself.downloaderCallBack[url] copy];
            });
            for (NSDictionary *callbacks in urlCallBacks) {
               dispatch_async(dispatch_get_main_queue(), ^{
                  DownloaderProgressBlock progress = callbacks[@"progress"];
                     if (progress) {
                       progress(alreadyReceiveSize,expectedContentLength);
                      }
               });
            }
      }
      DownloaderCompletedBlock:^(NSData *data,UIImage *image,NSError *error,BOOL finished){
           completedBlock(data,image,error,finished);
      }
      cancelled:^{}];
      [myself.downloadQueue addOperation:operation];
    }];
}
這部分主要就是在配置我們的operation,將配置完成後的operation添加到下載隊列。
/**
 *  下載隊列
 */
@property(strong,nonatomic) NSOperationQueue *downloadQueue;
Objective-C
1
[myself.downloadQueue addOperation:operation];
在這裡:
DownloaderProgressBlock:^(NSInteger alreadyReceiveSize,NSInteger expectedContentLength){
  __block NSArray *urlCallBacks;
  dispatch_sync(self.concurrentQueue, ^{
    urlCallBacks = [myself.downloaderCallBack[url] copy];
  });
  for (NSDictionary *callbacks in urlCallBacks) {
     dispatch_async(dispatch_get_main_queue(), ^{
        DownloaderProgressBlock progress = callbacks[@"progress"];
        if (progress) {
           progress(alreadyReceiveSize,expectedContentLength);
        }
      });
  }
}
就是進度的回調通知,在這裡可以知道,如果我們使用了GCD,保證通知對象加載完整後在進行通知
dispatch_sync(self.concurrentQueue, ^{
     urlCallBacks = [myself.downloaderCallBack[url] copy];
});
這裡使用同步保證了我們進度被通知對象的完整性。
接下來的話就是異步回調通知了,下面的其他地方的基本結構也都做了類似的處理。主要就是保證每一條下載線程,每一條通知都安全的進行著。在完成下載的時候移除對應url的狀態,這裡也是為了保證downloaderCallBack的線程安全性,我們加了一個屏障,來保證每次只有一個線程操作downloaderCallBack屬性。
子類化NSOperation
這裡開始就是做下載處理了。需要做的就是重寫start方法,在這裡創建並且配置NSURLSession對象。
-(void)start{
    NSLog(@"start");
    /**
     * 創建NSURLSessionConfiguration類的對象, 這個對象被用於創建NSURLSession類的對象.
     */
    NSURLSessionConfiguration *configura = [NSURLSessionConfiguration defaultSessionConfiguration];
    /**
     * 2. 創建NSURLSession的對象.
     * 參數一 : NSURLSessionConfiguration類的對象.(第1步創建的對象.)
     * 參數二 : session的代理人. 如果為nil, 系統將會提供一個代理人.
     * 參數三 : 一個隊列, 代理方法在這個隊列中執行. 如果為nil, 系統會自動創建一系列的隊列.
     * 注: 只能通過這個方法給session設置代理人, 因為在NSURLSession中delegate屬性是只讀的.
     */
    NSURLSession *session = [NSURLSession sessionWithConfiguration:configura delegate:self delegateQueue:nil];
    /**
     *  創建request
     */
    NSMutableURLRequest *request = self.request;
    /**
     *  創建數據類型任務
     */
    NSURLSessionDataTask *dataTask = [session dataTaskWithRequest:request];
    /**
     *  開始任務
     */
    [dataTask resume];
    /**
     *  在session中的所有任務都完成之後, 使session失效.
     */
    [session finishTasksAndInvalidate];
}
因為我們實現了NSURLSessionDataDelegate協議,所以可以自定義一些操作。
//最先調用,在這裡做一些數據的初始化。
-(void)URLSession:(NSURLSession *)session dataTask:(NSURLSessionDataTask *)dataTask didReceiveResponse:(NSURLResponse *)response completionHandler:(void (^)(NSURLSessionResponseDisposition))completionHandler{
    NSLog(@"開始");
    self.imageData = [[NSMutableData alloc] init];
    self.expectedContentLength = response.expectedContentLength;
    if (self.progressBlock) {
        self.progressBlock(0,self.expectedContentLength);
    }
    completionHandler(NSURLSessionResponseAllow);
}
//下載響應
- (void)URLSession:(NSURLSession *)session dataTask:(NSURLSessionDataTask *)dataTask
    didReceiveData:(NSData *)data{
    [self.imageData appendData:data];
    if (self.progressBlock) {
        self.progressBlock(self.imageData.length,self.expectedContentLength);
    }
}
//下載完成後調用
-(void)URLSession:(NSURLSession *)session task:(NSURLSessionTask *)task didCompleteWithError:(NSError *)error{
    self.completedBlock(self.imageData,nil,error,YES);
    [self cancel];
}
重寫了以上的一些實現。
最後強調下這裡:
NSMutableURLRequest *request = [[NSMutableURLRequest alloc] initWithURL:url cachePolicy: NSURLRequestReloadIgnoringLocalCacheData timeoutInterval:30];
為了避免潛在的重復緩存,NSURLCache與自己的緩存方案,則禁用圖片請求的緩存操作。
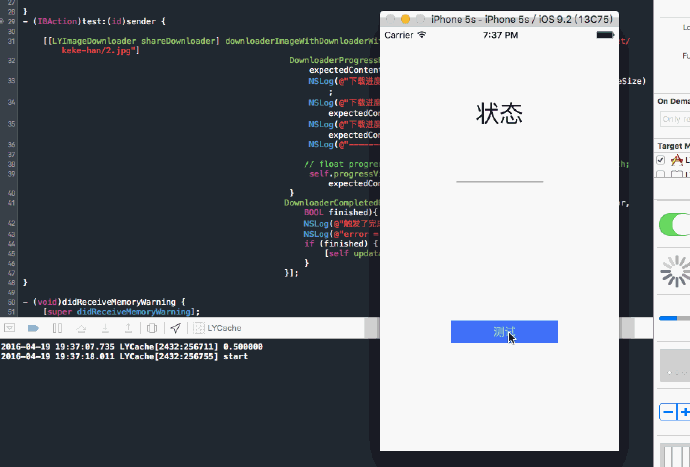
基本上我們就可以進行測試了:
寫了一個簡單UI,用來展示下載部分

緩存
緩存這個地方需要考慮的東西還是很多的,那麼將會針對一下問題進行描述,設計。
緩存在內存,或者是磁盤,或者是內存+磁盤
緩存是否成功
緩存的容器
存儲圖片方式
查詢圖片
清理圖片(完全清理,清理部分,其中清理部分圖片的清理方式為按時間,安空間的大小)
直接上代碼:
/**
 *  進行緩存
 *
 *  @param memoryCache  內存
 *  @param image        圖片
 *  @param imageData    圖片data
 *  @param urlKey       key值就用來唯一標記數據
 *  @param isSaveTOdisk 是否進行沙箱緩存
 */
-(void)saveImageWithMemoryCache:(NSCache *)memoryCache image:(UIImage *)image imageData:(NSData *)imageData urlKey:(NSString *)urlKey isSaveToDisk:(BOOL)isSaveToDisk{
    //內存緩存
    if ([memoryCache isEqual:nil]) {
        [self.memoryCache setObject:image forKey:urlKey];
    }else{
        [memoryCache setObject:image forKey:urlKey];
    }
    //磁盤緩存
    if (isSaveToDisk) {
        dispatch_sync(self.ioSerialQueue, ^{
            if (![_fileMange fileExistsAtPath:_diskCachePath]) {
                [_fileMange createDirectoryAtPath:_diskCachePath withIntermediateDirectories:YES attributes:nil error:nil];
            }
            NSString *pathForKey = [self defaultCachePathForKey:urlKey];
            NSLog(@"%@",pathForKey);
            [_fileMange createFileAtPath:pathForKey contents:imageData attributes:nil];
        });
    }
}
注釋中基本上就描述了各部分的職責,首先就是內存緩存,這裡的內存緩存我用NSCache進行處理,這裡用NSCache就是其實就是一個集合類型,這個集合類型維護這一個key-value結構。當某一些對象銷毀的代價,或者重新生成的代價高於我們內存保留。那麼我們就把它內存緩存下來就是很值的。因此重用這些對象是很值得的,畢竟我們不需要二次計算了,並且當我們的內存警報的時候,他自己會丟棄掉一些沒用的東西的。
就像代碼中標記的,就是做了內存緩存工作。
磁盤緩存使用NSFileManager實現,存放的位置就是沙箱的Cache文件夾內,這樣就可以了。並且我們可以看到,這裡我們是可以根據isSaveToDisk來判斷是否需要進行磁盤的緩存,因為有一些東西是不需要緩存在磁盤中的,另外,異步操作也是很關鍵的一個地方,同樣我們在這裡使用dispatch_sync來做一些處理,實現我們的異步操作。並且這裡的文件名實使用是將URL變換為MD5值。保證了唯一性。
緩存的操作基本上就完成了,既然能存,就需要對應查詢。
//查詢圖片
-(void)selectImageWithKey:(NSString *)urlKey completedBlock:(CompletedBlock)completed{
    UIImage *image = [self.memoryCache objectForKey:urlKey];
    if ([image isEqual:nil]) {
        NSLog(@"ok");
        completed(image,nil,ImageCacheTypeMemory);
    }else{
        NSString *pathForKey = [self defaultCachePathForKey:urlKey];
        NSLog(@"%@",pathForKey);
        NSData *imageData = [NSData dataWithContentsOfFile:pathForKey];
        UIImage *diskImage = [UIImage imageWithData:imageData];
        completed(diskImage,nil,ImageCacheTypeDisk);
    }
}
這裡的查詢基本上就是兩種方式,第一種如果內存中存在,那麼就在內存中讀取就可以了。當然也存在著內存中不存在的可能性,這樣就需要從磁盤中開始讀取信息數據。根據MD5值進行索引,然後block回調給上層數據信息進行處理。
最後就是刪除操作,因為如果我們設置了磁盤的上限,當我們設定的磁盤空間達到上限的時候該怎麼做?當我們想清空所有緩存的時候,我們該怎麼做呢?下面的這兩段代碼就是為了做清理磁盤空間的事情的。
/**
 *  清空全部
 *
 *  @param completion completion
 */
- (void)clearDiskOnCompletion:(NoParamsBlock)completion
{
    dispatch_async(self.ioSerialQueue, ^{
        [_fileMange removeItemAtPath:self.diskCachePath error:nil];
        [_fileMange createDirectoryAtPath:self.diskCachePath
              withIntermediateDirectories:YES
              attributes:nil
              error:NULL];
        if (completion) {
            dispatch_async(dispatch_get_main_queue(), ^{
                completion();
            });
        }
    });
}
這段代碼的作用就是為了做清空磁盤的作用,同樣是使用NSFileManager來實現。
/**
 *  按條件進行清空(主要是時間),這裡盜用了SDWebImage的設計
 *
 *  @param noParamsBlock completion
 */
-(void)clearDiskWithNoParamsBlock:(NoParamsBlock)noParamsBlock{
    dispatch_async(self.ioSerialQueue, ^{
        NSURL *diskCache = [NSURL fileURLWithPath:self.diskCachePath isDirectory:YES];
        NSArray *resourcKeys = @[NSURLIsDirectoryKey,NSURLContentModificationDateKey, NSURLTotalFileAllocatedSizeKey];
        // 1. 該枚舉器預先獲取緩存文件的有用的屬性
        NSDirectoryEnumerator *fileEnumerator = [_fileMange enumeratorAtURL:diskCache
                                  includingPropertiesForKeys:resourcKeys
                                  options:NSDirectoryEnumerationSkipsHiddenFiles
                                  errorHandler:NULL];
        NSDate *expirationDate = [NSDate dateWithTimeIntervalSinceNow:-60 * 60 * 24 * 7];
        NSMutableDictionary *cacheFiles = [NSMutableDictionary dictionary];
        NSInteger currentCacheSize = 0;
        NSMutableArray *urlsToDelete = [[NSMutableArray alloc] init];
        for (NSURL *fileURL in fileEnumerator) {
            NSDictionary *resourceValues = [fileURL resourceValuesForKeys:resourcKeys error:NULL];
            // 3. 跳過文件夾
            if ([resourceValues[NSURLIsDirectoryKey] boolValue]) {
                continue;
            }
            NSDate *modificationDate = resourceValues[NSURLContentModificationDateKey];
            if ([[modificationDate laterDate:expirationDate] isEqualToDate:expirationDate]) {
                [urlsToDelete addObject:fileURL];
                continue;
            }
            // 5. 存儲文件的引用並計算所有文件的總大小,以備後用
            NSNumber *totalAllocatedSize = resourceValues[NSURLTotalFileAllocatedSizeKey];
            currentCacheSize += [totalAllocatedSize unsignedIntegerValue];
            [cacheFiles setObject:resourceValues forKey:fileURL];
        }
        for (NSURL *fileURL in urlsToDelete) {
            [self.fileMange removeItemAtURL:fileURL error:NULL];
        }
        if (self.maxCacheSize > 0 && currentCacheSize > self.maxCacheSize) {
            const NSUInteger desiredCacheSize = self.maxCacheSize / 2;
            // Sort the remaining cache files by their last modification time (oldest first).
            NSArray *sortedFiles = [cacheFiles keysSortedByValueWithOptions:NSSortConcurrent
               usingComparator:^NSComparisonResult(id obj1, id obj2) {
                  return [obj1[NSURLContentModificationDateKey] compare:obj2[NSURLContentModificationDateKey]];
            }];
            // Delete files until we fall below our desired cache size.
            for (NSURL *fileURL in sortedFiles) {
                if ([_fileMange removeItemAtURL:fileURL error:nil]) {
                    NSDictionary *resourceValues = cacheFiles[fileURL];
                    NSNumber *totalAllocatedSize = resourceValues[NSURLTotalFileAllocatedSizeKey];
                    currentCacheSize -= [totalAllocatedSize unsignedIntegerValue];
                    if (currentCacheSize < desiredCacheSize) {
                        break;
                    }
                }
            }
        }
        if (noParamsBlock) {
            dispatch_async(dispatch_get_main_queue(), ^{
                noParamsBlock();
            });
        }
    });
}
這段代碼就是實現了部分的清理工作,清理的工作就是根據我們設定的一些參數來實現的,這裡包含著我們設定的緩存有效期,緩存的最大空間是多少。過了我們設定的有效期,這個時候我們就需要去清理掉這部分內容。另外如果如果所有緩存文件的總大小超過這一大小,則會按照文件最後修改時間的逆序,以每次一半的遞歸來移除那些過早的文件,直到緩存的實際大小小於我們設置的最大使用空間。
到了這裡我們的緩存的方案就基本上完成了,我們做一個小小的測試,從本地讀取一個文件,然後緩存到cache文件加重,然後進行加載,看一下效果。來看一下測試代碼:
- (IBAction)read:(id)sender {
    LDImageCache *l = [LDImageCache shareLDImageCache];
    UIImage *myImage = [UIImage imageNamed:@"author.jpg"];
    NSData *data = UIImagePNGRepresentation(myImage);
    [l saveImageWithMemoryCache:nil image:myImage imageData:data urlKey:@"lastdays.cn" isSaveToDisk:YES];
    [l selectImageWithKey:@"lastdays.cn"
           completedBlock:^(UIImage *image,NSError *error,ImageCacheType type){
               NSLog(@"%ld",(long)type);
               [self.image setImage:image];
           }];
//    [l clearDiskOnCompletion:^{
//        NSLog(@"完成清空");
//    }];
}
這裡的讀取數據,首先我們從本地讀取一個圖片,然後調用saveImageWithMemoryCache:將圖片數據緩存在內存和磁盤中。然後根據key值調用selectImageWithKey進行查詢,這裡我們輸出的ImageCacheType數據,查看一下都是從哪裡進行的讀取。我們會優先從內存中進行讀取數據。
管理器
實際的應用場景下我們不可能去直接使用下載跟緩存來處理完成我們的圖片混存的,所以需要提供一個管理器去幫助我們直接的去完成圖片的下載以及緩存工作。所以在這裡我們設計一個LDSCacheManage,就是將下載和管理綁定在一起。方便上層使用。
看下具體代碼:
-(void)downImageWithURL:(NSString *)urlString DownloaderProgressBlock:(DownloaderProgressBlock)progressBlock DownloaderCompletedBlock:(DownloaderCompletedBlock)completedBlock{
    NSURL *url = [NSURL URLWithString:urlString];
    if ([urlString isKindOfClass:NSString.class]) {
        url = [NSURL URLWithString:urlString];
    }
    if (![url isKindOfClass:NSURL.class]) {
        url = nil;
    }
    [[LDSImageCache shareLDImageCache] selectImageWithKey:urlString completedBlock:^(UIImage *image,NSError *error,ImageCacheType type){
        if (image) {
            dispatch_async(dispatch_get_main_queue(), ^{
                NSData *data = UIImagePNGRepresentation(image);
                completedBlock(data,image,error,YES);
                NSLog(@"讀取緩存");
            });
        }else{
            NSLog(@"進入下載");
            [[LYImageDownloader shareDownloader] downloaderImageWithDownloaderWithURL:url
             DownloaderProgressBlock:^(NSInteger alreadyReceiveSize,NSInteger expectedContentLength){
                  dispatch_async(dispatch_get_main_queue(), ^{
                      progressBlock(alreadyReceiveSize,expectedContentLength);
                  });
       }
DownloaderCompletedBlock:^(NSData *data,UIImage *image,NSError *error,BOOL finished){
    dispatch_async(dispatch_get_global_queue(DISPATCH_QUEUE_PRIORITY_HIGH, 0), ^{
  [[LDSImageCache shareLDImageCache] saveImageWithMemoryCache:nil image:image imageData:data urlKey:urlString isSaveToDisk:YES];
  });
  dispatch_async(dispatch_get_main_queue(), ^{
  completedBlock(data,image,error,YES);
  });
 }];
  }
}];
可以看到,我們先是對URL的正確性進行處理轉化,然後我們是根據URl先從磁盤中讀取緩存的,如果磁盤中存在,直接回調image就可以了,如果沒有就進入下載,這裡就是調用我們的downloaderImageWithDownloaderWithURL進入下載,下載完成後我們需要做緩存:
dispatch_async(dispatch_get_global_queue(DISPATCH_QUEUE_PRIORITY_HIGH, 0), ^{                              [[LDSImageCache shareLDImageCache] saveImageWithMemoryCache:nil image:image imageData:data urlKey:urlString isSaveToDisk:YES];
});
這裡我們采用的是在一個全局隊列中並行處理一個緩存操作。然後回調數據。
+(LDSCacheManage *)shareLDCacheManage{
    static LDSCacheManage *lDSCacheManage;
    static dispatch_once_t onceToken;
    dispatch_once(&onceToken, ^{
        lDSCacheManage = [[LDSCacheManage alloc] init];
    });
    return lDSCacheManage;
}
在這裡我們也是提供了一個單例。
視圖擴展
最後就是對UIImageView做視圖擴展,使其擁有異步下載和緩存遠程圖片的能力。
- (void)lds_setImageWithURL:(NSString *)url progressBlock:(DownloaderProgressBlock)progressBlock completed:(DownloaderCompletedBlock)completedBlock{
    __weak __typeof(self)wself = self;
    [[LDSCacheManage shareLDCacheManage] downImageWithURL:url
    DownloaderProgressBlock:^(NSInteger aleradyReceiveSize,NSInteger expectedContentLength){
       if (progressBlock) {
           progressBlock(aleradyReceiveSize,expectedContentLength);
       }
      }DownloaderCompletedBlock:^(NSData *data,UIImage *image,NSError *error,BOOL finished){
         dispatch_async(dispatch_get_main_queue(), ^{
             wself.image = image;
             [wself setNeedsLayout];
             if (completedBlock) {
                completedBlock(data, image, error, YES);
               }
            });
    }];
}
調用LDSCacheManage,進行圖片的讀取,至於讀取緩存內容還是去下載啊,那就交給LDSCacheManage去處理好了,我們就不管了。調用[wself setNeedsLayout]去更新視圖就可以了。
使用
- (IBAction)read:(id)sender {
    [[LDSImageCache shareLDImageCache] clearDiskOnCompletion:^{
        NSLog(@"完成清空");
    }];
}
- (IBAction)test:(id)sender {
    [self.image lds_setImageWithURL:@"https://sinacloud.net/keke-han/1.jpg" progressBlock:^(NSInteger alreadyReceiveSize,NSInteger expectedContentLength){
        self.progressView.progress = alreadyReceiveSize/(double)expectedContentLength;
    } completed:^(NSData *data,UIImage *image,NSError *error,BOOL finished){
        dispatch_async(dispatch_get_main_queue(), ^{
            self.status.text = @"成功";
        });
    }];
}
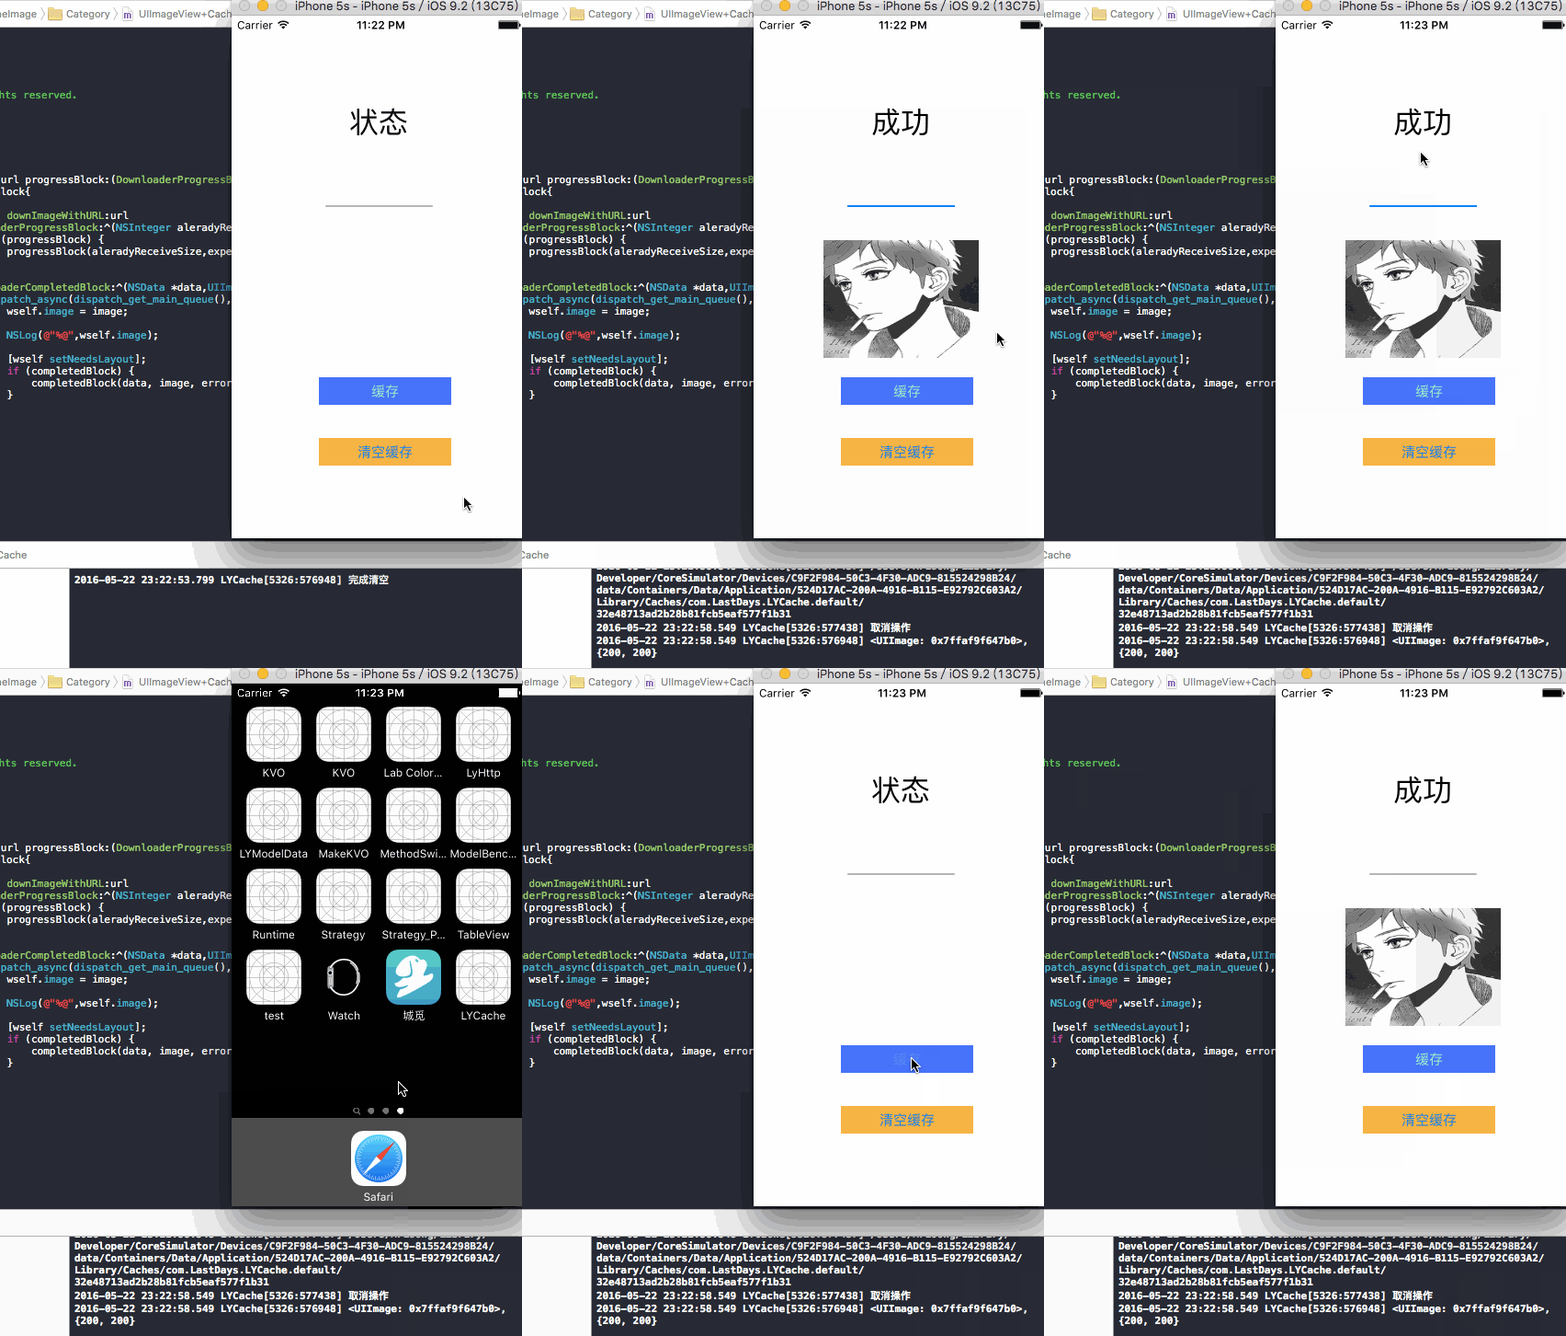
看下效果:

總結
緩存主要注意清空策略
下載主要還是對操作的管理
網絡請求應用的是NSURLSession
還有很多的不足和需要改進的地方。希望大家能幫我指出。
本文作者: 伯樂在線 - Lastdays


