iOS中 項目開發易錯知識點總結 韓俊強的博客
編輯:IOS開發綜合
點擊return取消textView 的響應者
- (BOOL)textFieldShouldReturn:(UITextField *)textField
{
    [_contactTextFiled resignFirstResponder];
    return YES;
}

- (BOOL)textView:(UITextView *)textView shouldChangeTextInRange:(NSRange)range replacementText:(NSString *)text{

    if([text isEqualToString:@"\n"]){

        [textView resignFirstResponder];
        [_contactTextFiled becomeFirstResponder];
        return YES;
    }
    return YES;
}
iOS一行代碼將所有子視圖從父視圖上移除
這裡主要利用了一個makeObjectsPerformSelector:函數。這個函數可以在很多場景下使用從而簡化代碼。
[xxxView.subviews makeObjectsPerformSelector:@selector(removeFromSuperview)];
有效解決刷新單個cell或者section閃一下的問題:
        [UIView setAnimationsEnabled:NO];
        [_listTable beginUpdates];
        [_listTable reloadSections:[NSIndexSet indexSetWithIndex:indexPath.section] withRowAnimation:UITableViewRowAnimationNone];
        [_listTable endUpdates];
        [UIView setAnimationsEnabled:YES];
畫出下列曲線:

    UIView *myCustomView = [[UIView alloc]initWithFrame:CGRectMake(0, 204,kScreenWidth, 120)];
    myCustomView.backgroundColor = [UIColor whiteColor];
    [view addSubview:myCustomView];

    UIBezierPath *bezierPath = [UIBezierPath bezierPath];
    [bezierPath moveToPoint:CGPointMake(0,0)];
    [bezierPath addCurveToPoint:CGPointMake(myCustomView.width, 0) controlPoint1:CGPointMake(0, 0) controlPoint2:CGPointMake(myCustomView.width/2, 40)];
    [bezierPath addLineToPoint:CGPointMake(myCustomView.width, myCustomView.height)];
    [bezierPath addLineToPoint:CGPointMake(0, myCustomView.height)];
    [bezierPath closePath];

    CAShapeLayer *shapLayer = [CAShapeLayer layer];
    shapLayer.path = bezierPath.CGPath;
    myCustomView.layer.mask = shapLayer;
    myCustomView.layer.masksToBounds = YES;
當你使用 UISearchController 在 UITableView 中實現搜索條,在搜索框已經激活並推入新的 VC 的時候會發生搜索框重疊的情況:那就是 definesPresentationContext 這個布爾值!
TabBar的隱藏與消失:
- (void)hidesTabBar:(BOOL)hidden{
    [UIView beginAnimations:nil context:NULL];
    [UIView setAnimationDuration:0];

    for (UIView *view in self.tabBarController.view.subviews){

        if ([view isKindOfClass:[UITabBar class]]) {
            if (hidden) {
                [view setFrame:CGRectMake(view.frame.origin.x, [UIScreen mainScreen].bounds.size.height, view.frame.size.width , view.frame.size.height)];
            }else{
                [view setFrame:CGRectMake(view.frame.origin.x, [UIScreen mainScreen].bounds.size.height - 49, view.frame.size.width, view.frame.size.height)];
            }
        }else{
            if([view isKindOfClass:NSClassFromString(@"UITransitionView")]){
                if (hidden){
                    [view setFrame:CGRectMake(view.frame.origin.x, view.frame.origin.y, view.frame.size.width, [UIScreen mainScreen].bounds.size.height)];
                }else{

                    [view setFrame:CGRectMake(view.frame.origin.x, view.frame.origin.y, view.frame.size.width, [UIScreen mainScreen].bounds.size.height - 49 )];
                }
            }
        }
    }
    [UIView commitAnimations];
}
獲取cell上按鈕所在分區和行數:
    UIView *view = [sender superview]; // 獲取父視圖的view
    GCCollectGroupCellTableViewCell *cell = (GCCollectGroupCellTableViewCell*)[view superview]; // 獲取cell
    NSIndexPath *indexPath = [_listTable indexPathForCell:cell]; // 獲取cell對應的分區
    NSLog(@"%@",detailArr[indexPath.section-1][indexPath.row][@"comname"]);
NSAttributedString 與NSString互轉:
    NSAttributedString * attrStr = [[NSAttributedString alloc] initWithData:[_CompanyFileds.comname dataUsingEncoding:NSUnicodeStringEncoding] options:@{ NSDocumentTypeDocumentAttribute: NSHTMLTextDocumentType } documentAttributes:nil error:nil];
    _CompanyFileds.comname = attrStr.string;
監控UITextField 變化:
// 注冊監聽
    [[NSNotificationCenter defaultCenter]postNotificationName:UITextFieldTextDidChangeNotification object:nil];
    [[NSNotificationCenter defaultCenter]addObserver:self selector:@selector(changeForKeyWord:) name:UITextFieldTextDidChangeNotification object:nil];


// 監聽_pageTextField.text變化
- (void)changeForKeyWord:(NSNotification *)sender
{
    [self checkNum:_pageTextField.text];
}
- (BOOL)checkNum:(NSString *)str
{
    NSString *regex = @"^[0-9]+(.[0-9]{2})?$";
    NSPredicate *pred = [NSPredicate predicateWithFormat:@"SELF MATCHES %@", regex];
    BOOL isMatch = [pred evaluateWithObject:str];
    if (!isMatch && _pageTextField.text.length>0) {
        UIAlertView *alertView = [[UIAlertView alloc]initWithTitle:nil message:@"頁碼只能輸入數字哦" delegate:self cancelButtonTitle:@"重新輸入" otherButtonTitles:nil, nil];
        alertView.delegate = self;
        [alertView show];
        return NO;
    }
    return YES;
}
監聽UITextField的點擊事件
[[NSNotificationCenter defaultCenter]postNotificationName:UITextFieldTextDidBeginEditingNotification object:nil];
        [[NSNotificationCenter defaultCenter]addObserver:self selector:@selector(enterEdited:) name:UITextFieldTextDidBeginEditingNotification object:nil];

- (void)enterEdited:(NSNotification *)sender
{
    事件寫這裡!希望幫到你!
}
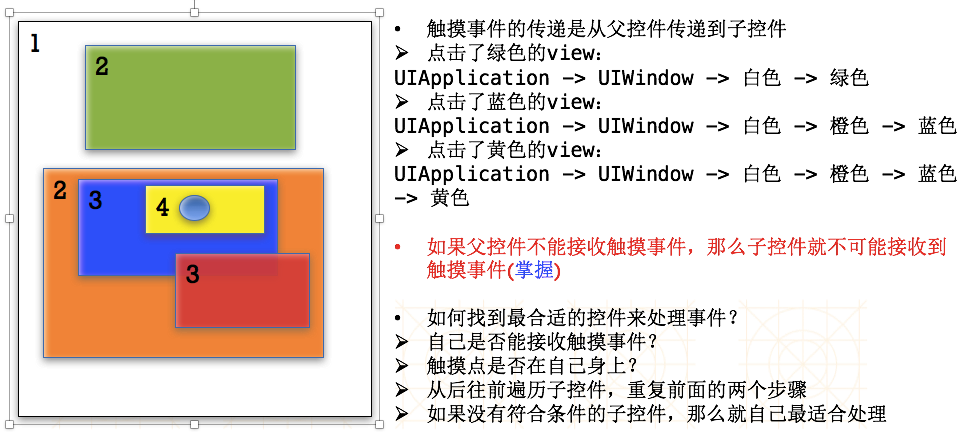
解決添加到父視圖手勢影響子視圖手勢的解決辦法:(手勢沖突)
//方法一:
#pragma mark--UIGestureRecognizerDelegate
-(BOOL)gestureRecognizer:(UIGestureRecognizer *)gestureRecognizer shouldReceiveTouch:(UITouch *)touch
{
    if([touch.view isKindOfClass:[UIButton class]]||[touch.view isKindOfClass:[UITableViewCell class]]||[touch.view isKindOfClass:[UITextField class]]||[touch.view isKindOfClass:[UITextView class]])
    {
        return NO;
    }
    return YES;
}
//方法二:
//UIView的exclusiveTouch屬性
//通過設置[self setExclusiveTouch:YES];可以達到同一界面上多個控件接受事件時的排他性,從而避免一些問題。
UITextField 邊框樣式及內容調整:
//1. 設置的時候在ib裡面記得選擇無邊框的,要不然隨便你設置,都是無效的,也是坑死了。
  _textBoxName.layer.borderWidth=1.0f;
    _textBoxName.layer.borderColor=[UIColorcolorWithRed:0xbf/255.0fgreen:0xbf/255.0fblue:0xbf/255.0falpha:1].CGColor;

   //2.在uitextfield 中文字最左邊距離左側邊框的距離
    _textBoxName.leftView=[[UIViewalloc] initWithFrame:CGRectMake(0,0, 16,51)];
    _textBoxName.leftViewMode=UITextFieldViewModeAlways;
圖片旋轉控制:
#pragma mark ----- 更新按鈕動畫
- (void)rotate360DegreeWithImageViews:(UIImageView *)myViews{
    CABasicAnimation *rotationAnimation = [CABasicAnimation animationWithKeyPath:@"transform.rotation.z"];
    rotationAnimation.toValue = [NSNumber numberWithFloat: M_PI * 2.0 ];
    rotationAnimation.duration = 1.0;
    rotationAnimation.cumulative = YES;rotate360DegreeWithImageViews
    rotationAnimation.repeatCount = 100000;
    [myViews.layer addAnimation:rotationAnimation forKey:@"rotationAnimation"];
}
[myViews.layer removeAllAnimations]; // 停止
改變cell的選中顏色:
cell.selectedBackgroundView = [[UIView alloc] initWithFrame:cell.frame];
cell.selectedBackgroundView.backgroundColor = COLOR_BACKGROUNDVIEW;
不需要任何顏色可以這麼設置:
cell.selectionStyle = UITableViewCellSelectionStyleNone;
取整問題:
Objective-C拓展了C,自然很多用法是和C一致的。比如浮點數轉化成整數,就有以下四種情況。
1.簡單粗暴,直接轉化


float f = 1.5; int a; a = (int)f; NSLog("a = %d",a);
輸出結果是1。(int)是強制類型轉化,丟棄浮點數的小數部分。

2.高斯函數,向下取整


float f = 1.6; int a; a = floor(f); NSLog("a = %d",a);
輸出結果是1。floor()方法是向下取整,類似於數學中的高斯函數 [].取得不大於浮點數的最大整數,對於正數來說是捨棄浮點數部分,對於復數來說,捨棄浮點數部分後再減1.

3.ceil函數,向上取整。


float f = 1.5; int a; a = ceil(f); NSLog("a = %d",a);
輸出結果是2。ceil()方法是向上取整,取得不小於浮點數的最小整數,對於正數來說是捨棄浮點數部分並加1,對於復數來說就是捨棄浮點數部分.

4.通過強制類型轉換四捨五入。

float f = 1.5; int a; a = (int)(f+0.5); NSLog("a = %d",a);
相關文章
+


