iOS Quartz2D實戰系列-手把手教你手勢解鎖
編輯:IOS開發綜合
手勢解鎖
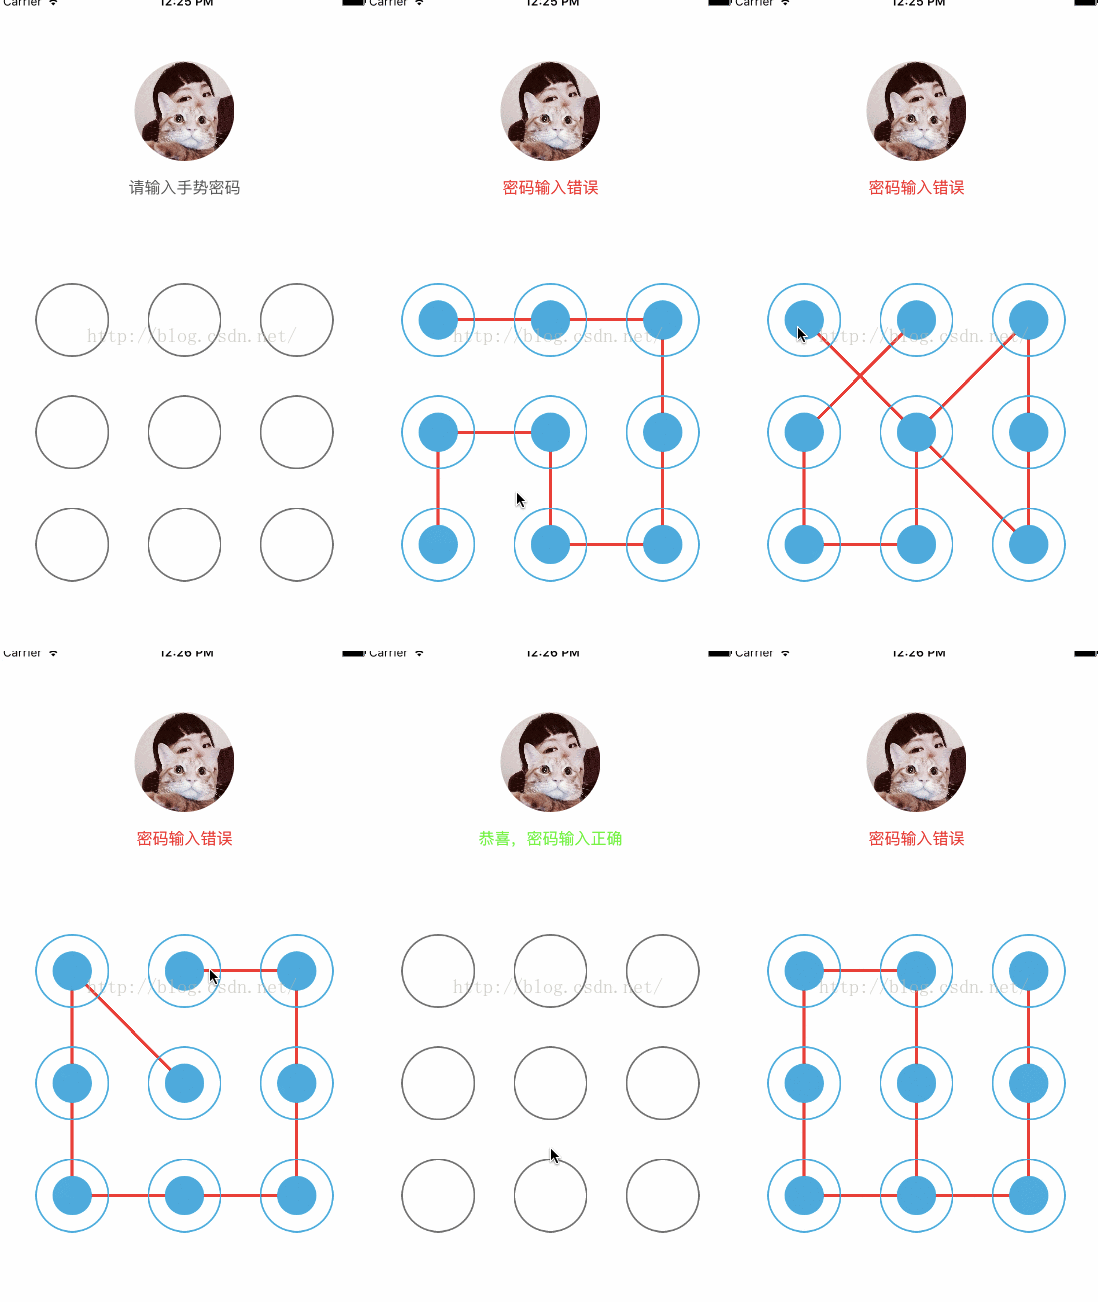
這是我模仿的QQ手勢解鎖部分界面~
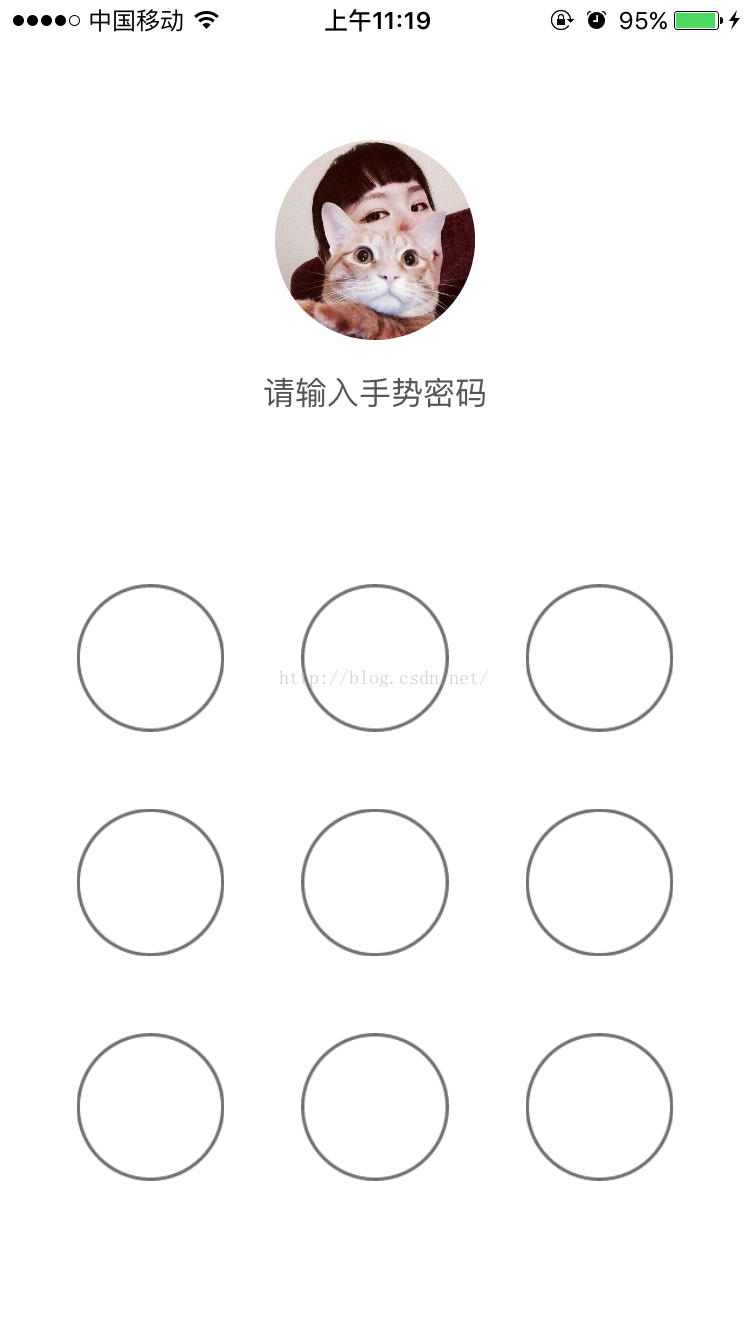
密碼輸入錯誤效果
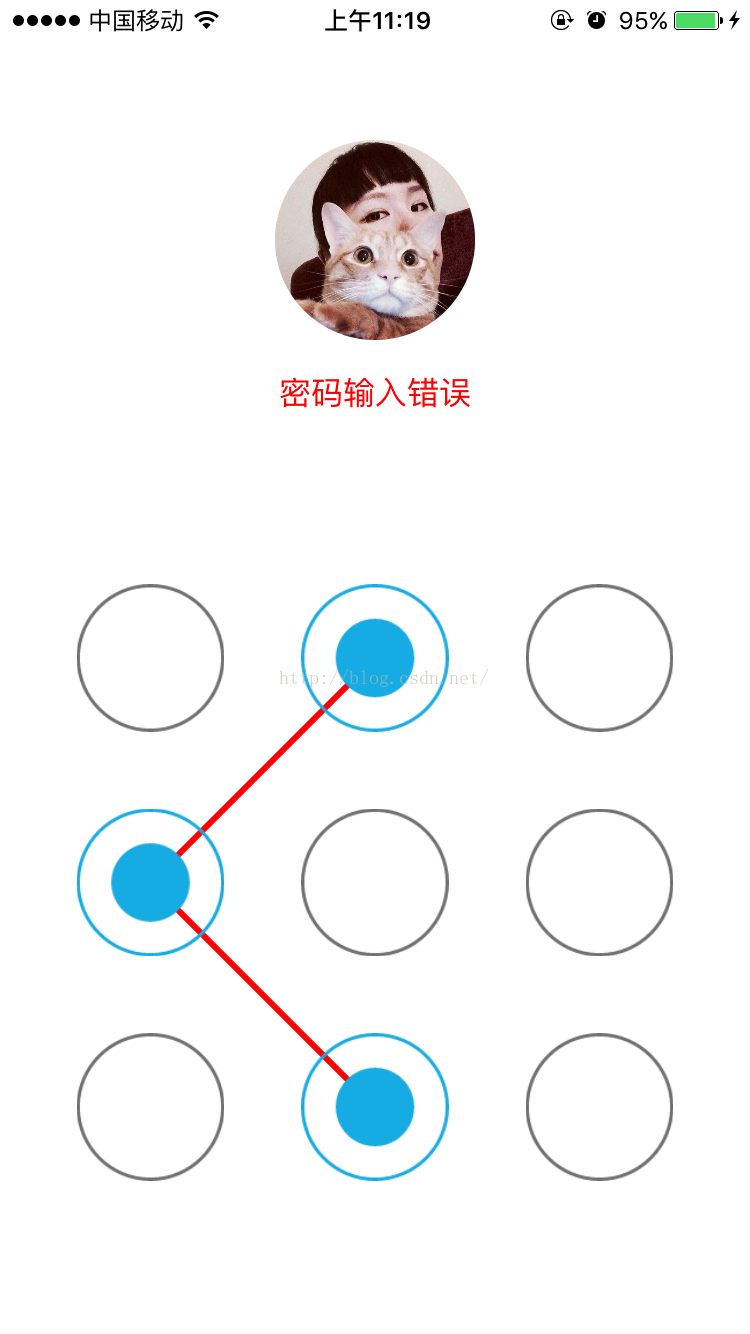
密碼輸入正確效果
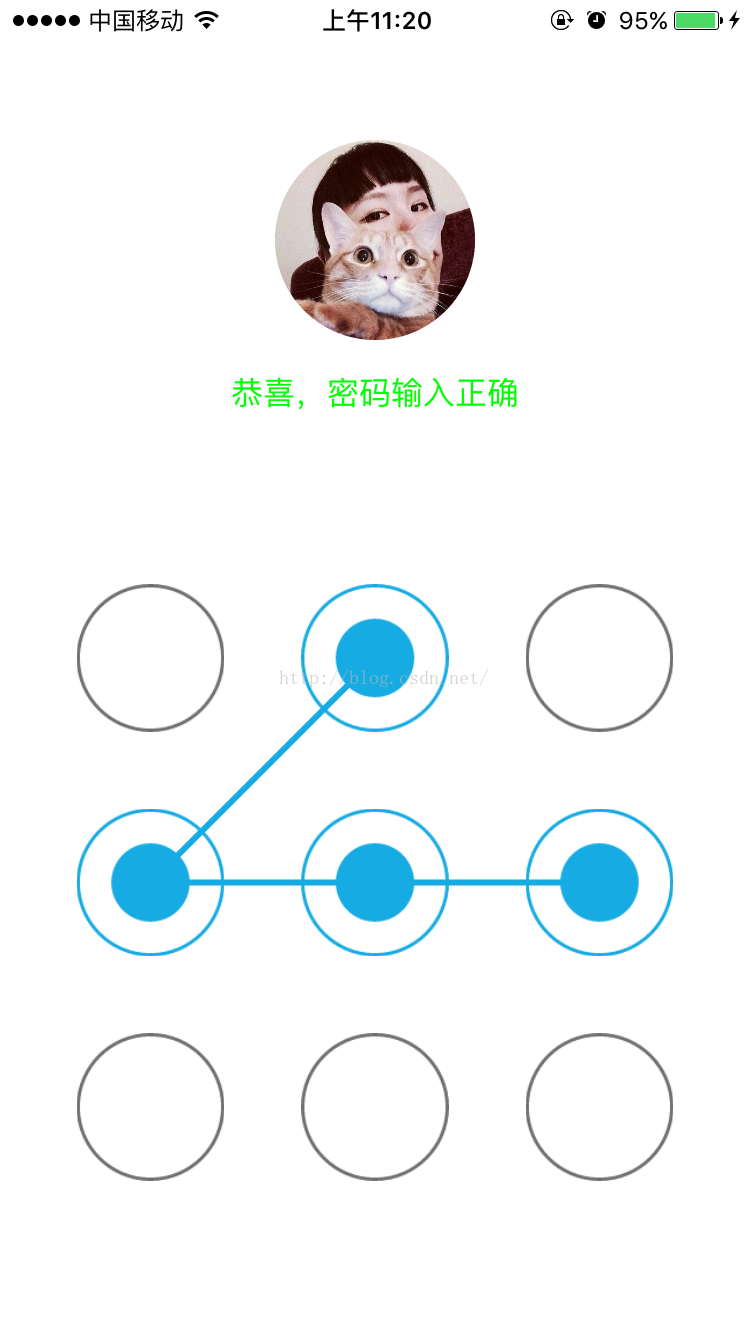
界面粗糙,還請海涵~
接下來開始上代碼了~
我是自定義了一個SpeedDailView繼承於UIView的九宮格界面
解釋都在注釋裡了
SpeedDialView.h
#importSpeedDialView.m@interface SpeedDialView : UIView //用來盛放選中的button @property (nonatomic,retain) NSMutableArray *btns; //輸入的密碼 @property (nonatomic,strong) NSMutableString *code; //正確密碼 @property (nonatomic,strong) NSString *password; //觸摸是否結束 @property (nonatomic,assign) BOOL isEnd; @end
#import "SpeedDialView.h"

@implementation SpeedDialView
- (instancetype)init
{
    self = [super init];
    if (self) {
    }
    return self;
}
//懶加載
- (NSMutableArray *)btns
{
    if (!_btns) {
        self.btns = [[NSMutableArray alloc]init];
    }
    return _btns;
}
//創建9個按鈕
- (void)setUpBasicUI
{
    for (int i = 0; i < 9; i++) {
        UIButton *btn = [UIButton buttonWithType:(UIButtonTypeCustom)];
        btn.tag = i;
        [self addSubview:btn];
    }
}
//設置9個按鈕的位置
- (void)layoutSubviews
{
    [super layoutSubviews];
    //這個方法只運行一次
    static dispatch_once_t onceToken;
    dispatch_once(&onceToken, ^{
        [self setUpBasicUI];

    });
    //經典的9宮格算法
    int totalColume = 3;
    CGFloat bWidth = 74;
    CGFloat bHeight = bWidth;
    CGFloat margin = (self.frame.size.width - bWidth * totalColume)/(totalColume + 1);

    for (int i = 0; i< self.subviews.count; i++) {
        int currentRow = i/totalColume;
        int currentColumn = i%totalColume;
        CGFloat originX = margin + (currentColumn * (margin + bWidth));
        CGFloat originY = currentRow * (margin + bHeight);
        //設置Button的外觀和大小
        UIButton *btn = self.subviews[i];
        [btn setImage:[UIImage imageNamed:@"xv"] forState:(UIControlStateNormal)];
        [btn setImage:[UIImage imageNamed:@"shi"] forState:(UIControlStateSelected)];
        btn.contentMode = UIViewContentModeCenter;
        btn.userInteractionEnabled = false;
        btn.frame = CGRectMake(originX, originY, bWidth, bHeight);

    }


}
//獲取當前的觸摸點的坐標
- (CGPoint)pointWithTouches:(NSSet *)touches
{
    UITouch *touch = [touches anyObject];
    CGPoint point = [touch locationInView:touch.view];
    return point;
}
//判斷當前點在不在Button中
- (UIButton *)buttonWithPoint:(CGPoint)point
{
    for (int i = 0; i < self.subviews.count; i++) {
        UIButton *btn = self.subviews[i];
        CGFloat wh = btn.frame.size.width - 5;
        //找到Button中心附近25*25的面積
        CGFloat frameX = btn.center.x - wh * 0.5;
        CGFloat frameY = btn.center.y - wh * 0.5;
        //判斷這個點在button中心附近25*25的面積內的話就是它了
        if (CGRectContainsPoint(CGRectMake(frameX, frameY, wh, wh), point)) {
            return btn;
        }
    }
    return nil;
}
//設置Button被選中的狀態
- (void)touchesBegan:(NSSet *)touches withEvent:(UIEvent *)event
{
    //當觸摸開始的時候將之前的痕跡抹掉 重新開始
    self.code = [[NSMutableString alloc]init];
    self.isEnd = NO;
    for (int i = 0; i < self.btns.count; i ++) {
        UIButton *btn = self.btns[i];
        btn.selected = NO;
    }
    [self.btns removeAllObjects];
    //找到touch到的點的位置(此處只有一個點 就是開始的那個點)
    CGPoint point = [self pointWithTouches:touches];
    //判斷這個點所在的Button
    UIButton *btn = [self buttonWithPoint:point];
    if (btn != nil && btn.selected == false) {
        btn.selected = YES;
        //把button加到數組中
        [self.btns addObject:btn];
        //並記錄走過的路線 用Button的tag拼接出的字符串
        [self.code appendString:[NSString stringWithFormat:@"%ld",(long)btn.tag]];
    }
    [self setNeedsDisplay];
}
- (void)touchesMoved:(NSSet *)touches withEvent:(UIEvent *)event
{
    //找到touch到的點的位置
    CGPoint point = [self pointWithTouches:touches];
    //判斷這個點所在的Button
    UIButton *btn = [self buttonWithPoint:point];
    if (btn != nil && btn.selected == false) {
        btn.selected = YES;
        //把button加到數組中
        [self.btns addObject:btn];
        //並記錄走過的路線 用Button的tag拼接出的字符串
        [self.code appendString:[NSString stringWithFormat:@"%ld",(long)btn.tag]];
    }
    [self setNeedsDisplay];
}

//使用touchend清空數據
- (void)touchesEnded:(NSSet *)touches withEvent:(UIEvent *)event
{
    //繪制選中的按鈕少於3個的時候沒有軌跡記錄
    if (self.btns.count < 3) {
        for (int i = 0; i < self.btns.count; i ++) {
            UIButton *btn = self.btns[i];
            btn.selected = NO;
        }
        [self.btns removeAllObjects];
    }
    else
    {
        //標志 結束
        self.isEnd = YES;
    }
    [self setNeedsDisplay];
}
//優化 先判空
-(void)drawRect:(CGRect)rect
{
    //如果沒有選擇的button 則不繪圖
    if (self.btns.count == 0) {
        return;
    }
    //使用貝塞爾曲線繪制路線
    UIBezierPath * path = [UIBezierPath bezierPath];
    for (int i = 0; i < self.btns.count; i ++) {
        UIButton *btn = self.btns[i];
        if (i == 0) {
            [path moveToPoint:btn.center];
        }
        else
        {
            [path addLineToPoint:btn.center];
        }
    }
    //設置線的顏色
    [[UIColor colorWithRed:23/255.0 green:171/255.0 blue:227/255.0 alpha:1] set];
    //設置線的寬度
    [path setLineWidth:3];
    //設置連接風格
    [path setLineJoinStyle:(kCGLineJoinRound)];
    //判斷是否結束 在touchEnd方法中更改isEnd的值
    if (_isEnd == YES) {
        if (![self.code isEqualToString:self.password]) {
            //修改Path的顏色
            [[UIColor redColor]set];
            //發送通知 提醒ViewController更改Label上的文字
            [[NSNotificationCenter defaultCenter] postNotificationName:@"changeLabel" object:nil];
        }
        else
        {
            //發送通知 提醒ViewController更改Label上的文字
            [[NSNotificationCenter defaultCenter]postNotificationName:@"changeLabel2" object:nil];
        }
    }
    //渲染
    [path stroke];

}
@end
使用方法
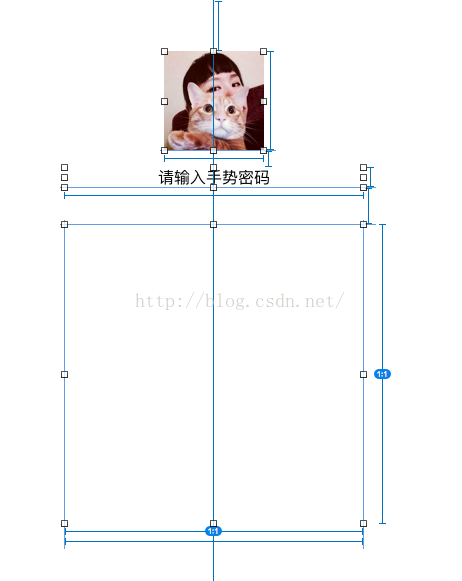
在ViewController的Xib裡設計了界面,其中最下面正方形是關聯SpeedDialView的View。
ViewController.m
@interface ViewController ()
@property (weak, nonatomic) IBOutlet UILabel *label;
@property (weak, nonatomic) IBOutlet SpeedDialView *speedDialView;

@end

@implementation ViewController
- (void)viewWillAppear:(BOOL)animated
{
    self.label.text = @"請輸入手勢密碼";
    self.label.textColor = [UIColor darkGrayColor];
}
- (void)viewDidLoad {
    [super viewDidLoad];
    [[NSNotificationCenter defaultCenter]addObserver:self selector:@selector(changeLabel) name:@"changeLabel" object:nil];
     [[NSNotificationCenter defaultCenter]addObserver:self selector:@selector(changeLabel2) name:@"changeLabel2" object:nil];

    self.speedDialView.password = @"1345";


}
- (void)changeLabel
{
    self.label.text = @"密碼輸入錯誤";
    self.label.textColor = [UIColor redColor];
}
- (void)changeLabel2
{
    self.label.text = @"恭喜,密碼輸入正確";
    self.label.textColor = [UIColor greenColor];
}
- (void)didReceiveMemoryWarning {
    [super didReceiveMemoryWarning];
    // Dispose of any resources that can be recreated.
}

@end
最後,就是成果展示了~
大功告成~
我對明天沒有期待,因為我對今天滿意~
UIButton圖片提供


最後,提供Demo地址點擊打開鏈接
相關文章
+
