iOS UITableViewCell的滑動出現多個按鈕
編輯:IOS開發綜合
前言: 本篇博客其實就是想介紹tableviewcell滑動的一些”事”, 昨天在逛github的時候看到的還挺有意思的三方庫, , 簡單用了一下感覺不錯, 一作為記錄, 二是希望有類似需求的可以得到幫助.
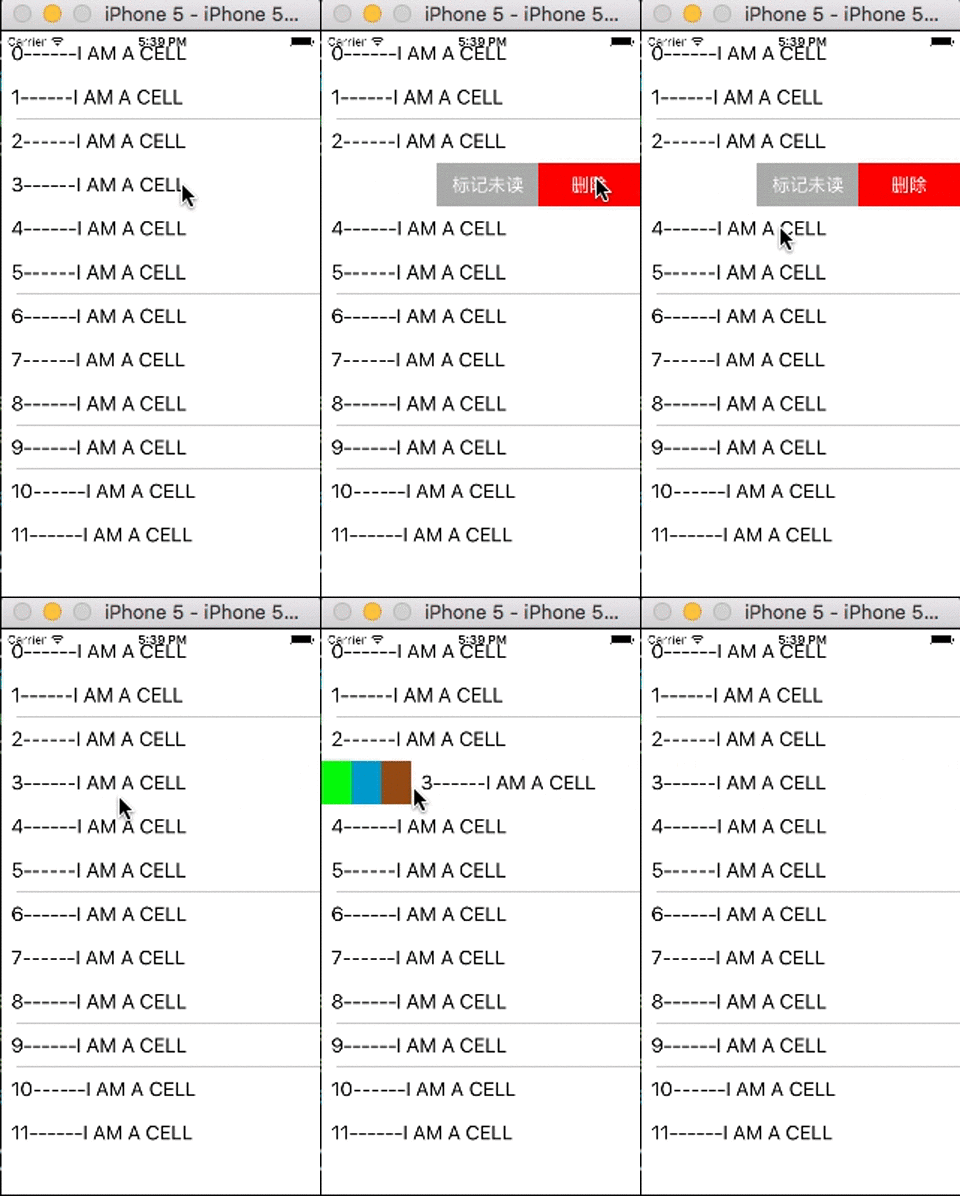
本篇介紹了 iOS5之後(使用三方庫) iOS8之後(系統方法)分別的實現方式
iOS > = 5.0
iOS> = 8.0
MGSwipeTableCell(Github上的三方庫)- iOS >= 5.0
直接使用比較簡單 通過代碼看一下
首先簽這個協議MGSwipeTableCellDelegate
添加左邊按鈕方法
- (NSArray *)btnLeftCount:(int)count
{
    NSMutableArray *result = [NSMutableArray array];
    UIColor *colors[3] = {[UIColor greenColor],
        [UIColor colorWithRed:0 green:0x99/255.0 blue:0xcc/255.0 alpha:1.0],
        [UIColor colorWithRed:0.59 green:0.29 blue:0.08 alpha:1.0]};;
    for (int i = 0; i < count; i ++) {
        // 按鈕提供了幾個方法, 可以點進去看一看
        MGSwipeButton *btn = [MGSwipeButton buttonWithTitle:@"" backgroundColor:colors[i] padding:15 callback:^BOOL(MGSwipeTableCell *sender) {
            return YES;
        }];
        // 把按鈕加到數組中
        [result addObject:btn];
    }
    return result;
}
添加右邊按鈕的方法
- (NSArray *)btnRightCount:(int)count
{
    NSMutableArray *result = [NSMutableArray array];
    NSArray *titleArray = @[@"刪除", @"標記未讀"];
    UIColor *color[2] = {[UIColor redColor], [UIColor lightGrayColor]};
    for (int i = 0; i < count; i ++) {
        MGSwipeButton *btn = [MGSwipeButton buttonWithTitle:titleArray[i] backgroundColor:color[i] padding:15 callback:^BOOL(MGSwipeTableCell *sender) {
            BOOL autoHide = i != 0;
            return autoHide;
        }];
        // 把按鈕加到數組中
        [result addObject:btn];
    }
    return result;
}
重用池可以這樣寫
- (UITableViewCell *)tableView:(UITableView *)tableView cellForRowAtIndexPath:(NSIndexPath *)indexPath
{
    static NSString *cellID = @"cellId";
    // 這裡如果MGSwipeTableCell是足夠你使用的, 你可以直接使用
    // 或者自定義創建cell繼承於MGSwipeTableCell, 像我下面代碼這樣
    XTCustomCell *cell = [tableView dequeueReusableCellWithIdentifier:cellID];
    if (!cell) {
        cell = [[XTCustomCell alloc] initWithStyle:UITableViewCellStyleSubtitle reuseIdentifier:cellID];
    }
    cell.label.text = [NSString stringWithFormat:@"%ld------%@", (long)indexPath.row, self.arrayTest[indexPath.row]];
    cell.label.font = [UIFont systemFontOfSize:20];
    // 指定代理人
    cell.delegate = self;
    // NO: 只有單個可以滑動 , YES: 多個可以滑動
    cell.allowsMultipleSwipe = NO;
    return cell;
}
添加按鈕
-(NSArray*) swipeTableCell:(MGSwipeTableCell*) cell swipeButtonsForDirection:(MGSwipeDirection)direction
             swipeSettings:(MGSwipeSettings*) swipeSettings expansionSettings:(MGSwipeExpansionSettings*) expansionSettings;
{
    if (direction == MGSwipeDirectionRightToLeft) {

        return [self btnRightCount:2];
    }
    else {
        return [self btnLeftCount:3];

    }
}
按鈕的點擊代理方法
-(BOOL) swipeTableCell:(MGSwipeTableCell*) cell tappedButtonAtIndex:(NSInteger) index direction:(MGSwipeDirection)direction fromExpansion:(BOOL) fromExpansion
{

    switch (direction) {
        case MGSwipeDirectionLeftToRight: {
            if (index == 0) {
                NSLog(@"right ------- 0");
            }else{
                NSLog(@"right ------- 1");
            }
            break;
        }
        case MGSwipeDirectionRightToLeft: {
            if (index == 0) {
                NSLog(@"left ------- 0");
                // 這裡簡單的做了個刪除操作
                NSIndexPath * path = [_tableView indexPathForCell:cell];
                [_arrayTest removeObjectAtIndex:path.row];
                [_tableView deleteRowsAtIndexPaths:@[path] withRowAnimation:UITableViewRowAnimationLeft];
                return NO;
            }else{
                NSLog(@"left ------- 1");
            }
            break;
        }
    }
    return YES;
}
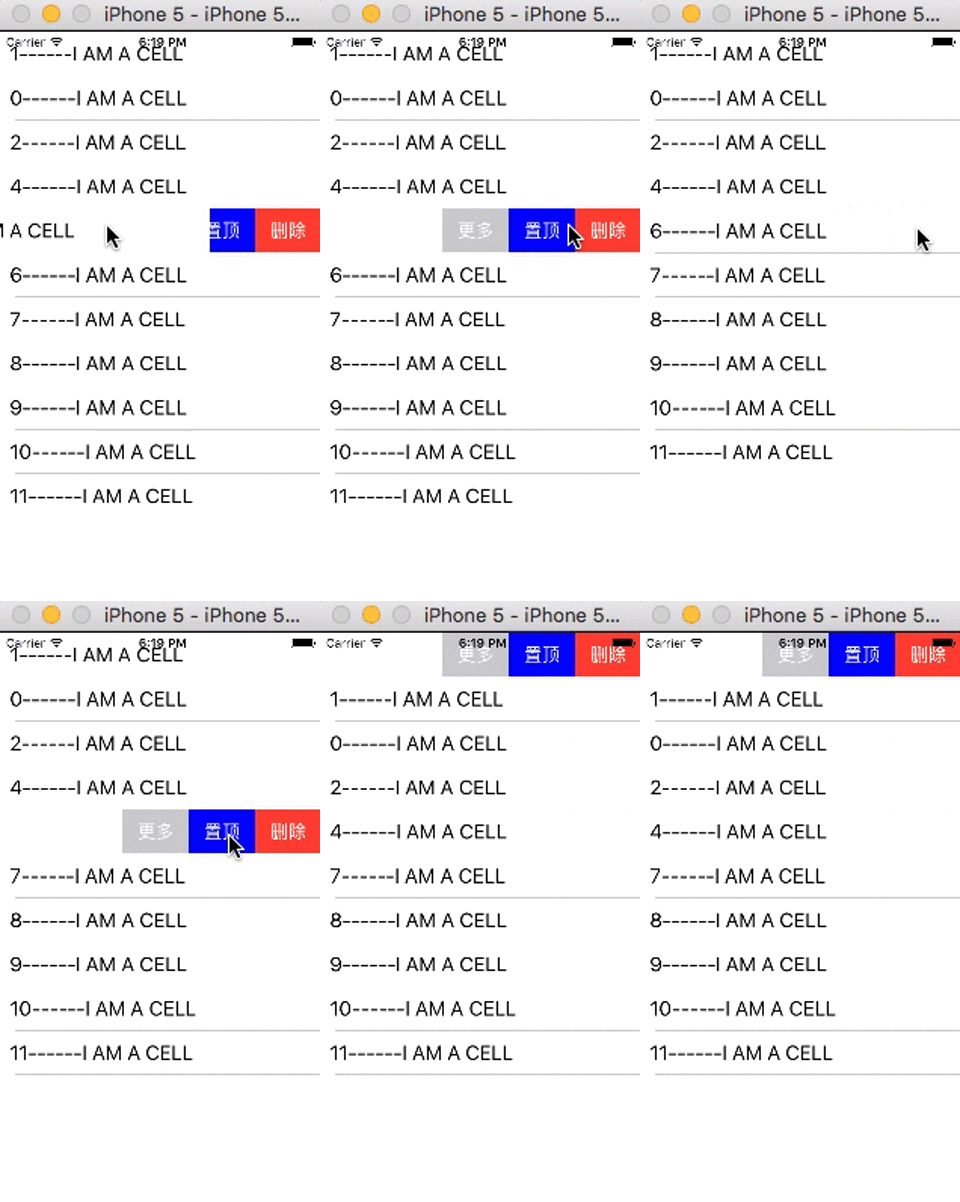
iOS8 之後也提供了類似的實現
- (NSArray *)tableView:(UITableView *)tableView editActionsForRowAtIndexPath:(NSIndexPath *)indexPath
{
    UITableViewRowAction *deleteRowAction = [UITableViewRowAction rowActionWithStyle:UITableViewRowActionStyleDestructive title:@"刪除" handler:^(UITableViewRowAction * _Nonnull action, NSIndexPath * _Nonnull indexPath) {
        [self.arrayTest removeObjectAtIndex:indexPath.row];
        [self.tableView deleteRowsAtIndexPaths:@[indexPath] withRowAnimation:UITableViewRowAnimationAutomatic];
    }];

    UITableViewRowAction *topRowAction = [UITableViewRowAction rowActionWithStyle:UITableViewRowActionStyleDefault title:@"置頂" handler:^(UITableViewRowAction * _Nonnull action, NSIndexPath * _Nonnull indexPath) {
        [self.arrayTest exchangeObjectAtIndex:indexPath.row withObjectAtIndex:0];
        NSIndexPath *firstIndexPath = [NSIndexPath indexPathForRow:0 inSection:indexPath.section];
        [tableView moveRowAtIndexPath:indexPath toIndexPath:firstIndexPath];
    }];
    topRowAction.backgroundColor = [UIColor blueColor];

    UITableViewRowAction *moreRowAction = [UITableViewRowAction rowActionWithStyle:UITableViewRowActionStyleNormal title:@"更多" handler:^(UITableViewRowAction * _Nonnull action, NSIndexPath * _Nonnull indexPath) {
        [self.tableView reloadRowsAtIndexPaths:@[indexPath] withRowAnimation:UITableViewRowAnimationMiddle];
    }];
    return @[deleteRowAction,topRowAction,moreRowAction];
}
相關文章
+

