UICollectionView
UICollectionView 和 UICollectionViewController 類是iOS6 新引進的API,用於展示集合視圖,布局更加靈活,可實現多列布局,用法類似於UITableView 和 UITableViewController 類。
使用UICollectionView 必須實現UICollectionViewDataSource,UICollectionViewDelegate,UICollectionViewDelegateFlowLayout這三個協議。
下面先給出常用到的一些方法。(只給出常用的,其他的可以查看相關API)
#pragmamark--UICollectionViewDataSource //定義展示的UICollectionViewCell的個數- -(NSInteger)collectionView:(UICollectionView*)collectionViewnumberOfItemsInSection:(NSInteger)section
- {
- return30;
- }
- -(NSInteger)numberOfSectionsInCollectionView:(UICollectionView*)collectionView
- {
- return1;
- }
- -(UICollectionViewCell*)collectionView:(UICollectionView*)collectionViewcellForItemAtIndexPath:(NSIndexPath*)indexPath
- {
- staticNSString*CellIdentifier=@"GradientCell";
- UICollectionViewCell*cell=[collectionViewdequeueReusableCellWithReuseIdentifier:CellIdentifierforIndexPath:indexPath];
- cell.backgroundColor=[UIColorcolorWithRed:((10*indexPath.row)/255.0)green:((20*indexPath.row)/255.0)blue:((30*indexPath.row)/255.0)alpha:1.0f];
- returncell;
- }
- //定義每個UICollectionView的大小
- -(CGSize)collectionView:(UICollectionView*)collectionViewlayout:(UICollectionViewLayout*)collectionViewLayoutsizeForItemAtIndexPath:(NSIndexPath*)indexPath
- {
- returnCGSizeMake(96,100);
- }
- -(UIEdgeInsets)collectionView:(UICollectionView*)collectionViewlayout:(UICollectionViewLayout*)collectionViewLayoutinsetForSectionAtIndex:(NSInteger)section
- {
- returnUIEdgeInsetsMake(5,5,5,5);
- }
- //UICollectionView被選中時調用的方法
- -(void)collectionView:(UICollectionView*)collectionViewdidSelectItemAtIndexPath:(NSIndexPath*)indexPath
- {
- UICollectionViewCell*cell=(UICollectionViewCell*)[collectionViewcellForItemAtIndexPath:indexPath];
- cell.backgroundColor=[UIColorwhiteColor];
- }
- -(BOOL)collectionView:(UICollectionView*)collectionViewshouldSelectItemAtIndexPath:(NSIndexPath*)indexPath
- {
- returnYES;
- }
下面通過一個例子具體介紹下。(例子來自網絡。但是是通過第三方獲得的,無法取得鏈接。還望見諒。)
iOS CollectionView的出現是一大福利,再也不用用TableView來定義復雜的多欄表格了,用法與Table類似,只是Cell必須自己添加,無默認模式
由於CollectionView沒有默認的Cell布局,所以一般還是自定義方便又快捷
一、自定義Cell
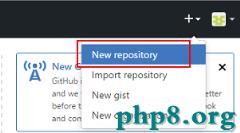
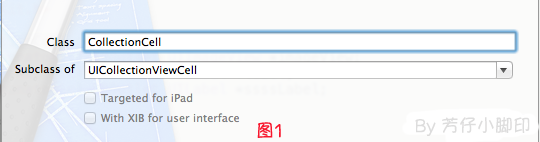
1、新建類CollectionCell繼承自UICollectionViewCell
2、新建Xib,命名為CollectionCell.xib

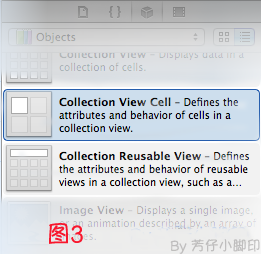
a.選中CollectionCell.xib刪掉默認的View,從控件中拖一個Collection View Cell(圖3)到畫布中,設置大小為95*116;
b.選中剛剛添加的Cell,更改類名為CollectionCell,如圖4

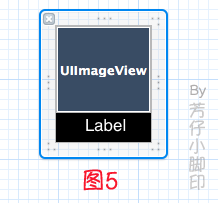
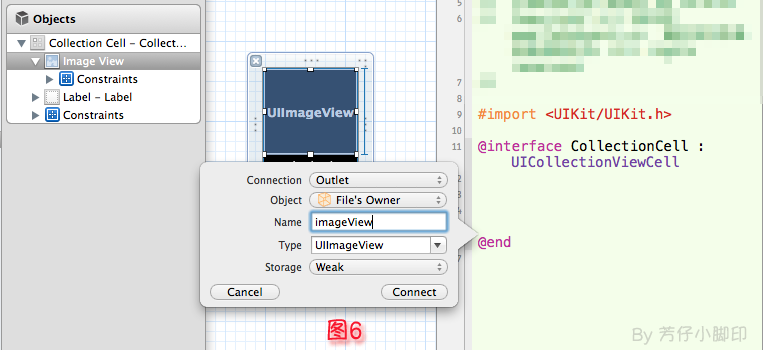
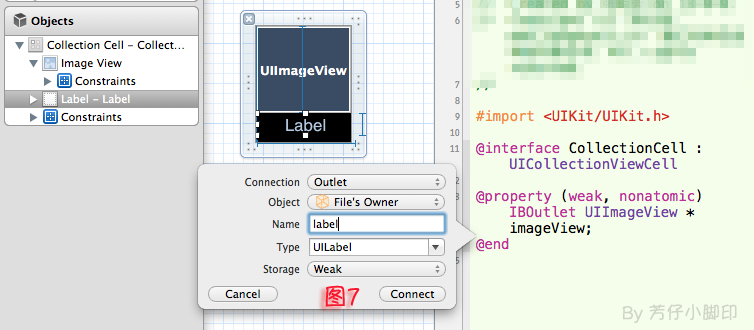
c.在CollectionCell.xib的CollectionCell中添加一個ImageView和一個Label(圖5)
d.創建映射, 圖6,圖7
e.選中CollectionCell.m , 重寫init方法
- -(id)initWithFrame:(CGRect)frame
- {
- self=[superinitWithFrame:frame];
- if(self)
- {
- //初始化時加載collectionCell.xib文件
- NSArray*arrayOfViews=[[NSBundlemainBundle]loadNibNamed:@"CollectionCell"owner:selfoptions:nil];
- //如果路徑不存在,returnnil
- if(arrayOfViews.count<1)
- {
- returnnil;
- }
- //如果xib中view不屬於UICollectionViewCell類,returnnil
- if(![[arrayOfViewsobjectAtIndex:0]isKindOfClass:[UICollectionViewCellclass]])
- {
- returnnil;
- }
- //加載nib
- self=[arrayOfViewsobjectAtIndex:0];
- }
- returnself;
- }
f.選中CollectionCell.xib 修改其identifier為CollectionCell。
二、定義UICollectionView;
1、拖動一個Collection View到指定ViewController的View上
2、連線dataSource和delegate,並創建映射,命名為CollectionView
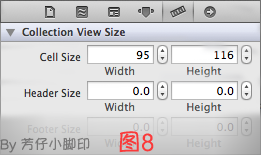
3、選中CollectionView的標尺,將Cell Size的Width和Height改成與自定義的Cell一樣的95*116,圖8
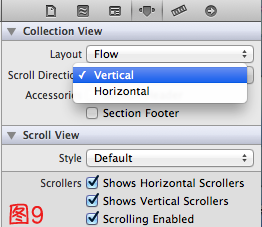
4、選中CollectionView的屬性,可以修改其屬性,比如是垂直滑動,還是水平滑動,選擇Vertical或Horizontal
5、選中CollectionViewCell,修改Class,繼承自CollectionCell
5、在ViewDidLoad方法中聲明Cell的類,在ViewDidLoad方法中添加,此句不聲明,將無法加載,程序崩潰
其中,CollectionCell是這個Cell的標識(之前幾步已經定義過了。 )
- [self.collectionViewregisterClass:[CollectionCellclass]forCellWithReuseIdentifier:@"CollectionCell"];
6、在ViewController.h中聲明代理
7、在.m文件中實現代理方法
- //每個section的item個數
- -(NSInteger)collectionView:(UICollectionView*)collectionViewnumberOfItemsInSection:(NSInteger)section
- {
- return12;
- }
- -(UICollectionViewCell*)collectionView:(UICollectionView*)collectionViewcellForItemAtIndexPath:(NSIndexPath*)indexPath
- {
- CollectionCell*cell=(CollectionCell*)[collectionViewdequeueReusableCellWithReuseIdentifier:@"CollectionCell"forIndexPath:indexPath];
- //圖片名稱
- NSString*imageToLoad=[NSStringstringWithFormat:@"%d.png",indexPath.row];
- //加載圖片
- cell.imageView.image=[UIImageimageNamed:imageToLoad];
- //設置label文字
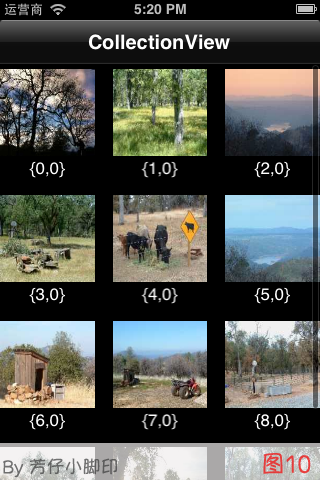
- cell.label.text=[NSStringstringWithFormat:@"{%ld,%ld}",(long)indexPath.row,(long)indexPath.section];
- returncell;
- }
8 。效果如圖10
點擊某項後跳轉事件與UITableView類似,實現代理方法
- -(void)collectionView:(UICollectionView*)collectionViewdidSelectItemAtIndexPath:(NSIndexPath*)indexPath
即可,不贅述

- iOS9與XCode7中不克不及應用http銜接的疾速處理方法
- iOS開源一個簡略的訂餐app UI框架
- xcode8 封閉掌握台不打印不信息的處理辦法(圖文詳解)
- 史上最具體的CocoaPods裝置教程(圖文)
- IOS Xcode中快捷鍵年夜全
- iOS中處理Xcode 8掌握台亂碼的方法
- IOS開辟之適配iOS10及Xcode8的留意點
- xcode8提交ipa掉敗沒法構建版本成績的處理計劃
- XCode 加速編譯鏈接速度的辦法
- 2016 cocoapods的裝置和應用辦法和版本進級碰到的成績
- 在uiview 的tableView中點擊cell進入跳轉到另外一個界面的完成辦法
- IOS 陀螺儀開辟(CoreMotion框架)實例詳解
- iOS開辟之UIScrollView控件詳解
- 進修iOS自界說導航掌握器UINavigationController
- Xcode 8打印log日記的成績小結及處理辦法