【ios學習記錄】-如何定制UITableView的圓角單元格
編輯:IOS開發綜合
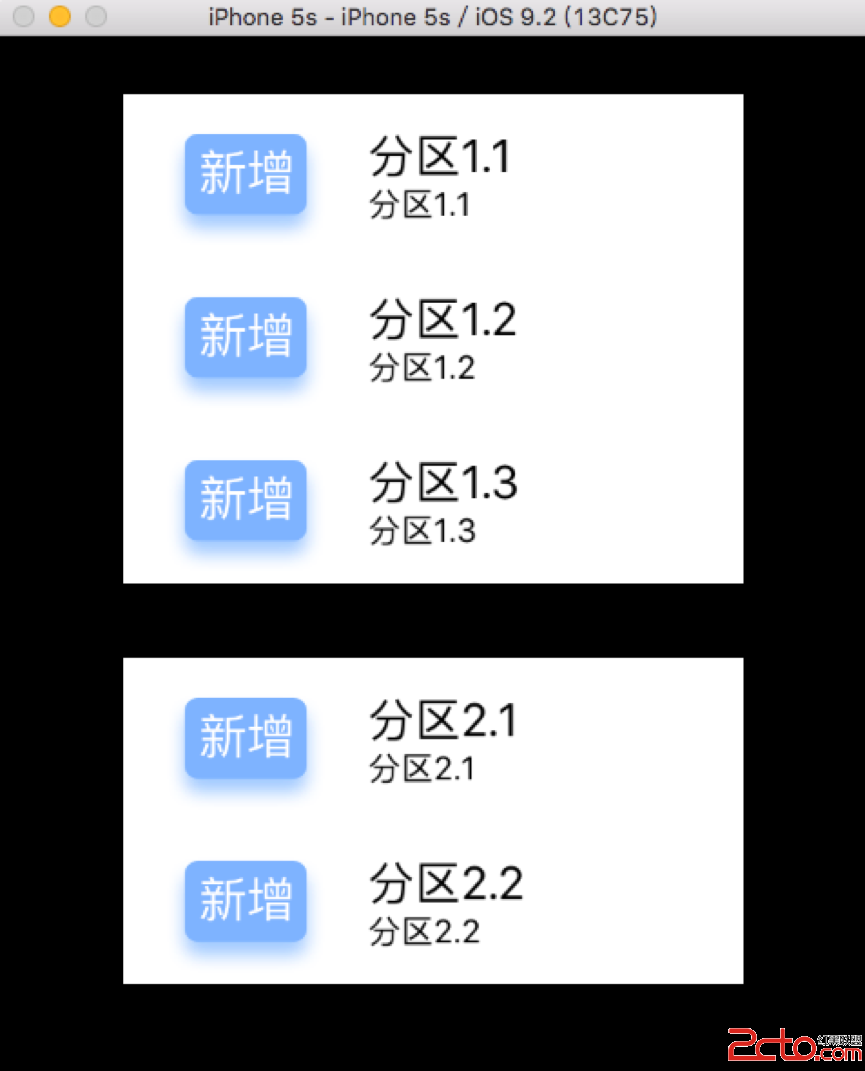
自從ios7更新以來,UITableView控件的邊角style由默認圓角變成了直角,更加適應UI扁平化設計的效果了。但對於某種情況來說,如果tableview寬度不是拉伸到與父視圖等寬,那麼使用直角的tableview則會顯得不好看。如下圖分組列表(group tableview)所示。
 vcfQp7n7tcS7sKOs1PK74c/Uyr7UssjzzsK6zaOs08O7p7vhvvW1w7rDv7SjrMzl0em63LrDoaPI58/CzbzL+cq+oaM8L3A+DQo8cD48aW1nIGFsdD0="圓角矩形單元格" src="/uploadfile/Collfiles/20160401/20160401094625478.png" title="\" />
要實現以上分組列表(group tableview)的圓角效果,主要是通過Core Graphics API來實現圖層重繪。於是根據在網上找到的資料和個人搜集的信息,在這裡主要通過實現UITableViewDelegate協議中的willDisplayCell函數進行自定義cell的操作。
主要思路:
cell背景色設為透明-》新建圖層-》圓角矩形圖層繪制-》把該圖層作為自子圖層賦給UIView-》UIView賦給cell的backgroundView。所謂千言萬語,不如一句代碼,現貼出核心代碼並給出最詳細的注釋。
/**
 * 將要為每行row繪制cell,可自定義cell顯示方法
 */
- (void)tableView:(UITableView *)tableView willDisplayCell:(UITableViewCell *)cell forRowAtIndexPath:(NSIndexPath *)indexPath
{
    if ([cell respondsToSelector:@selector(tintColor)]) {
        if (tableView == self.mainTableView) {
            // 圓角弧度半徑
            CGFloat cornerRadius = 5.f;
            // 設置cell的背景色為透明,如果不設置這個的話,則原來的背景色不會被覆蓋
            cell.backgroundColor = UIColor.clearColor;

            // 創建一個shapeLayer
            CAShapeLayer *layer = [[CAShapeLayer alloc] init];
            // 創建一個可變的圖像Path句柄,該路徑用於保存繪圖信息
            CGMutablePathRef pathRef = CGPathCreateMutable();
            // 獲取cell的size
            CGRect bounds = CGRectInset(cell.bounds, 0, 0);

            // CGRectGetMinY:返回對象頂點坐標
            // CGRectGetMaxY:返回對象底點坐標
            // CGRectGetMinX:返回對象左邊緣坐標
            // CGRectGetMaxX:返回對象右邊緣坐標

            // 這裡要判斷分組列表中的第一行,每組section的最後一行,每組section的中間行
            BOOL addLine = NO;
            // CGPathAddRoundedRect(pathRef, nil, bounds, cornerRadius, cornerRadius);
            if (indexPath.row == 0) {
                // 初始起點為cell的左下角坐標
                CGPathMoveToPoint(pathRef, nil, CGRectGetMinX(bounds), CGRectGetMaxY(bounds));
                // 起始坐標為左下角,設為p1,(CGRectGetMinX(bounds), CGRectGetMinY(bounds))為左上角的點,設為p1(x1,y1),(CGRectGetMidX(bounds), CGRectGetMinY(bounds))為頂部中點的點,設為p2(x2,y2)。然後連接p1和p2為一條直線l1,連接初始點p到p1成一條直線l,則在兩條直線相交處繪制弧度為r的圓角,並把左邊直線和圓角路徑添加到path中。
                CGPathAddArcToPoint(pathRef, nil, CGRectGetMinX(bounds), CGRectGetMinY(bounds), CGRectGetMidX(bounds), CGRectGetMinY(bounds), cornerRadius);
                // 繪制右上角的圓角,包含頂端直線和右上角圓角並寫入path中
                CGPathAddArcToPoint(pathRef, nil, CGRectGetMaxX(bounds), CGRectGetMinY(bounds), CGRectGetMaxX(bounds), CGRectGetMidY(bounds), cornerRadius);
                // 右邊直線路徑寫入到path中,構成了一個左上角和右上角為圓角的矩形
                CGPathAddLineToPoint(pathRef, nil, CGRectGetMaxX(bounds), CGRectGetMaxY(bounds));
                addLine = YES;
            } else if (indexPath.row == [tableView numberOfRowsInSection:indexPath.section]-1) {
                // 初始起點為cell的左上角坐標
                CGPathMoveToPoint(pathRef, nil, CGRectGetMinX(bounds), CGRectGetMinY(bounds));
                // 左邊直線和左下角圓角路徑添加到path
                CGPathAddArcToPoint(pathRef, nil, CGRectGetMinX(bounds), CGRectGetMaxY(bounds), CGRectGetMidX(bounds), CGRectGetMaxY(bounds), cornerRadius);
               // 底邊直線和右下角圓角路徑添加到path
                CGPathAddArcToPoint(pathRef, nil, CGRectGetMaxX(bounds), CGRectGetMaxY(bounds), CGRectGetMaxX(bounds), CGRectGetMidY(bounds), cornerRadius);
              // 右邊直線添加到path,此時路徑構成一個左下角和右下角為圓角的矩形
                CGPathAddLineToPoint(pathRef, nil, CGRectGetMaxX(bounds), CGRectGetMinY(bounds));
            } else {
                // 中間行,直接添加rectangle信息到path中(不包括圓角)
                CGPathAddRect(pathRef, nil, bounds);
                addLine = YES;
            }
            // 把已經繪制好的可變圖像路徑賦值給圖層
            layer.path = pathRef;
            // 注意:但凡通過Quartz2D中帶有creat/copy/retain方法創建出來的值都必須要釋放
            CFRelease(pathRef);
            // 按照shape layer的path填充顏色,類似於渲染render
            layer.fillColor = [UIColor colorWithWhite:1.f alpha:0.8f].CGColor;

            // 添加分隔線圖層
            if (addLine == YES) {
                CALayer *lineLayer = [[CALayer alloc] init];
                CGFloat lineHeight = (1.f / [UIScreen mainScreen].scale);
                lineLayer.frame = CGRectMake(CGRectGetMinX(bounds), bounds.size.height-lineHeight, bounds.size.width, lineHeight);
                // 分隔線顏色取自於原來tableview的分隔線顏色
                lineLayer.backgroundColor = tableView.separatorColor.CGColor;
                // 添加子圖層
                [layer addSublayer:lineLayer];
            }

            // view大小與cell一致
            UIView *roundView = [[UIView alloc] initWithFrame:bounds];
            // 添加自定義圓角後的子圖層到roundView中
            [roundView.layer insertSublayer:layer atIndex:0];
            roundView.backgroundColor = UIColor.clearColor;
            //cell的背景view
            //cell.selectedBackgroundView = roundView;
            cell.backgroundView = roundView;

        }
    }
}
函數分析:
CGPathAddArcToPoint(p1, nil, x1, y1, x2, y2, r);
//把起點和終點繪制的圓角路徑添加到graphics path中,包含直線和圓角。
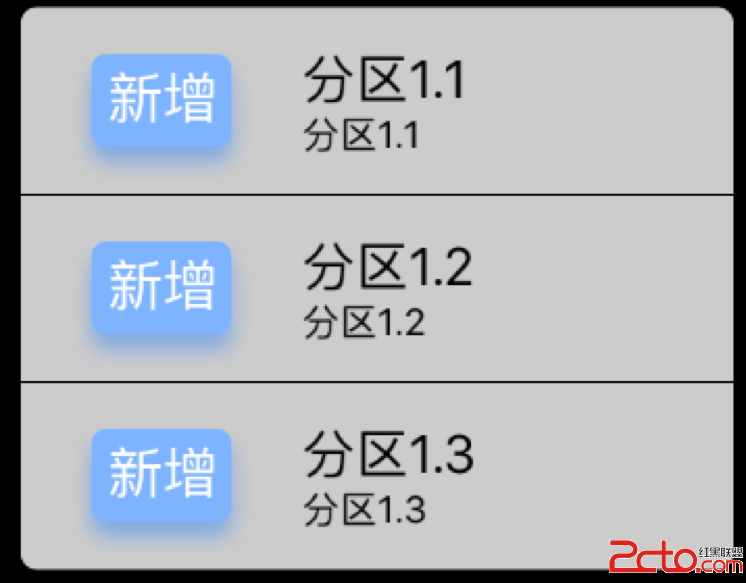
紅色邊部分的路徑會被寫入到path中。
繪制path流程:
// 只舉例列表第一行
// 初始起點為cell的左下角坐標
CGPathMoveToPoint(pathRef, nil, CGRectGetMinX(bounds), CGRectGetMaxY(bounds));
// 起始坐標為左下角,設為p1,(CGRectGetMinX(bounds), CGRectGetMinY(bounds))為左上角的點,設為p1(x1,y1),(CGRectGetMidX(bounds), CGRectGetMinY(bounds))為頂部中點的點,設為p2(x2,y2)。然後連接p1和p2為一條直線l1,連接初始點p到p1成一條直線l,則在兩條直線相交處繪制弧度為r的圓角。
CGPathAddArcToPoint(pathRef, nil, CGRectGetMinX(bounds), CGRectGetMinY(bounds), CGRectGetMidX(bounds), CGRectGetMinY(bounds), cornerRadius);
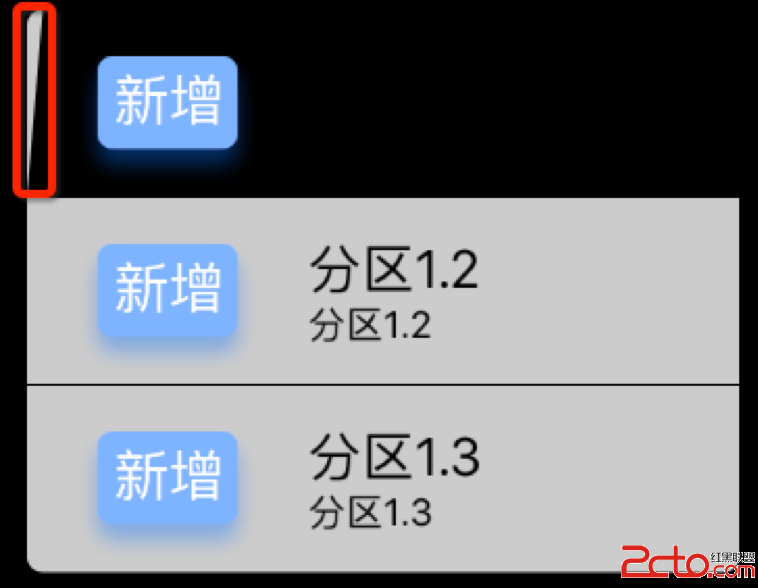
// 繪制右上角的圓角,包含頂端直線和右上角圓角路徑並寫入path中
CGPathAddArcToPoint(pathRef, nil, CGRectGetMaxX(bounds), CGRectGetMinY(bounds), CGRectGetMaxX(bounds), CGRectGetMidY(bounds), cornerRadius);
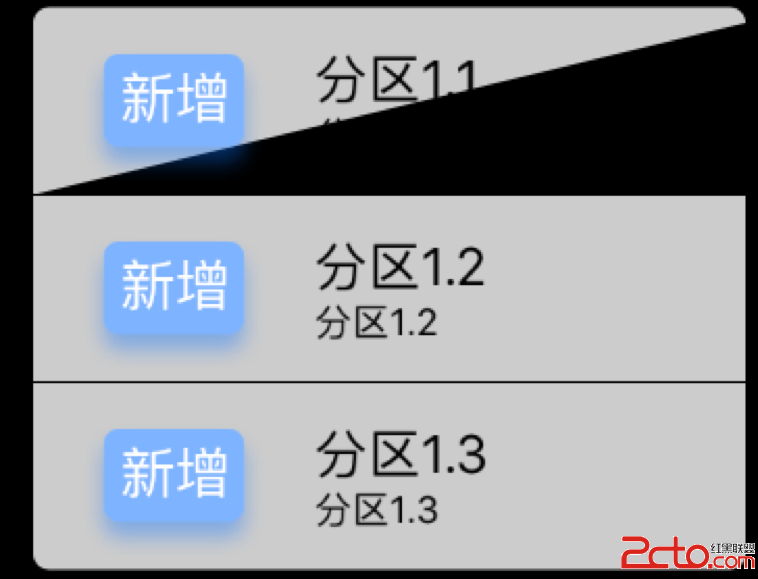
// 右邊直線路徑寫入到path中,構成了一個左上角和右上角為圓角的矩形,然後調用layer.fillColor = [UIColor colorWithWhite:1.f alpha:0.8f].CGColor;,按照layer的path繪圖路徑進行顏色填充,相當於渲染的功能
CGPathAddLineToPoint(pathRef, nil, CGRectGetMaxX(bounds), CGRectGetMaxY(bounds));

簡單的圓角cell實現OK!整體代碼可在這下載:CornerRadiusTableView
相關文章
+
