iOS-target-action設計模式了解
編輯:IOS開發綜合
iOS-target-action設計模式了解
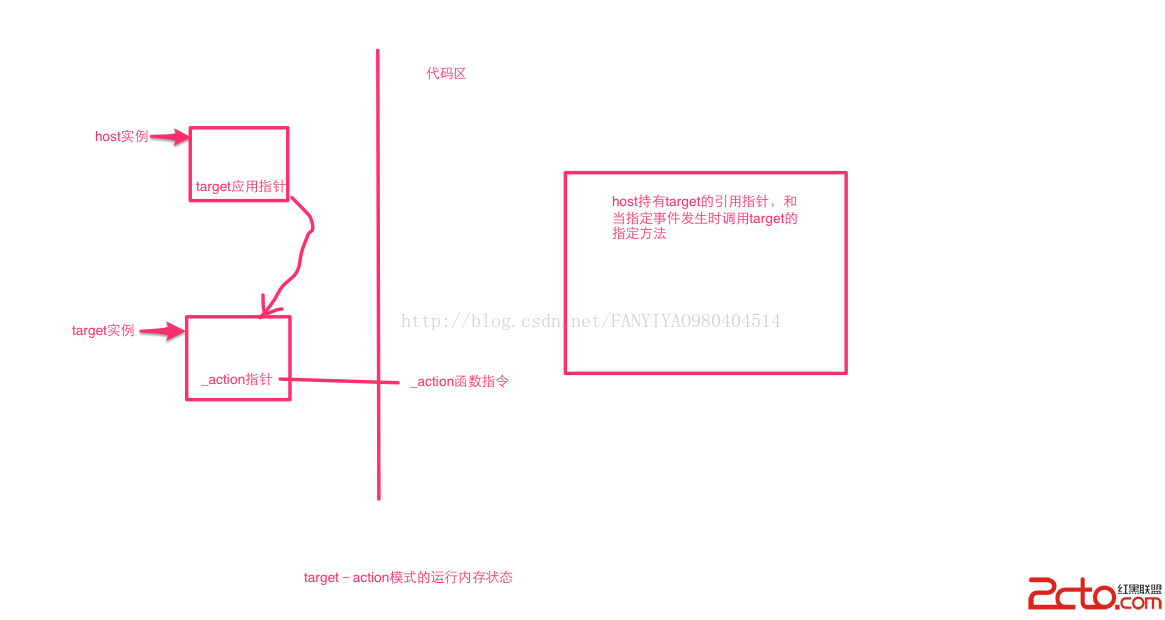
target-action的設計模式的本質就是在host中產生的事件調用target的action方法。
下面我們通過一個UIView來實現UIButton的點擊事件。
@interface CustomButton : UIView
-(void)addCustomButton:(id)target andSelector:(SEL)action;
@end

@implementation CustomButton{
    id _target;
    SEL _action;
}

-(void)addCustomButton:(id)target andSelector:(SEL)action{
    if (target==_target) {
        return;
    }

    _target = target;
    _action = action;
}

-(void)touchesBegan:(NSSet *)touches withEvent:(UIEvent *)event{}

-(void)touchesEnded:(NSSet *)touches withEvent:(UIEvent *)event{
    if (_target) {
        if ([_target respondsToSelector:_action]) {
            [_target performSelector:_action withObject:self];
        }
    }
}
使用
- (void)viewDidLoad {
    [super viewDidLoad];www.2cto.com
    // Do any additional setup after loading the view, typically from a nib.

    CustomButton *btn = [[CustomButton alloc]initWithFrame:CGRectMake(0, 100, 200, 200)];
    btn.backgroundColor = [UIColor redColor];
    [btn addCustomButton:self andSelector:@selector(hello:)];
    [self.view addSubview:btn];

}

-(void)hello:(id)sender{
    NSLog(@"hello customer ");
}
運行結果
2015-03-29 17:09:03.803 Target_action[1863:89334] hello customer
運行內存狀態:
- 上一頁:讀書筆記——IOS之Web開發
- 下一頁:iOS-二進制協議的封裝
相關文章
+
