iOS_UIScrollView實現無限滾動,思路與代碼
編輯:IOS開發綜合
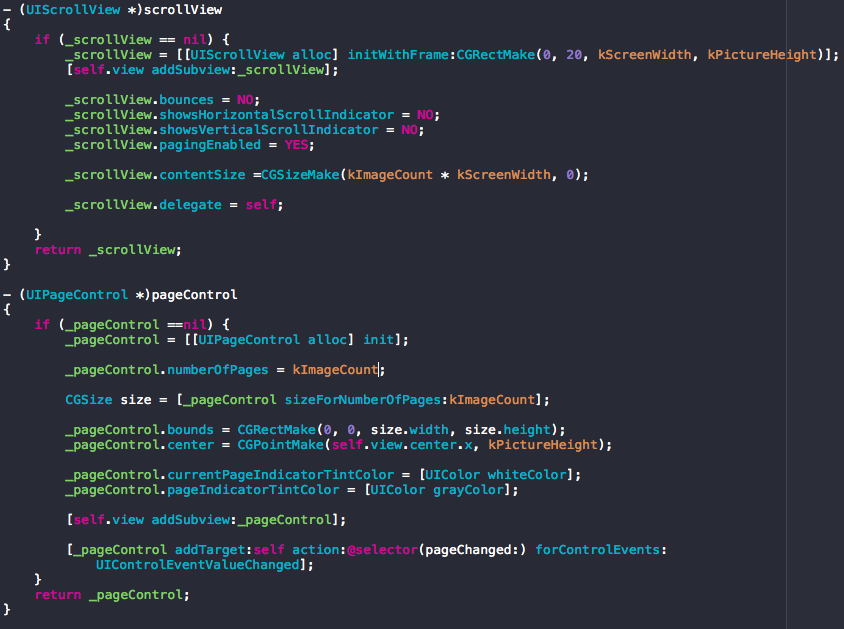
UIScrollView實現無限滾動的三種思路。
當然只是我的一些用法,當然還有非常多的實現方式,如果大家有好的實現思路也可以告訴我,相互學習嘛~
UIScrollView無限滾動
第一種方式:
原理:利用結束的位置來重新設置ScrollView ContentOffset的值,讓人產生視覺上的無限循環,優點:代碼易懂,缺點,會創建多余的內存。
第二種方式:
原理:利用中間的兩個變量來當前的View及緩沖的View,只創建兩個View,將當前的View放在中間。判斷滑動的位置,優先去緩沖的View找,然後結束滑動在更新當前View的image
第三種方式(這裡就不講解了):
原理:利用CollectionView來實現,代碼也非常簡單。一次性給數據源傳入 images.count * 1000,然後默認加載的時候,跳轉到 (images.count * 1000)/2.0 + ((images.count * 1000)/2.0) % images.count的位置就實現了
github代碼地址:https://github.com/MakeZL/UIScrollViewLoopDemo點擊打開鏈接
好了。我們先看第一種實現比較簡單的
/**
 *
 第一種方式:
    利用結束的位置來重新設置ScrollView ContentOffset的值,讓人產生視覺上的無限循環
    優點:代碼易懂
    缺點,會創建多余的內存。
 */
- (void)realizeScrollLoop1{

    UIScrollView *scrollView = [[UIScrollView alloc] init];
    scrollView.showsHorizontalScrollIndicator = NO;
    scrollView.showsVerticalScrollIndicator = NO;
    scrollView.pagingEnabled = YES;
    scrollView.frame = self.view.bounds ;
    scrollView.delegate = self;
    [self.view addSubview:scrollView];
    self.scrollView = scrollView;
    [scrollView setContentSize:CGSizeMake(([self.slideImages count] + 2) * scrollView.frame.size.width, 0)];

    CGSize scrollViewSize = scrollView.frame.size;

    // 遍歷創建子控件
    [self.slideImages enumerateObjectsUsingBlock:^(NSString *imageName, NSUInteger idx, BOOL *stop) {
        UIImageView *imageView = [[UIImageView alloc] init];
        imageView.image = [UIImage imageNamed:imageName];
        imageView.frame = CGRectMake((idx+1) * scrollViewSize.width, 0, scrollViewSize.width, scrollViewSize.height);
        [scrollView addSubview:imageView];
    }];

    // 將最後一張圖片弄到第一張的位置
    UIImageView *imageView = [[UIImageView alloc] init];
    imageView.image = [UIImage imageNamed:
                       self.slideImages[[self.slideImages count] - 1]];
    imageView.frame = CGRectMake(0, 0, scrollViewSize.width, scrollViewSize.height);
    [scrollView addSubview:imageView];

    // 將第一張圖片放到最後位置,造成視覺上的循環
    UIImageView *lastImageView = [[UIImageView alloc] init];
    lastImageView.image = [UIImage imageNamed:
                           self.slideImages[0]];
    lastImageView.frame = CGRectMake(scrollViewSize.width * ([self.slideImages count] + 1), 0, scrollViewSize.width, scrollViewSize.height);
    [scrollView addSubview:lastImageView];

    [scrollView setContentOffset:CGPointMake(scrollViewSize.width, 0)];
}
- (void)scrollViewDidEndDecelerating:(UIScrollView *)scrollView{
    NSInteger page = scrollView.contentOffset.x / scrollView.frame.size.width;
    // 如果當前頁是第0頁就跳轉到數組中最後一個地方進行跳轉
    if (page == 0) {
        [scrollView setContentOffset:CGPointMake(scrollView.frame.size.width * ([[self slideImages] count]), 0)];
    }else if (page == [[self slideImages] count] + 1){
        // 如果是第最後一頁就跳轉到數組第一個元素的地點
        [scrollView setContentOffset:CGPointMake(scrollView.frame.size.width, 0)];
    }
}
是不是很簡單。下面我們來看第二種
第二種方式,帶緩存:
/**
 *
    第二種方式:
        利用中間的兩個變量來當前的View及緩沖的View,最多創建三個View,將當前的View放在中間。判斷滑動的位置,優先去緩沖的View找
        優點:對內存消耗少,缺點:代碼相比要復雜一絲絲
 */
- (void) realizeScrollLoop2{

    status = ScrollViewLoopStatusResuing;

    UIScrollView *scrollView = [[UIScrollView alloc] init];
    scrollView.pagingEnabled = YES;
    scrollView.frame = self.view.bounds ;
    scrollView.delegate = self;
    [self.view addSubview:scrollView];
    self.scrollView = scrollView;

    CGSize scrollViewSize = scrollView.frame.size;
    scrollView.contentSize = CGSizeMake(3 * scrollViewSize.width, 0);
    scrollView.contentOffset = CGPointMake(scrollViewSize.width, 0);

    UIImageView *currentView = [[UIImageView alloc] init];
    currentView.tag = 0;
    currentView.frame = CGRectMake(scrollViewSize.width, 0, scrollViewSize.width, scrollViewSize.height);
    currentView.image = [UIImage imageNamed:@"00.jpg"];
    [scrollView addSubview:currentView];
    self.currentView = currentView;

    [self resuingView];
    self.index = 0;

}
實現UIScrollViewDelegate
- (void)scrollViewDidScroll:(UIScrollView *)scrollView{
    if (status == ScrollViewLoopStatusResuing) {
        if (scrollView.contentOffset.x > _currentView.frame.origin.x) {

            NSInteger val = self.index + 1;
            if (self.index >= [self.slideImages count] - 1) {
                val = 0;
            }

            // 取緩沖區的View
            self.resuingView.image = [UIImage imageNamed:[NSString stringWithFormat:@"0%zd.jpg",val]];
            self.resuingView.x = CGRectGetMinX(_currentView.frame) + _currentView.width;
            self.isLastScrollDirection = YES;
        }else{
            NSInteger val = self.index - 1;
            if (val < 0) {
                val = [self.slideImages count]-1;
            }
            self.resuingView.image = [UIImage imageNamed:[NSString stringWithFormat:@"0%zd.jpg",val]];
            self.resuingView.x = 0;
            self.isLastScrollDirection = NO;
        }
    }
}
- (void)scrollViewDidEndDecelerating:(UIScrollView *)scrollView{

    // 是否是往右邊滑動
    if (self.isLastScrollDirection) {
        self.index++;
    }else{
        self.index--;
    }

    // 補全
    if (self.index < 0) {
        self.index = [self.slideImages count]-1;
    } else if(self.index > [self.slideImages count]-1){
        self.index = 0;
    }

    _currentView.image = [UIImage imageNamed:[NSString stringWithFormat:@"0%zd.jpg",self.index]];

}
這樣就能實現無限循環了
- 上一頁:iOS圓盤轉動引導圖的簡單實現
- 下一頁:ios之代碼創建控件和排版
相關文章
+


