iOS中模態Model視圖跳轉和Push視圖跳轉的需求實現方法
編輯:IOS開發綜合
本文給大家分享下模態Model視圖跳轉和Push視圖跳轉的需求實現。
開前自打小廣告:一鍵合成APP引導頁,包含不同狀態下的引導頁操作方式,同時支持動態圖片引導頁和靜態圖片引導頁以及視頻引導頁;GitHub地址: https://github.com/dingding3w/DHGuidePageHUD (多多Star,多多支持😊);
(一)連續兩次模態Model視圖之後,然後返回首頁(A -> B -> C -> A)
①效果圖展示:
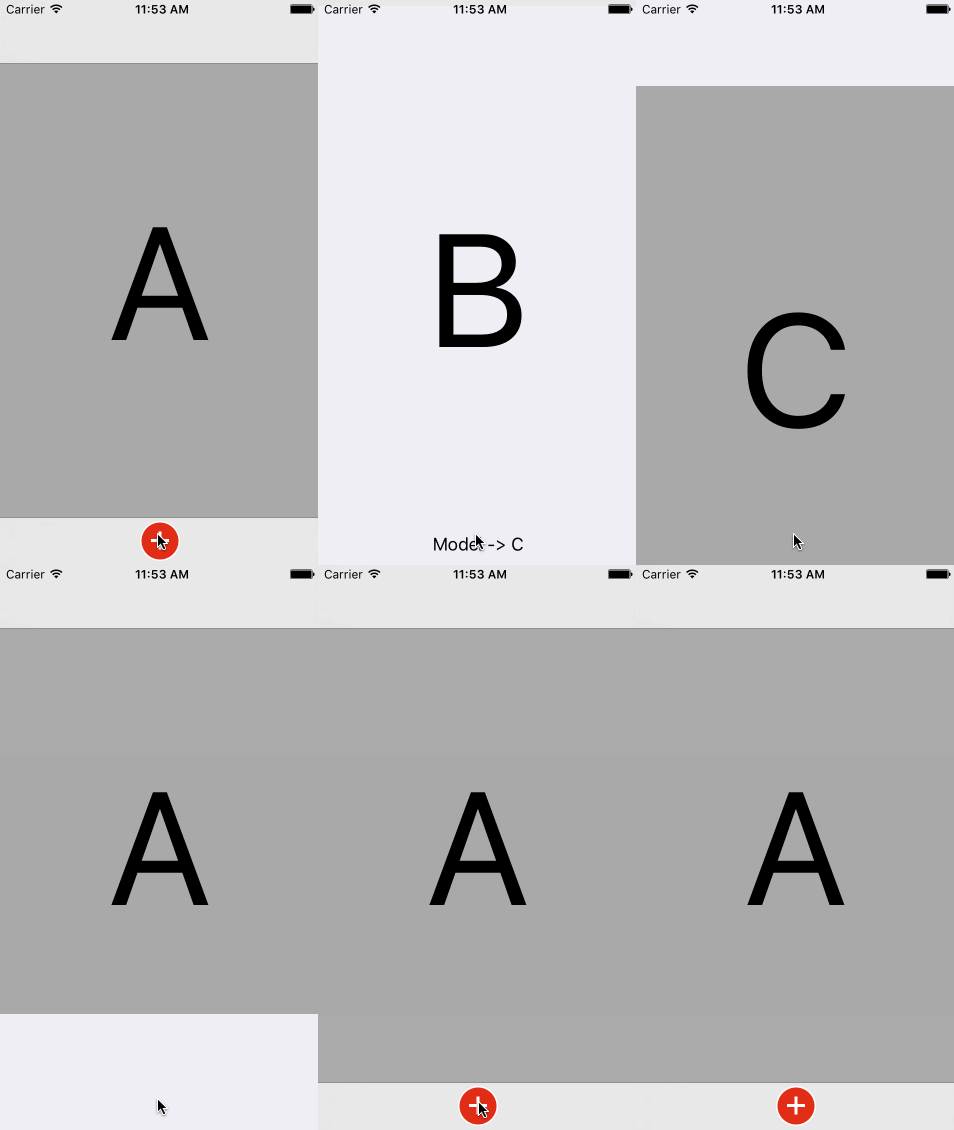
②核心代碼展示:
/** 在C頁面的DisMiss方法裡面添加一下代碼(iOS6.0+) */
  if ([self respondsToSelector:@selector(presentingViewController)]){
    [self.presentingViewController.presentingViewController dismissViewControllerAnimated:YES completion:nil];
  }
  else {
    [self.parentViewController.parentViewController dismissViewControllerAnimated:YES completion:nil];
  }
(二)在模態Model推出的視圖中Push下一個帶導航欄的視圖,然後返回首頁(A -> B ->C -> A)
①效果圖展示:
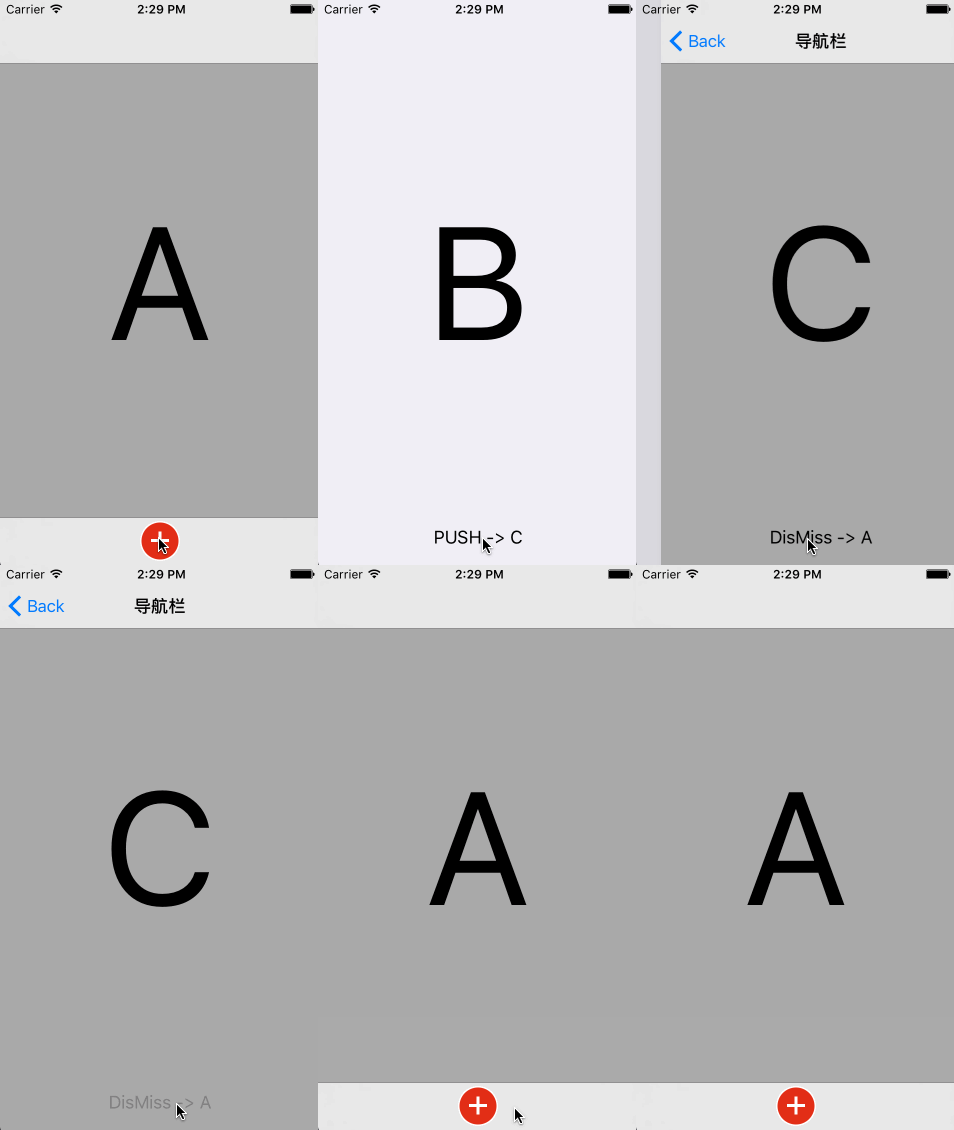
②核心代碼展示:
/** 這裡用到的核心處理辦法是 */
/** 1.在A控制器模態Model推出B控制器的時候先給B控制器包裝一個導航控制器 */
UINavigationController *ANavigationController = [[UINavigationController alloc] initWithRootViewController:[[BViewController alloc] init]];
[self presentViewController:ANavigationController animated:YES completion:nil];
/** 2.在B控制器遵守UINavigationControllerDelegate實現代理協議,隱藏當前控制器的導航欄 */
#pragma mark - UINavigationControllerDelegate
- (void)navigationController:(UINavigationController *)navigationController willShowViewController:(UIViewController *)viewController animated:(BOOL)animated {
  // 判斷要顯示的控制器是否是自身控制器
  BOOL isShowMyController = [viewController isKindOfClass:[self class]];
  [self.navigationController setNavigationBarHidden:isShowMyController animated:YES];
}
#pragma mark - Push出C控制器
[self.navigationController pushViewController:[[CViewController alloc] init] animated:YES];
/** 3.在C控制器裡面可直接在返回按鈕方法裡DisMiss */
[self.navigationController dismissViewControllerAnimated:YES completion:nil];
以上所述是小編給大家介紹的iOS中模態Model視圖跳轉和Push視圖跳轉的需求實現方法,希望對大家有所幫助,如果大家有任何疑問請給我留言,小編會及時回復大家的。在此也非常感謝大家對本站網站的支持!
- 源碼推薦(8.27):自定義寬高比的相冊框,view隱藏時也隱藏autolayout的NSLayoutAttribute
- iPhone 6來電閃光燈怎麼設置?
- 日版iphone6為什麼停售?
- iOS8.4越獄後必裝的插件安裝教程
- iOS8激活鎖設置方法 iPhone激活鎖查詢教程
- IOS完成圓形圖片後果的兩種辦法
- iPad mini3有指紋識別嗎?iPad mini3支持Touch ID嗎?
- iPhone6/iphone6 plus翻新機鑒別方法
- UIImage 的imageWithContentsOfFile:path和imageNamed的區別
- 如何更改綁定在Apple ID上的電子郵件地址
相關文章
+
