IOS 自定義UIPickView詳解及實例代碼
IOS 自定義UIPickView
蘋果一直推崇使用原生的組件,自帶的UIPickView其實也很漂亮了,看起來也很美觀。但是有時候,產品會有一些特殊的設計和需求。本文將會講解如何修改蘋果原生的組件的屬性,達到自定義UIPickView的效果。
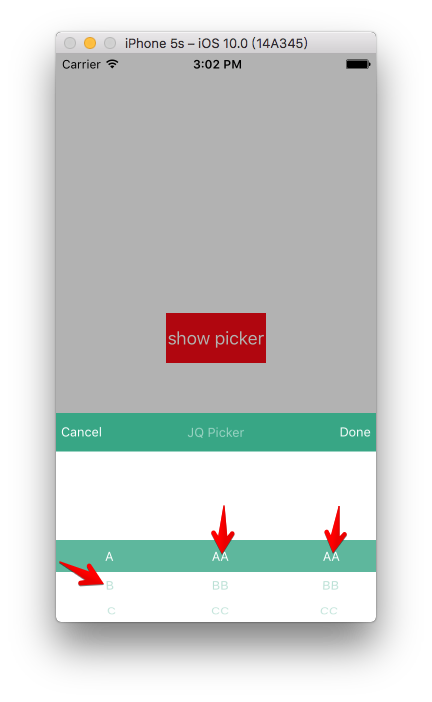
需求如下。需要自定義一個Tab。自定義選中文字的顏色。自定義選中顏色背景,自定義未選中文字顏色。
修改未選中的文字的字體和顏色
經過分析,上面的取消和確定按鈕實現起來還是很簡單的。加一個條就好了,我就不介紹具體步驟,下面的沒有選中時候文字的樣色,已經字體大小,我們都可以在下面的代理方法裡面修改。
//Change style
- (UIView *)pickerView:(UIPickerView *)pickerView viewForRow:(NSInteger)row forComponent:(NSInteger)component reusingView:(UIView *)view{


  CGFloat width = [self pickerView:self.pickerView widthForComponent:component];
  CGFloat rowheight =[self pickerView:self.pickerView rowHeightForComponent:(component)];

  UIView *myView = [[UIView alloc]init];
  myView.frame =CGRectMake(0.0f, 0.0f, width, rowheight);
  UILabel *txtlabel = [[UILabel alloc] init];
  txtlabel.textColor = self.plainColor;
  txtlabel.tag=200;
  txtlabel.font = [UIFont systemFontOfSize:15*SCALE_6];
  txtlabel.textAlignment = NSTextAlignmentCenter;
  txtlabel.frame = myView.frame;
  txtlabel.text = [self pickerView:pickerView titleForRow:row forComponent:component];

  [myView addSubview:txtlabel];
  return myView;
}
這樣就可以修改未選中文字的顏色了。
修改選中的背景顏色和字體
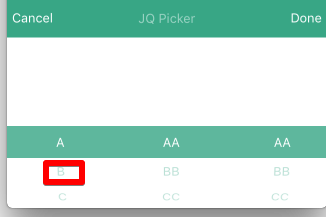
但是背景顏色和字體如何修改呢。就是下圖這個顏色和自體:
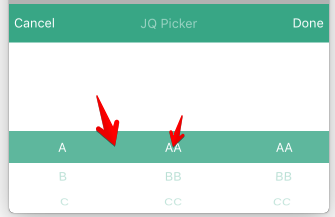
我一開始嘗試了在這種方法,就是在上面加一層Label。然後在代理方法中改變Label的值。
-(NSString*)pickerView:(UIPickerView *)pickerView titleForRow:(NSInteger)row forComponent:(NSInteger)component
{
  if (component==0) {
    return self.leftArray[row];

  }else if(component==1){
    return self.rightArray[row];
  }else {
  return self.rightArray[row];
  }
}
不過這個方法在如果使用手指點擊的話,索引值是對不上的,這樣的後果就是,Label會一卡一卡的。如果只在這個方法設置Label的值,那快速滑動的時候獲取不到值,Label值變化就會很慢。完全沒有了原生的那種效果了。
最後,我才用的是獲取系統圖層的方法,在選擇器的代理方法裡面獲取相應的圖層,然後進行修改。我們先看一下PickView的圖層。
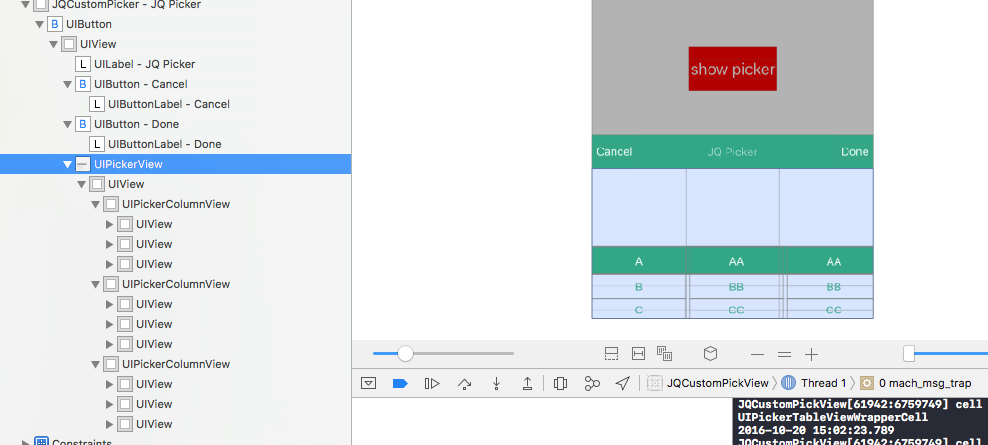
我們只需要在代理方面裡面拿到對應的視圖然後修改就好
 //Change style
- (UIView *)pickerView:(UIPickerView *)pickerView viewForRow:(NSInteger)row forComponent:(NSInteger)component reusingView:(UIView *)view{


  CGFloat width = [self pickerView:self.pickerView widthForComponent:component];
  CGFloat rowheight =[self pickerView:self.pickerView rowHeightForComponent:(component)];

  UIView *myView = [[UIView alloc]init];
  myView.frame =CGRectMake(0.0f, 0.0f, width, rowheight);
  UILabel *txtlabel = [[UILabel alloc] init];
  txtlabel.textColor = self.plainColor;
  txtlabel.tag=200;
  txtlabel.font = [UIFont systemFontOfSize:15*SCALE_6];
  txtlabel.textAlignment = NSTextAlignmentCenter;
  txtlabel.frame = myView.frame;
  txtlabel.text = [self pickerView:pickerView titleForRow:row forComponent:component];

  [myView addSubview:txtlabel];

  UIView* topLine  =  [pickerView.subviews objectAtIndex:1];
  UIView* botomLine  =  [pickerView.subviews objectAtIndex:2];
  topLine.hidden = YES;
  botomLine.hidden = YES;

  BOOL isSetttingBackColor = NO;

  UIView *subview = [self.pickerView.subviews firstObject];

  for ( UIView *pickerColumnView in subview.subviews) {

    NSLog(@"pickerColumnView class %@",[pickerColumnView class]);

    UIView *pickerView = [pickerColumnView.subviews lastObject];
    if (!isSetttingBackColor) {
       pickerView.backgroundColor = self.selectedBackColor;
      isSetttingBackColor = !isSetttingBackColor;
    }

    UIView *tableView = [pickerView.subviews lastObject];
    for (UIView *cell in tableView.subviews) {
      NSLog(@"cell class %@",[cell class]);
      UIView *cellview = [cell.subviews lastObject];
      UIView *labelSuper = [cellview.subviews lastObject];
      UILabel *label = [labelSuper.subviews lastObject];
      label.textColor = [UIColor whiteColor];
    }

  }
  return myView;
}
下面的代碼是用戶隱藏pickView自帶的兩根細線。
 UIView* topLine  =  [pickerView.subviews objectAtIndex:1];
  UIView* botomLine  =  [pickerView.subviews objectAtIndex:2];
  topLine.hidden = YES;
  botomLine.hidden = YES;
設置是否修改顏色BOOL isSetttingBackColor = NO;這個變量是為了防止多次設置背景顏色。造成相互遮蓋。
最後效果如下:
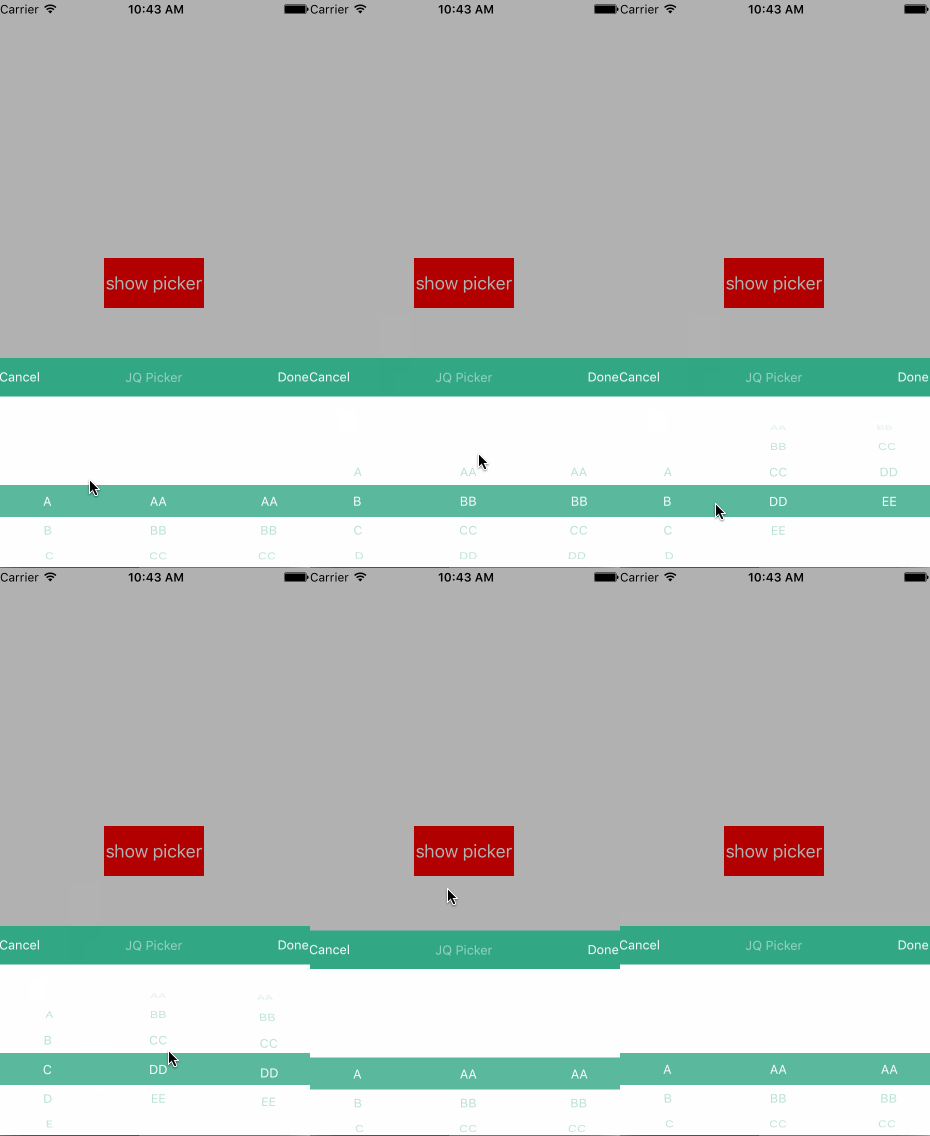
Demo地址:http://xiazai.jb51.net/201612/yuanma/JSDCustomPickView-master(jb51.net).rar
感謝閱讀,希望能幫助到大家,謝謝大家對本站的支持!

