iOS UITextField最大字符數和字節數的限制詳解
前言
這裡我給大家幾組測試用例可以一試,為啥不好用。
1、限制10個字節,輸入2個Emoj之後是8個字節(一個Emoj是4個字節),此時再輸入一個中文,看看結果如何(中文的UTF8占3個字節)
2、限制5個字符,一個Emoj是2個字符,其他都是一個。此時輸入兩個Emoj,再輸入中文,然後中文聯想試試。
就目前的情況來說,看了很多資料,並沒有一個通用的能限制字符數和字節數的封裝。這裡全面進行了總結,並進行了封裝。歡迎大家下載。
一. 字符限制
1. 錯誤方法
常見的這種方法是錯誤的,會導致Emoj表情的截取問題
- (BOOL)textField:(UITextField *)textField shouldChangeCharactersInRange:(NSRange)range replacementString:(NSString *)string
{
 if(range.length + range.location > textField.text.length)
 {
 return NO;
 }

 NSUInteger newLength = [textField.text length] + [string length] - range.length;
 return newLength <= 5;
}
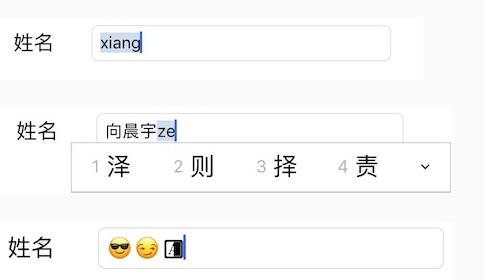
這種限制方法會導致拼音下出現這種情況,且無法輸入.無法輸入滿5個字符。在emoj表情也有問題
2. 推薦方法
使用rangeOfComposedCharacterSequencesForRange, 防止在range范圍內整詞被截斷
- (void)textFieldDidChange:(UITextField *)textField
{
 NSString *toBeString = textField.text;

 UITextRange *selectedRange = [textField markedTextRange];
 UITextPosition *position = [textField positionFromPosition:selectedRange.start offset:0];

 // 沒有高亮選擇的字,則對已輸入的文字進行字數統計和限制,防止中文被截斷
 if (!position){
 if (toBeString.length > _maxLength){
  //中文和emoj表情存在問題,需要對此進行處理
  NSRange rangeRange = [toBeString rangeOfComposedCharacterSequencesForRange:NSMakeRange(0, _maxLength)];
  textField.text = [toBeString substringWithRange:rangeRange];
 }
 }
}
二. 字節限制
1. 限制字節數
在UTF8中,英文和數字是1個字節,漢子是3個字節,emoji是3或者4個字節。這裡的難度比上面更大,如果截取失敗,極有可能出現亂碼。這裡我們的做法如下
- (void)textFieldDidChange:(UITextField *)textField
{
 NSString *toBeString = textField.text;
 //---字節處理
 NSInteger bytesCount = strlen([textField.text UTF8String]);
 if (bytesCount > _maxBytesLength) {
 NSString *content = [textField.text subStrWithUtf8Len:(int)_maxBytesLength];
 textField.text = content;
 }
}

- (BOOL)textField:(UITextField *)textField shouldChangeCharactersInRange:(NSRange)range replacementString:(NSString *)string{

 NSString * inputString = [textField.text stringByReplacingCharactersInRange:range withString:string];

 //限制字節數
 if ([inputString length] > 0){
 NSInteger len = strlen([inputString UTF8String]);
 if (len > _maxBytesLength){
  return NO;
 }
 else {
  return YES;
 }
 }
 return YES;
}
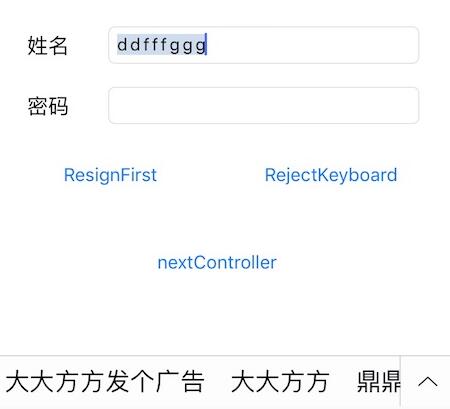
這裡不能只在進行限制,在textFieldDidChange中需要對中文聯想做處理才行
三. 放棄鍵盤
1. 能拿到uitextfield的時候用
- (BOOL)textFieldShouldReturn:(UITextField *)textField
{
 return [textField resignFirstResponder];
}
2. 點擊view消失的時候用
[self.view endEditing:YES];
3. 難以獲取的時候用
[[UIApplication sharedApplication] sendAction:@selector(resignFirstResponder) to:nil from:nil forEvent:nil];
或者
[[[UIApplication sharedApplication] keyWindow] endEditing:YES];
4.Tableview點擊空白處或者滾動時消失
{
 UITapGestureRecognizer *singleTap = [[UITapGestureRecognizer alloc] initWithTarget:self action:@selector(fingerTapped:)];
 [self.view addGestureRecognizer:singleTap];
}

#pragma mark- 鍵盤消失
-(void)fingerTapped:(UITapGestureRecognizer *)gestureRecognizer{
 [self.view endEditing:YES];
}
-(void)scrollViewWillBeginDragging:(UIScrollView *)scrollView{
 [self.view endEditing:YES];
}
四. 正則表達式限制
請參考 正則表達式語法表 ,這裡我提供了兩種表達式給大家參考,一個Int,一個無unsignedInt
-(BOOL) isTextFieldMatchWithRegularExpression:(NSString *)exporession{

 NSPredicate *predicate = [NSPredicate predicateWithFormat:@"SELF MATCHES %@",exporession];
 return [predicate evaluateWithObject:self];
}
-(BOOL) isTextFieldIntValue{
 return [self isTextFieldMatchWithRegularExpression:@"[-]{0,1}[0-9]*"];
}
-(BOOL) isTextFieldUnsignedIntValue{
 return [self isTextFieldMatchWithRegularExpression:@"[0-9]+"];
}
五. UITextfield的鍵盤事件多次回調問題
1.鍵盤高度遮擋問題
一般出現遮擋的時候我們用以下代碼,看看當前textfield是否在鍵盤下面,在的話算出鍵盤的頂端和textfield的底部的距離,然後做偏移動畫
- (void)keyboardWillShow:(NSNotification *)notification {

 NSDictionary *userInfo = [notification userInfo];

 NSValue* aValue = [userInfo objectForKey:UIKeyboardFrameEndUserInfoKey];
 CGRect keyboardRect = [aValue CGRectValue];
 keyboardRect = [self.view convertRect:keyboardRect fromView:nil];

 CGFloat keyboardTop = keyboardRect.origin.y;

 CGFloat offset = self.normalTextField.frame.size.height + self.normalTextField.frame.origin.y - keyboardTop;

 NSValue *animationDurationValue = [userInfo objectForKey:UIKeyboardAnimationDurationUserInfoKey];
 NSTimeInterval animationDuration;
 [animationDurationValue getValue:&animationDuration];

 if(offset > 0){
 // Animate the resize of the text view's frame in sync with the keyboard's appearance.
 [UIView beginAnimations:nil context:NULL];
 [UIView setAnimationDuration:animationDuration];

 CGRect rect = CGRectMake(0.0f, -offset,self.view.frame.size.width,self.view.frame.size.height);
 self.view.frame = rect;
 [UIView commitAnimations];
 }
}
1、真機
如果使用了中文輸入法,注冊的keyboardWillShow會回調兩次。第一次是鍵盤默認高度216,第二次則是加了keyboard的導航欄的高度。
2、模擬器
第一次彈出鍵盤沒有問題
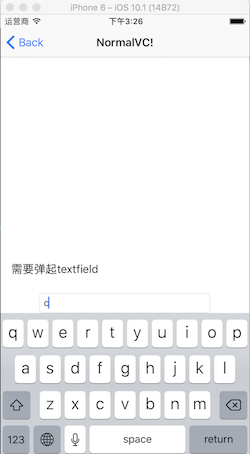
打印userinfo:
(lldb) po userInfo
{
 UIKeyboardAnimationCurveUserInfoKey = 7;
 UIKeyboardAnimationDurationUserInfoKey = "0.25";
 UIKeyboardBoundsUserInfoKey = "NSRect: {{0, 0}, {414, 226}}";
 UIKeyboardCenterBeginUserInfoKey = "NSPoint: {207, 849}";
 UIKeyboardCenterEndUserInfoKey = "NSPoint: {207, 623}";
 UIKeyboardFrameBeginUserInfoKey = "NSRect: {{0, 736}, {414, 226}}";
 UIKeyboardFrameEndUserInfoKey = "NSRect: {{0, 510}, {414, 226}}";
 UIKeyboardIsLocalUserInfoKey = 1;
}
此時我們去按123旁邊的小圓球會出現如下的圖:
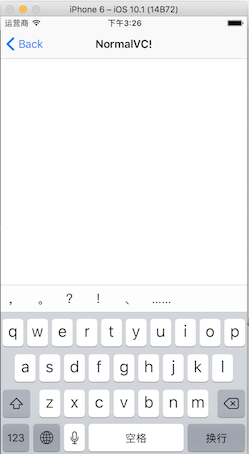
打印userinfo:
(lldb) po userInfo
{
 UIKeyboardAnimationCurveUserInfoKey = 7;
 UIKeyboardAnimationDurationUserInfoKey = "0.25";
 UIKeyboardBoundsUserInfoKey = "NSRect: {{0, 0}, {414, 271}}";
 UIKeyboardCenterBeginUserInfoKey = "NSPoint: {207, 623}";
 UIKeyboardCenterEndUserInfoKey = "NSPoint: {207, 600.5}";
 UIKeyboardFrameBeginUserInfoKey = "NSRect: {{0, 510}, {414, 226}}";
 UIKeyboardFrameEndUserInfoKey = "NSRect: {{0, 465}, {414, 271}}";
 UIKeyboardIsLocalUserInfoKey = 1;
}
鍵盤被遮擋了。
總結:觀察結果,發現了這個規律,打印一下時間,還有一個問題就是,中文鍵盤第一次啟動的時候會回調兩次。
keyboardRect = [self.view convertRect:keyboardRect fromView:nil];
所以去掉這句話即可
六. 使用封裝的XXTextField
UITextView , UITextfield 中如果有keyboard的時候,需要一個自動彈起事件,以及彈起之後的content的偏移對父view的處理。如果每個頁面都實現一次會非常復雜。這裡我們介紹一種自動化的處理機制。在此之前,先介紹一下文字處理框架.最後給大家推薦一下我寫的 XXTextField ,大家也可以在此基礎上自己添加一些正則表達式。
1.解決uiview中的textfield 遮擋問題
_textfieldName.keyboardType = UIKeyboardTypeDefault;
_textfieldName.inputType = XXTextFieldTypeOnlyInt;
_textfieldName.maxLength = 5;
_textfieldPwd.inputType = XXTextFieldTypeForbidEmoj;

#import "XXKeyboardManager.h"
@interface XXCorrectVC ()<XXKeyboardManagerShowHiddenNotificationDelegate>
@end

@implementation XXCorrectVC

- (void)viewDidLoad {
 [super viewDidLoad];
 [[XXKeyboardManager sharedInstance] setDelegate:self];
 // Do any additional setup after loading the view from its nib.
}
#pragma mark- KeyBoardShow/Hidden
- (void)showKeyboardWithRect:(CGRect)keyboardRect
    withDuration:(CGFloat)animationDuration
{
 CGFloat offset = self.textFieldCorrect.frame.size.height + self.textFieldCorrect.frame.origin.y - keyboardRect.origin.y;
 if(offset < 0){
  return;
 }
 [UIView animateWithDuration:animationDuration
       delay:0.f
      options:UIViewAnimationOptionCurveEaseInOut animations:^{
  CGRect rect = CGRectMake(0.0f, -offset,self.view.frame.size.width,self.view.frame.size.height);
  self.view.frame = rect;
 } completion:^(BOOL finished) {

 }];
}

- (void)hiddenKeyboardWithRect:(CGRect)keyboardRect
     withDuration:(CGFloat)animationDuration
{
 [UIView animateWithDuration:animationDuration
       delay:0.f
      options:UIViewAnimationOptionCurveEaseInOut animations:^{
  self.textFieldCorrect.frame = self.view.bounds;
 } completion:^(BOOL finished) {
 }];
}
@end
2.解決uitableview中鍵盤遮擋問題
/*
 * 鍵盤要顯示的時候
 */
- (void)showKeyboardWithRect:(CGRect)keyboardRect
    withDuration:(CGFloat)animationDuration{

 CGSize kbSize = keyboardRect.size;

 UIEdgeInsets contentInsets = UIEdgeInsetsMake(0.0, 0.0, kbSize.height, 0.0);
 _baseTableView.contentInset = contentInsets;
 _baseTableView.scrollIndicatorInsets = contentInsets;

 // If active text field is hidden by keyboard, scroll it so it's visible
 // Your app might not need or want this behavior.
 CGRect aRect = self.view.frame;
 aRect.size.height -= kbSize.height;

 if (!CGRectContainsPoint(aRect, _activeCell.frame.origin) ) {
  [_baseTableView scrollRectToVisible:_activeCell.frame animated:YES];
 }
}

/*
 * 鍵盤要消失的時候
 */
- (void)hiddenKeyboardWithRect:(CGRect)keyboardRect
     withDuration:(CGFloat)animationDuration{
 _baseTableView.contentInset = UIEdgeInsetsZero;
 _baseTableView.scrollIndicatorInsets = UIEdgeInsetsZero;
}
總結
以上就是這篇文章的全部內容了,希望本文的內容對各位Android開發者們能有所幫助,如果有疑問大家可以留言交流。

