IOS多線程開發之線程的狀態
大家都知道,在開發過程中應該盡可能減少用戶等待時間,讓程序盡可能快的完成運算。可是無論是哪種語言開發的程序最終往往轉換成匯編語言進而解釋成機器碼來執行。但是機器碼是按順序執行的,一個復雜的多步操作只能一步步按順序逐個執行。改變這種狀況可以從兩個角度出發:對於單核處理器,可以將多個步驟放到不同的線程,這樣一來用戶完成UI操作後其他後續任務在其他線程中,當CPU空閒時會繼續執行,而此時對於用戶而言可以繼續進行其他操作;對於多核處理器,如果用戶在UI線程中完成某個操作之後,其他後續操作在別的線程中繼續執行,用戶同樣可以繼續進行其他UI操作,與此同時前一個操作的後續任務可以分散到多個空閒CPU中繼續執行(當然具體調度順序要根據程序設計而定),及解決了線程阻塞又提高了運行效率。蘋果從iPad2 開始使用雙核A5處理器(iPhone中從iPhone 4S開始使用),A7中還加入了協處理器,如何充分發揮這些處理器的性能確實值得思考。今天將重點分析iOS多線程開發:
一、簡單介紹
線程的創建:
復制代碼 代碼如下:
self.thread=[[NSThread alloc]initWithTarget:self selector:@selector(test) object:nil];
說明:創建線程有多種方式,這裡不做過多的介紹。

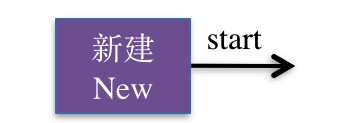
線程的開啟:
復制代碼 代碼如下:
[self.thread start];

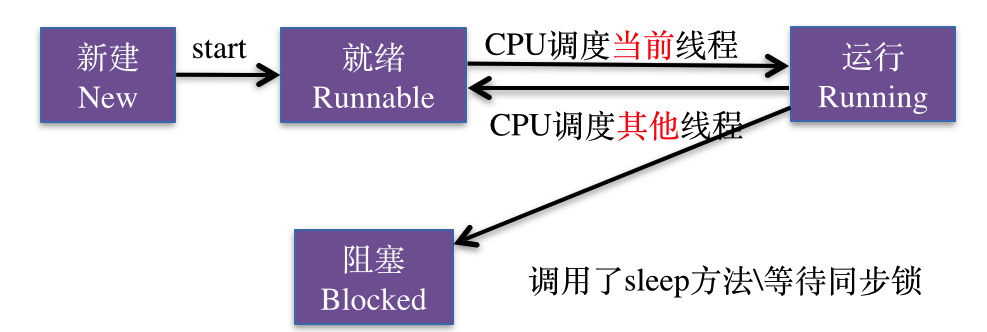
線程的運行和阻塞:
(1)設置線程阻塞1,阻塞2秒
[NSThread sleepForTimeInterval:2.0];
(2)第二種設置線程阻塞2,以當前時間為基准阻塞4秒
復制代碼 代碼如下:
NSDate *date=[NSDate dateWithTimeIntervalSinceNow:4.0];
[NSThread sleepUntilDate:date];

線程處理阻塞狀態時在內存中的表現情況:(線程被移出可調度線程池,此時不可調度)

線程的死亡:
當線程的任務結束,發生異常,或者是強制退出這三種情況會導致線程的死亡。

線程死亡後,線程對象從內存中移除。

二、代碼示例
代碼示例1:
//
// YYViewController.m
// -NSThread-線程的狀態
//
// Created by apple on --.
// Copyright (c) 年 itcase. All rights reserved.
//
#import "YYViewController.h"
@interface YYViewController ()
@property(nonatomic,strong)NSThread *thread;
@end
@implementation YYViewController
- (void)viewDidLoad
{
[super viewDidLoad];
//創建線程
self.thread=[[NSThread alloc]initWithTarget:self selector:@selector(test) object:nil];
//設置線程的名稱
[self.thread setName:@"線程A"];
}
//當手指按下的時候,開啟線程
-(void)touchesBegan:(NSSet *)touches withEvent:(UIEvent *)event
{
//開啟線程
[self.thread start];
}
-(void)test
{
//獲取線程
NSThread *current=[NSThread currentThread];
NSLog(@"test---打印線程---%@",self.thread.name);
NSLog(@"test---線程開始---%@",current.name);
//設置線程阻塞,阻塞秒
NSLog(@"接下來,線程阻塞秒");
[NSThread sleepForTimeInterval:.];
//第二種設置線程阻塞,以當前時間為基准阻塞秒
NSLog(@"接下來,線程阻塞秒");
NSDate *date=[NSDate dateWithTimeIntervalSinceNow:.];
[NSThread sleepUntilDate:date];
for (int i=; i<; i++) {
NSLog(@"線程--%d--%@",i,current.name);
}
NSLog(@"test---線程結束---%@",current.name);
}
@end
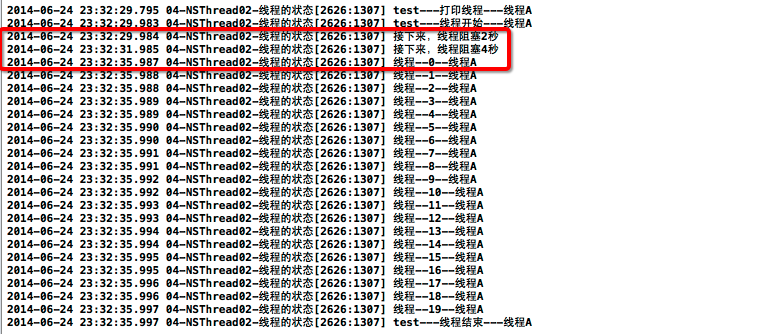
打印查看:

代碼示例2(退出線程):
//
// YYViewController.m
// -NSThread-線程的狀態
//
// Created by apple on --.
// Copyright (c) 年 itcase. All rights reserved.
//
#import "YYViewController.h"
@interface YYViewController ()
@property(nonatomic,strong)NSThread *thread;
@end
@implementation YYViewController
- (void)viewDidLoad
{
[super viewDidLoad];
//創建線程
self.thread=[[NSThread alloc]initWithTarget:self selector:@selector(test) object:nil];
//設置線程的名稱
[self.thread setName:@"線程A"];
}
//當手指按下的時候,開啟線程
-(void)touchesBegan:(NSSet *)touches withEvent:(UIEvent *)event
{
//開啟線程
[self.thread start];
}
-(void)test
{
//獲取線程
NSThread *current=[NSThread currentThread];
NSLog(@"test---打印線程---%@",self.thread.name);
NSLog(@"test---線程開始---%@",current.name);
//設置線程阻塞,阻塞秒
NSLog(@"接下來,線程阻塞秒");
[NSThread sleepForTimeInterval:.];
//第二種設置線程阻塞,以當前時間為基准阻塞秒
NSLog(@"接下來,線程阻塞秒");
NSDate *date=[NSDate dateWithTimeIntervalSinceNow:.];
[NSThread sleepUntilDate:date];
for (int i=; i<; i++) {
NSLog(@"線程--%d--%@",i,current.name);
if (==i) {
//結束線程
[NSThread exit];
}
}
NSLog(@"test---線程結束---%@",current.name);
}
@end
打印示例:

注意:人死不能復生,線程死了也不能復生(重新開啟),如果在線程死亡之後,再次點擊屏幕嘗試重新開啟線程,則程序會掛。

以上內容是小編給大家介紹的IOS多線程開發之線程的狀態 ,希望大家喜歡。
- 從哪可以下載iOS10?iOS10固件下載地址
- iOS開辟中的ViewController轉場切換後果完成簡介
- 現在ios5.0.1停止驗證了,我的iphone4s是ios5.0.1以越獄,請問能備份shsh嗎?
- iOS10.2 Beta4固件下載地址 iOS10.2 Beta4描述文件下載地址[圖]
- ios7.0.3越獄發布時間不確定,ios7.0.3越獄可能延遲到明年初
- 蘋果iOS8 beta2升級教程步驟介紹
- 蘋果iPhone6S相機圖標不見了怎麼辦?
- 更新ios7無法同步怎麼辦?
- 升級iOS10後耗電快怎麼辦?解決辦法
- iPhone4s買原封好呢 還是買牛皮盒的好呢?? 那些有保障 都是原封的 就是牛皮盒安全一點有發票和提貨單


